Comprehensive Rust 🦀 へようこそ


This is a free Rust course developed by the Android team at Google. The course covers the full spectrum of Rust, from basic syntax to advanced topics like generics and error handling.
コースの最新バージョンは https://google.github.io/comprehensive-rust/ にあります。他の場所でお読みの場合は、そちらで最新情報をご確認ください。
The course is available in other languages. Select your preferred language in the top right corner of the page or check the Translations page for a list of all available translations.
The course is also available as a PDF.
本講座の目的は、Rustを教える事です。Rustに関する前提知識は不要としており、次の目標を設定しています:
- Rustの基本構文と言語についての理解を深める。
- 既存のプログラムを修正したり、新規プログラムをRustで書けるようにする。
- 一般的なRustのイディオムを紹介する。
コースの最初の4日間を「Rust の基礎」と呼びます。
Building on this, you’re invited to dive into one or more specialized topics:
- Android: a half-day course on using Rust for Android platform development (AOSP). This includes interoperability with C, C++, and Java.
- Chromium: a half-day course on using Rust within Chromium based browsers. This includes interoperability with C++ and how to include third-party crates in Chromium.
- Bare-metal: a whole-day class on using Rust for bare-metal (embedded) development. Both microcontrollers and application processors are covered.
- Concurrency: a whole-day class on concurrency in Rust. We cover both classical concurrency (preemptively scheduling using threads and mutexes) and async/await concurrency (cooperative multitasking using futures).
本講座の対象外
Rustは非常に汎用性の高い言語であり、数日で全てを網羅する事はできません。本講座の目標として設定されていないものには、以下のようなものがあります:
- Learning how to develop macros: please see Chapter 19.5 in the Rust Book and Rust by Example instead.
前提知識
The course assumes that you already know how to program. Rust is a statically-typed language and we will sometimes make comparisons with C and C++ to better explain or contrast the Rust approach.
If you know how to program in a dynamically-typed language such as Python or JavaScript, then you will be able to follow along just fine too.
これはスピーカーノートの一例です。これを使用してスライドを捕捉します。講師がカバーすべき要点や、授業でよく出る質問への回答などが含まれます。
講座の運営について
このページは講師用です。
以下は、Google内での講座の運営方法に関する情報です。
クラスは通常午前9時から午後4時までで、途中で1時間の昼食休憩があります。つまり、午前のクラスが3時間、午後のクラスが3時間となります。どちらのセッションにも、休憩と、受講者が演習に取り組むための時間が複数回含まれています。
講座開始までに、以下にあげる準備を済ませておくと良いでしょう:
-
資料に慣れておいてください。要点を強調するためにスピーカーノートが用意されています(内容の追加にご協力ください!)。プレゼン時には、スクリーンを見やすい状態で保つために、スピーカーノートはポップアップウィンドウで開いてください(スピーカーノートの横にある小さな矢印をクリック)。
-
Decide on the dates. Since the course takes four days, we recommend that you schedule the days over two weeks. Course participants have said that they find it helpful to have a gap in the course since it helps them process all the information we give them.
-
十分な広さの部屋を確保しておいてください。15~25名程度のクラスを推奨しています。受講者にとって質問がしやすい人数であり、1人の講師が質問に答える時間も確保できる規模だからです。また、皆さんはPCで作業をする必要があるため、講師を含めた人数分の机を用意しておいてください。ライブコーディング形式での実施を想定しているため、講壇は不要です。
-
当日は少し早めに到着して準備をしてください。自分のPCで実行する
mdbook serveから直接プレゼンを行う事を推奨します(インストール手順はこちら)。これにより、ページ切り替え時に遅延なしで最適なパフォーマンスが得られます。また、PCを使用する事で、受講者や自分自身が見つけたタイプミスなども修正可能になります。 -
練習問題は個人か小さいグループで解いてください。回答をレビューする時間も含め、各練習問題に30~45分を費やします。受講者が行き詰まっているかどうか、何か質問があるかなど確認してください。複数の受講者が同じ問題で詰まっている場合、クラス全体に対してそれを共有し、解決策を提供してください。例えば、探している情報が標準ライブラリのどこにあるかを示す、など。
以上です。運営頑張ってください!皆さんにとっても楽しい時間になりますように!
本講座の改善に向けてフィードバックをお願いします。うまくいった点や改善点について幅広くご意見お聞かせください。受講者からのフィードバックも歓迎しております!
講座の構成
このページは講師用です。
Rust の基礎
Rust の基礎 を構成する最初の 4 日間で、さまざまな項目を駆け足で学びます。
コースのスケジュール:
- Day 1 Morning (2 hours and 5 minutes, including breaks)
| Segment | Duration |
|---|---|
| ようこそ | 5 minutes |
| Hello, World | 15 minutes |
| 型と値 | 40 minutes |
| 制御フローの基本 | 40 minutes |
- Day 1 Afternoon (2 hours and 35 minutes, including breaks)
| Segment | Duration |
|---|---|
| タプルと配列 | 35 minutes |
| 参照 | 55 minutes |
| ユーザー定義型 | 50 minutes |
- Day 2 Morning (2 hours and 10 minutes, including breaks)
| Segment | Duration |
|---|---|
| ようこそ | 3 minutes |
| パターンマッチング | 1 hour |
| Methods and Traits | 50 minutes |
- Day 2 Afternoon (3 hours and 15 minutes, including breaks)
| Segment | Duration |
|---|---|
| ジェネリクス(generics) | 45 minutes |
| 標準ライブラリ内の型 | 1 hour |
| 標準ライブラリ内のトレイト | 1 hour and 10 minutes |
- Day 3 Morning (2 hours and 20 minutes, including breaks)
| Segment | Duration |
|---|---|
| ようこそ | 3 minutes |
| メモリ管理 | 1 hour |
| スマートポインタ | 55 minutes |
- Day 3 Afternoon (1 hour and 55 minutes, including breaks)
| Segment | Duration |
|---|---|
| 借用 | 55 minutes |
| ライフタイム | 50 minutes |
- Day 4 Morning (2 hours and 40 minutes, including breaks)
| Segment | Duration |
|---|---|
| ようこそ | 3 minutes |
| イテレータ | 45 minutes |
| モジュール | 40 minutes |
| テスト | 45 minutes |
- Day 4 Afternoon (2 hours and 20 minutes, including breaks)
| Segment | Duration |
|---|---|
| エラー処理 | 1 hour and 5 minutes |
| Unsafe Rust | 1 hour and 5 minutes |
専門的なトピック
In addition to the 4-day class on Rust Fundamentals, we cover some more specialized topics:
Rust in Android
The Rust in Android deep dive is a half-day course on using Rust for Android platform development. This includes interoperability with C, C++, and Java.
AOSPのチェックアウトが必要です。同じ端末から講座のリポジトリをチェックアウトし、src/android/ディレクトリをAOSPチェックアウトのルートに移動してください。これにより、Androidビルドシステムがsrc/android/内のAndroid.bpを確認できるようになります。
エミュレータまたは実際のデバイスでadb syncが機能する事を確認し、src/android/build_all.shを使用して全てのAndroidの例を事前にビルドしてください。スクリプトを読んで実行コマンドを確認し、手動で実行した際に正常に動作する事を確認してください。
Rust in Chromium
Chromium での Rust は半日コースで、Chromium ブラウザの一部として Rust を使用する方法について詳しく説明します。Chromium の gn ビルドシステムで Rust を使用することで、サードパーティ ライブラリ(「クレート」)、および C++ との相互運用性を導入できます。
受講者は、Chromium をビルドできる必要があります。時間を短縮できるデバッグのコンポーネント ビルドを 推奨 しますが、どのようなビルドでも問題ありません。作成した Chromium ブラウザを実行できることを確認します。
Bare-Metal Rust
The Bare-Metal Rust deep dive is a full day class on using Rust for bare-metal (embedded) development. Both microcontrollers and application processors are covered.
マイクロコントローラの章では、事前にBBCmicro:bitv2開発ボードを購入する必要があります。また、welcomeページで説明されているように、複数のパッケージをインストールする必要があります。
Rustでの並行性
The Concurrency in Rust deep dive is a full day class on classical as well as async/await concurrency.
新規クレートの作成と、依存関係(dependencies)のダウンロードが必要です。その後、例をsrc/main.rsにコピペして実行する事ができます:
cargo init concurrency
cd concurrency
cargo add tokio --features full
cargo run
コースのスケジュール:
- Morning (3 hours and 20 minutes, including breaks)
| Segment | Duration |
|---|---|
| スレッド | 30 minutes |
| チャネル | 20 minutes |
| SendとSync | 15 minutes |
| 状態共有 | 30 minutes |
| 練習問題 | 1 hour and 10 minutes |
- Afternoon (3 hours and 20 minutes, including breaks)
| Segment | Duration |
|---|---|
| Asyncの基礎 | 30 minutes |
| チャネルと制御フロー | 20 minutes |
| 落とし穴 | 55 minutes |
| 練習問題 | 1 hour and 10 minutes |
フォーマット
本講座はインタラクティブな形式で行います。積極的に質問して、Rustへの理解を深めてください!
キーボード ショートカット
mdBookには、便利なショートカットキーがいくつか存在します:
- Arrow-Left: Navigate to the previous page.
- Arrow-Right: Navigate to the next page.
- Ctrl + Enter: Execute the code sample that has focus.
- s: Activate the search bar.
翻訳
本資料は、ボランティアによって翻訳されています:
- ポルトガル語(ブラジル): @rastringer、@hugojacob、@joaovicmendes、@henrif75
- Chinese (Simplified) by @suetfei, @wnghl, @anlunx, @kongy, @noahdragon, @superwhd, @SketchK, and @nodmp.
- 中国語(繁体字): @hueich、@victorhsieh、@mingyc、@kuanhungchen、@johnathan79717
- Farsi by @DannyRavi, @javad-jafari, @Alix1383, @moaminsharifi , @hamidrezakp and @mehrad77.
- Japanese by @CoinEZ-JPN, @momotaro1105, @HidenoriKobayashi and @kantasv.
- Korean by @keispace, @jiyongp, @jooyunghan, and @namhyung.
- スペイン語: @deavid
- Ukrainian by @git-user-cpp, @yaremam and @reta.
- Farsi by @DannyRavi, @javad-jafari, @Alix1383, @moaminsharifi, @hamidrezakp and @mehrad77.
画面右上の言語切り替えボタンから、切り替えを行なってください。
Incomplete Translations
進行中の翻訳が多数あります。最新の翻訳へのリンクを以下に示します。
- Arabic by @younies
- ベンガル語: @raselmandol
- French by @KookaS, @vcaen and @AdrienBaudemont.
- ドイツ語: @Throvn、@ronaldfw
- Italian by @henrythebuilder and @detro.
The full list of translations with their current status is also available either as of their last update or synced to the latest version of the course.
この取り組みにご協力いただける場合は、our instructionsをご覧ください。翻訳はissue trackerで管理されています。
Cargoの使用
Rustを学び始めると、まもなくRustエコシステムで広く使われているビルドシステム兼パッケージマネージャであるCargoという標準ツールに出会います。ここでは、Cargoの概要や使用方法、そして本講座における重要性について簡単に説明します。
インストール
https://rustup.rs/ の手順に沿ってインストールしてください。
This will give you the Cargo build tool (cargo) and the Rust compiler (rustc). You will also get rustup, a command line utility that you can use to install to different compiler versions.
Rust をインストールしたら、Rust で動作するようにエディタまたは IDE を設定する必要があります。ほとんどのエディタでは、rust-analyzer と通信することでこれを行います。rust-analyzer は、VS Code、Emacs、Vim / Neovim など、多くのエディタ向けにオートコンプリート機能と「定義に移動」機能を提供します。RustRover という別の IDE も用意されています。
-
On Debian/Ubuntu, you can also install Cargo, the Rust source and the Rust formatter via
apt. However, this gets you an outdated Rust version and may lead to unexpected behavior. The command would be:sudo apt install cargo rust-src rustfmt -
On macOS, you can use Homebrew to install Rust, but this may provide an outdated version. Therefore, it is recommended to install Rust from the official site.
Rust エコシステム
Rustエコシステムの主要ツールは以下の通りです:
-
rustc: Rustのコンパイラです。.rsファイルをバイナリや他の中間形式に変換します。 -
cargo: the Rust dependency manager and build tool. Cargo knows how to download dependencies, usually hosted on https://crates.io, and it will pass them torustcwhen building your project. Cargo also comes with a built-in test runner which is used to execute unit tests. -
rustup: the Rust toolchain installer and updater. This tool is used to install and updaterustcandcargowhen new versions of Rust are released. In addition,rustupcan also download documentation for the standard library. You can have multiple versions of Rust installed at once andrustupwill let you switch between them as needed.
要点:
-
Rust言語とコンパイラは、6週間のリリースサイクルを採用しています。新しいリリースは、古いリリースとの後方互換性を維持しながら、新機能を提供します。
-
リリースチャネルは3つあります:「stable」「beta」「nightly」。
-
新機能は「nightly」でテストされ、「beta」が6週間毎に「stable」となります。
-
依存関係は、代替の レジストリ、git、フォルダなどから解決することもできます。
-
Rustにはeditions(エディション)があります:現在のエディションはRust2021です。以前はRust2015とRust2018でした。
-
エディションでは、後方非互換な変更を加える事ができます。
-
コードの破損を防ぐために、エディションはオプトイン方式です:
Cargo.tomlで、クレートに対して適用したいエディションを選択します。 -
エコシステムの分断を避けるために、コンパイラは異なるエディションのコードを混在させる事ができます。
-
コンパイラを直接使用する事は非常に稀であり、基本的には
cargoを介します。 -
It might be worth alluding that Cargo itself is an extremely powerful and comprehensive tool. It is capable of many advanced features including but not limited to:
- プロジェクト・パッケージの構造管理
- workspaces(ワークスペース)
- 開発用とランタイム用の依存関係管理・キャッシュ
- build scripting(ビルドスクリプト)
- global installation
- cargo clippyなどのサブコマンドプラグインによる拡張
-
詳細はofficial Cargo Bookを参照してください。
-
講座のサンプルコード
本講座は、主にブラウザ内で実行可能な例を使います。こうする事で、セットアップが容易になり、一貫した開発環境の提供が可能となります。
ただし、できればCargoをインストールしてください: 練習問題で使えると便利です。また最終日に依存関係を扱う課題を扱いますが、そこではCargoが必要になります。
講座のコードブロックはインタラクティブです:
fn main() {
    println!("Edit me!");
}
You can use Ctrl + Enter to execute the code when focus is in the text box.
ほとんどのサンプルコードは上記のように編集可能ですが、一部だけ以下のような理由から編集不可となっています:
-
講座のページ内に埋め込まれたプレイグラウンドでユニットテストは実行できません。コードを実際のプレイグラウンドで開き、デモンストレーションを行う必要があります。
-
講座のページ内に埋め込まれたプレイグラウンドでは、ページ移動すると状態が失われます!故に、受講生はローカル環境や実際のプレイグラウンドを使用して問題を解く必要があります。
Cargoを使ってローカルで実行
コードをローカルで試したい場合、Rust Bookの手順に従ってRustをインストールしてください。正常にインストールされたら、rustcとcargoが使えるようになります。最新のstableリリースのバージョンは以下の通りです:
% rustc --version
rustc 1.69.0 (84c898d65 2023-04-16)
% cargo --version
cargo 1.69.0 (6e9a83356 2023-04-12)
Rust は下位互換性を維持しているため、新しいバージョンを使用することもできます。
With this in place, follow these steps to build a Rust binary from one of the examples in this training:
-
「Copy to clipboard」でコードをコピー。
-
cargo new exerciseでexercise/ディレクトリを作成:$ cargo new exercise Created binary (application) `exercise` package -
exercise/ディレクトリに移動し、cargo runでバイナリをビルドして実行:$ cd exercise $ cargo run Compiling exercise v0.1.0 (/home/mgeisler/tmp/exercise) Finished dev [unoptimized + debuginfo] target(s) in 0.75s Running `target/debug/exercise` Hello, world! -
src/main.rsのボイラープレートコードを、コピーしたコードで置き換えてください。例えば、前のページの例を使った場合、src/main.rsは以下のようになります。fn main() { println!("Edit me!"); } -
cargo runで更新されたバイナリをビルドして実行:$ cargo run Compiling exercise v0.1.0 (/home/mgeisler/tmp/exercise) Finished dev [unoptimized + debuginfo] target(s) in 0.24s Running `target/debug/exercise` Edit me! -
cargo checkでプロジェクトのエラーチェックを行い、cargo buildでコンパイルだけ(実行はせず)を行います。通常のデバッグビルドでは、生成されたファイルはtarget/debug/に格納されます。最適化されたリリースビルドにはcargo build —releaseを使い、ファイルはtarget/release/に格納されます。 -
プロジェクトに依存関係を追加するには、
Cargo.tomlを編集します。その後、cargoコマンドを実行すると、自動的に不足している依存関係がダウンロードされてコンパイルされます。
受講者にCargoのインストールとローカルエディタの使用を勧めてください。通常の開発環境を持つ事で、作業がスムーズになります。
Day 1へようこそ
This is the first day of Rust Fundamentals. We will cover a lot of ground today:
- Rustの基本的な構文: 変数、スカラー型と複合型、列挙型、構造体、参照、関数、メソッド。
- Types and type inference.
- 制御フローの構造: ループ、条件など。
- ユーザー定義型: 構造体と列挙型。
- パターン マッチング: 列挙型、構造体、配列の分解。
スケジュール
Including 10 minute breaks, this session should take about 2 hours and 5 minutes. It contains:
| Segment | Duration |
|---|---|
| ようこそ | 5 minutes |
| Hello, World | 15 minutes |
| 型と値 | 40 minutes |
| 制御フローの基本 | 40 minutes |
受講生に伝えてください:
- They should ask questions when they get them, don’t save them to the end.
- The class is meant to be interactive and discussions are very much encouraged!
- As an instructor, you should try to keep the discussions relevant, i.e., keep the discussions related to how Rust does things vs some other language. It can be hard to find the right balance, but err on the side of allowing discussions since they engage people much more than one-way communication.
- The questions will likely mean that we talk about things ahead of the slides.
- This is perfectly okay! Repetition is an important part of learning. Remember that the slides are just a support and you are free to skip them as you like.
1 日目は、他の言語にも共通する Rust の「基本的な」事項を示します。Rust のより高度な部分については、後日説明します。
教室で教える場合は、ここでスケジュールを確認することをおすすめします。各セグメントの終わりに演習を行い、休憩を挟んでから答え合わせをしてください。上記の時間配分は、あくまでコースを予定どおりに進めるための目安ですので、必要に応じて柔軟に調整してください。
Hello, World
This segment should take about 15 minutes. It contains:
| Slide | Duration |
|---|---|
| Rustとは? | 10 minutes |
| Rustのメリット | 3 minutes |
| プレイグラウンド | 2 minutes |
Rustとは?
Rustは2015年に1.0版がリリースされた新しいプログラミング言語です:
- RustはC++と同様に、静的にコンパイルされる言語です
rustcはバックエンドにLLVMを使用しています。
- Rustは多くのプラットフォームとアーキテクチャをサポートしています:
- x86, ARM, WebAssembly, …
- Linux, Mac, Windows, …
- Rustは様々なデバイスで使用されています:
- ファームウェアやブートローダ、
- スマートディスプレイ、
- 携帯電話、
- デスクトップ、
- サーバ。
RustとC++が似ているところ:
- 高い柔軟性。
- 高度な制御性。
- Can be scaled down to very constrained devices such as microcontrollers.
- ランタイムやガベージコレクションがない。
- パフォーマンスを犠牲にせず、信頼性と安全性に焦点を当てている。
Rustのメリット
Rustのユニークなセールスポイントをいくつか紹介します:
-
コンパイル時のメモリ安全性 - クラス全体のメモリのバグをコンパイル時に防止します。
- 未初期化の変数がない。
- 二重解放が起きない。
- 解放済みメモリ使用(use-after-free)がない。
NULL(ヌル)ポインタがない。- ミューテックス(mutex)のロックの解除忘れがない。
- スレッド間でデータ競合しない。
- イテレータが無効化されない。
-
未定義のランタイム動作がない - Rust ステートメントで行われる処理が未規定のまま残ることはありません。
- 配列へのアクセスには境界チェックが行われる。
- Integer overflow is defined (panic or wrap-around).
-
最新の言語機能 - 高水準言語に匹敵する表現力があり、人間が使いやすい機能を備えています。
- 列挙型とパターンマッチング
- ジェネリクス
- オーバーヘッドのないFFI
- ゼロコスト抽象化
- 優秀なコンパイルエラー。
- 組み込みの依存関係マネージャ。
- 組み込みのテストサポート。
- Language Server Protocol(LSP)のサポート。
ここにはあまり時間をかけないでください。これらのポイントについては、後ほど詳しく説明します。
受講者にどの言語の経験があるかを尋ねてください。回答に応じて、Rustのさまざまな特徴を強調することができます:
-
CまたはC++の経験がある場合: Rustは借用チェッカーを介して実行時エラーの一部を排除してくれます。それに加え、CやC++と同等のパフォーマンスを得ることができ、メモリ安全性の問題はありません。さらに、パターンマッチングや組み込みの依存関係管理などの構造要素を含む現代的な言語です。
-
Experience with Java, Go, Python, JavaScript…: You get the same memory safety as in those languages, plus a similar high-level language feeling. In addition you get fast and predictable performance like C and C++ (no garbage collector) as well as access to low-level hardware (should you need it).
プレイグラウンド
このコースの例や演習には、短い Rust プログラムを簡単に実行できる Rust プレイグラウンド を使用します。最初の「hello-world」プログラムを実行してみましょう。次のような便利な機能があります。
-
「Tools」 にある
rustfmtオプションを使用して、コードを「standard」の形式でフォーマットします。 -
Rust には、コードを生成するための主要な「プロファイル」が 2 つあります。1 つは Debug(追加のランタイムチェックがあり、最適化が少ない)で、もう 1 つは Release(ランタイムチェックが少なく、最適化が多い)です。これらは上部の [Debug] からアクセスできます。
-
興味がある場合は、「…」 の下にある 「ASM」 を使用すると、生成されたアセンブリ コードを確認できます。
受講者が休憩に入ったら、プレイグラウンドを開いていろいろ試してみるよう促します。タブを開いたままにして、コースの残りの部分で学習したことを試すようすすめましょう。これは、Rust の最適化や生成されたアセンブリについて詳しく知りたい受講者に特に役立ちます。
型と値
This segment should take about 40 minutes. It contains:
| Slide | Duration |
|---|---|
| Hello, World | 5 minutes |
| 変数 | 5 minutes |
| 値 | 5 minutes |
| 算術 | 3 minutes |
| 型推論 | 3 minutes |
| 演習: フィボナッチ | 15 minutes |
Hello, World
さっそく一番シンプルなプログラムである定番のHello Worldからみてみましょう:
fn main() {
    println!("Hello 🌍!");
}
プログラムの中身:
- 関数は
fnで導入されます。 - CやC++と同様に、ブロックは波括弧で囲みます。
main関数はプログラムのエントリーポイントになります。- Rustには衛生的なマクロがあり、
println!はその一例です。 - Rustの文字列はUTF-8でエンコードされ、どんなUnicode文字でも含む事ができます。
This slide tries to make the students comfortable with Rust code. They will see a ton of it over the next four days so we start small with something familiar.
要点:
-
Rust is very much like other languages in the C/C++/Java tradition. It is imperative and it doesn’t try to reinvent things unless absolutely necessary.
-
Rust is modern with full support for things like Unicode.
-
Rust uses macros for situations where you want to have a variable number of arguments (no function overloading).
-
Macros being ‘hygienic’ means they don’t accidentally capture identifiers from the scope they are used in. Rust macros are actually only partially hygienic.
-
Rust はマルチパラダイムです。たとえば、強力な オブジェクト指向プログラミング機能 を備えている一方、非関数型言語であるにもかかわらず、さまざまな 関数的概念 を内包しています。
変数
Rust は静的型付けによって型安全性を提供します。変数のバインディングは let を使用して行います。
fn main() {
    let x: i32 = 10;
    println!("x: {x}");
    // x = 20;
    // println!("x: {x}");
}
-
x = 20のコメント化を解除して、変数がデフォルトで不変であることを示します。変更を許可するには、mutキーワードを追加します。 -
ここでの
i32は変数の型です。これはコンパイル時に指定する必要がありますが、多くの場合、プログラマーは型推論(後述)を使用することでこれを省略できます。
値
基本的な組み込み型と、各型のリテラル値の構文を以下に示します。
| 型 | リテラル | |
|---|---|---|
| 符号付き整数 | i8、i16、i32、i64、i128、isize | -10、0、1_000、123_i64 |
| 符号なし整数 | u8、u16、u32、u64、u128、usize | 0、123、10_u16 |
| 浮動小数点数 | f32、f64 | 3.14、-10.0e20、2_f32 |
| Unicode スカラー値 | char | 'a'、'α'、'∞' |
| ブール値 | bool | true、false |
各型の幅は次のとおりです。
iN、uN、fNは N ビット幅です。isizeとusizeはポインタの幅です。charは 32 ビット幅です。boolは 8 ビット幅です。
上記には示されていない構文もあります。
- 数字のアンダースコアはすべて省略できます。アンダースコアは読みやすくするためにのみ使用します。そのため、
1_000は1000(または10_00)、123_i64は123i64と記述できます。
算術
fn interproduct(a: i32, b: i32, c: i32) -> i32 {
    return a * b + b * c + c * a;
}

fn main() {
    println!("result: {}", interproduct(120, 100, 248));
}
main 以外の関数が出てきたのは今回が初めてですが、その意味は明確です。つまり、3 つの整数を取り、1 つの整数を返します。関数については、後で詳しく説明します。
算術は他の言語とよく似ており、優先順位も類似しています。
What about integer overflow? In C and C++ overflow of signed integers is actually undefined, and might do unknown things at runtime. In Rust, it’s defined.
i32 を i16 に変更して、整数オーバーフローを確認します。これは、デバッグビルドではパニックになり(チェックされ)、リリースビルドではラップされます。オーバーフロー、飽和、キャリーなどのオプションもあり、メソッド構文を使用してこれらのオプションにアクセスします(例: (a * b).saturating_add(b * c).saturating_add(c * a))。
実際には、コンパイラは定数式のオーバーフローを検出します。この例で別の関数が必要になるのはそのためです。
型推論
Rust は、どのように変数が 使用されているか を確認することで、型を判別します。
fn takes_u32(x: u32) {
    println!("u32: {x}");
}

fn takes_i8(y: i8) {
    println!("i8: {y}");
}

fn main() {
    let x = 10;
    let y = 20;

    takes_u32(x);
    takes_i8(y);
    // takes_u32(y);
}
このスライドは、変数の宣言と使用方法による制約に基づいて、Rust コンパイラが型を推測する仕組みを示しています。
このように宣言された変数は、どのようなデータも保持できる動的な「任意の型」ではない、という点を強調することが非常に重要です。このような宣言によって生成されたマシンコードは、型の明示的な宣言と同一です。コンパイラが代わりに作業を行い、より簡潔なコードの作成を支援します。
整数リテラルの型に制約がない場合、Rust はデフォルトで i32 を使用します。これは、エラー メッセージに {integer} として表示されることがあります。同様に、浮動小数点リテラルはデフォルトで f64 になります。
fn main() {
    let x = 3.14;
    let y = 20;
    assert_eq!(x, y);
    // エラー: `{float} == {integer}` の実装がありません
}
演習: フィボナッチ
The Fibonacci sequence begins with [0,1]. For n>1, the n’th Fibonacci number is calculated recursively as the sum of the n-1’th and n-2’th Fibonacci numbers.
n 番目のフィボナッチ数を計算する関数 fib(n) を記述します。この関数はいつパニックするでしょうか。
fn fib(n: u32) -> u32 {
    if n < 2 {
        // ベースケース。
        todo!("ここを実装してください")
    } else {
        // 再帰的なケース。
        todo!("ここを実装してください")
    }
}

fn main() {
    let n = 20;
    println!("fib({n}) = {}", fib(n));
}
解答
fn fib(n: u32) -> u32 {
    if n < 2 {
        return n;
    } else {
        return fib(n - 1) + fib(n - 2);
    }
}

fn main() {
    let n = 20;
    println!("fib({n}) = {}", fib(n));
}
制御フローの基本
This segment should take about 40 minutes. It contains:
| Slide | Duration |
|---|---|
| if 式 | 4 minutes |
| ループ | 5 minutes |
| break と continue | 4 minutes |
| ブロックとスコープ | 5 minutes |
| 関数 | 3 minutes |
| マクロ | 2 minutes |
| 演習: コラッツ数列 | 15 minutes |
if 式
Rust の if 式 は、他の言語における if 文と全く同じように使えます。
fn main() {
    let x = 10;
    if x == 0 {
        println!("zero!");
    } else if x < 100 {
        println!("biggish");
    } else {
        println!("huge");
    }
}
さらに、if を式としても用いることができます。それぞれのブロックにある最後の式が、if 式の値となります。
fn main() {
    let x = 10;
    let size = if x < 20 { "small" } else { "large" };
    println!("number size: {}", size);
}
Because if is an expression and must have a particular type, both of its branch blocks must have the same type. Show what happens if you add ; after "small" in the second example.
An if expression should be used in the same way as the other expressions. For example, when it is used in a let statement, the statement must be terminated with a ; as well. Remove the ; before println! to see the compiler error.
ループ
Rust には、while、loop、for の 3 つのループ キーワードがあります。
while
while キーワード は、他の言語における while と非常によく似た働きをします。
fn main() {
    let mut x = 200;
    while x >= 10 {
        x = x / 2;
    }
    println!("Final x: {x}");
}
for
The for loop iterates over ranges of values or the items in a collection:
fn main() {
    for x in 1..5 {
        println!("x: {x}");
    }

    for elem in [1, 2, 3, 4, 5] {
        println!("elem: {elem}");
    }
}
- Under the hood
forloops use a concept called “iterators” to handle iterating over different kinds of ranges/collections. Iterators will be discussed in more detail later. - Note that the first
forloop only iterates to4. Show the1..=5syntax for an inclusive range.
loop
loop ステートメント は、break まで永久にループするだけです。
fn main() {
    let mut i = 0;
    loop {
        i += 1;
        println!("{i}");
        if i > 100 {
            break;
        }
    }
}
break と continue
次のイテレーションをすぐさま開始したい場合は continue を使用してください。
If you want to exit any kind of loop early, use break. With loop, this can take an optional expression that becomes the value of the loop expression.
fn main() {
    let mut i = 0;
    loop {
        i += 1;
        if i > 5 {
            break;
        }
        if i % 2 == 0 {
            continue;
        }
        println!("{}", i);
    }
}
Note that loop is the only looping construct which can return a non-trivial value. This is because it’s guaranteed to only return at a break statement (unlike while and for loops, which can also return when the condition fails).
Labels
continue と break はオプションでラベル引数を取ることができます。ラベルはネストしたループから抜け出すために使われます。
fn main() {
    let s = [[5, 6, 7], [8, 9, 10], [21, 15, 32]];
    let mut elements_searched = 0;
    let target_value = 10;
    'outer: for i in 0..=2 {
        for j in 0..=2 {
            elements_searched += 1;
            if s[i][j] == target_value {
                break 'outer;
            }
        }
    }
    print!("elements searched: {elements_searched}");
}
- Labeled break also works on arbitrary blocks, e.g.
#![allow(unused)]
fn main() {
'label: {
    break 'label;
    println!("This line gets skipped");
}
}
ブロックとスコープ
コードブロック
A block in Rust contains a sequence of expressions, enclosed by braces {}. Each block has a value and a type, which are those of the last expression of the block:
fn main() {
    let z = 13;
    let x = {
        let y = 10;
        println!("y: {y}");
        z - y
    };
    println!("x: {x}");
}
最後の式が ; で終了した場合、ブロック全体の値と型は () になります。
- ブロック内にある最後の行を変更することによって、ブロック全体の値が変わることが分かります。例えば、行末のセミコロンを追加/削除したり、
returnを使用したりすることで、ブロックの値は変化します。
スコープとシャドーイング
変数のスコープは、囲まれたブロック内に限定されます。
外側のスコープの変数と、同じスコープの変数の両方をシャドーイングできます。
fn main() {
    let a = 10;
    println!("before: {a}");
    {
        let a = "hello";
        println!("inner scope: {a}");

        let a = true;
        println!("shadowed in inner scope: {a}");
    }

    println!("after: {a}");
}
- 最後の例の内側のブロックに
bを追加し、そのブロックの外側でアクセスを試みることで、変数のスコープが制限されていることを示します。 - Shadowing is different from mutation, because after shadowing both variables’ memory locations exist at the same time. Both are available under the same name, depending where you use it in the code.
- シャドーイング変数の型はさまざまです。
- シャドーイングは一見わかりにくいように見えますが、
.unwrap()の後の値を保持する場合に便利です。
関数
fn gcd(a: u32, b: u32) -> u32 {
    if b > 0 {
        gcd(b, a % b)
    } else {
        a
    }
}

fn main() {
    println!("gcd: {}", gcd(143, 52));
}
- 宣言パラメータの後には型(一部のプログラミング言語と逆)、戻り値の型が続きます。
- 関数本体(または任意のブロック)内の最後の式が戻り値になります。式の末尾の
;を省略します。returnキーワードは早期リターンに使用できますが、関数の最後は「裸の値」の形式にするのが慣用的です(returnを使用するにはgcdをリファクタリングします)。 - Some functions have no return value, and return the ‘unit type’,
(). The compiler will infer this if the return type is omitted. - オーバーロードはサポートされていません。各関数の実装は 1 つです。
- 常に固定数のパラメータを受け取ります。デフォルトの引数はサポートされていません。マクロを使用して可変関数をサポートできます。
- 常に 1 つのパラメータ型セットを受け取ります。これらの型は汎用にすることもできますが、これについては後で説明します。
マクロ
マクロはコンパイル時に Rust コードに展開され、可変長引数を取ることができます。これらは末尾の ! で区別されます。Rust 標準ライブラリには、各種の便利なマクロが含まれています。
println!(format, ..):std::fmtで説明されている書式を適用して、1 行を標準出力に出力します。format!(format, ..):println!と同様に機能しますが、結果を文字列として返します。dbg!(expression): 式の値をログに記録して返します。todo!(): 一部のコードに未実装のマークを付けます。実行するとパニックが発生します。unreachable!(): コードの一部をアクセス不能としてマークします。実行するとパニックが発生します。
fn factorial(n: u32) -> u32 {
    let mut product = 1;
    for i in 1..=n {
        product *= dbg!(i);
    }
    product
}

fn fizzbuzz(n: u32) -> u32 {
    todo!()
}

fn main() {
    let n = 4;
    println!("{n}! = {}", factorial(n));
}
このセクションの要点は、マクロの一般的な利便性と、その使用方法を示すことにあります。マクロとして定義されている理由と、展開先は特に重要ではありません。
マクロの定義についてはコースでは説明しませんが、後のセクションで導出マクロの使用について説明します。
演習: コラッツ数列
The Collatz Sequence is defined as follows, for an arbitrary n1 greater than zero:
- If ni is 1, then the sequence terminates at ni.
- If ni is even, then ni+1 = ni / 2.
- If ni is odd, then ni+1 = 3 * ni + 1.
For example, beginning with n1 = 3:
- 3 is odd, so n2 = 3 * 3 + 1 = 10;
- 10 is even, so n3 = 10 / 2 = 5;
- 5 is odd, so n4 = 3 * 5 + 1 = 16;
- 16 is even, so n5 = 16 / 2 = 8;
- 8 is even, so n6 = 8 / 2 = 4;
- 4 is even, so n7 = 4 / 2 = 2;
- 2 is even, so n8 = 1; and
- 数列は終了します。
任意の初期値 n に対するコラッツ数列の長さを計算する関数を作成します。
/// `n` から始まるコラッツ数列の長さを決定。
fn collatz_length(mut n: i32) -> u32 {
  todo!("ここを実装してください")
}

#[test]
fn test_collatz_length() {
    assert_eq!(collatz_length(11), 15);
}

fn main() {
    println!("Length: {}", collatz_length(11));
}
解答
/// `n` から始まるコラッツ数列の長さを決定。
fn collatz_length(mut n: i32) -> u32 {
    let mut len = 1;
    while n > 1 {
        n = if n % 2 == 0 { n / 2 } else { 3 * n + 1 };
        len += 1;
    }
    len
}

#[test]
fn test_collatz_length() {
    assert_eq!(collatz_length(11), 15);
}

fn main() {
    println!("Length: {}", collatz_length(11));
}
おかえり
Including 10 minute breaks, this session should take about 2 hours and 35 minutes. It contains:
| Segment | Duration |
|---|---|
| タプルと配列 | 35 minutes |
| 参照 | 55 minutes |
| ユーザー定義型 | 50 minutes |
タプルと配列
This segment should take about 35 minutes. It contains:
| Slide | Duration |
|---|---|
| 配列 | 5 minutes |
| タプル | 5 minutes |
| 配列のイテレート | 3 minutes |
| パターンとデストラクト | 5 minutes |
| 演習: ネストされた配列 | 15 minutes |
配列
fn main() {
    let mut a: [i8; 10] = [42; 10];
    a[5] = 0;
    println!("a: {a:?}");
}
-
配列型
[T; N]には、同じ型TのN(コンパイル時定数)個の要素が保持されます。なお、配列の長さはその型の一部分です。つまり、[u8; 3]と[u8; 4]は 2 つの異なる型とみなされます。スライス(サイズが実行時に決定される)については後で説明します。 -
境界外の配列要素にアクセスしてみてください。配列アクセスは実行時にチェックされます。Rust では通常、これらのチェックを最適化により除去できます(Unsafe Rust を使用することで回避できます)。
-
リテラルを使用して配列に値を代入することができます。
-
println!マクロは、?形式のパラメータを使用してデバッグ実装を要求します。つまり、{}はデフォルトの出力を、{:?}はデバッグ出力を提供します。整数や文字列などの型はデフォルトの出力を実装しますが、配列はデバッグ出力のみを実装します。そのため、ここではデバッグ出力を使用する必要があります。 -
#を追加すると(例:{a:#?})、読みやすい「プリティ プリント」形式が呼び出されます。
タプル
fn main() {
    let t: (i8, bool) = (7, true);
    println!("t.0: {}", t.0);
    println!("t.1: {}", t.1);
}
-
配列と同様に、タプルの長さは固定されています。
-
タプルは、異なる型の値を複合型にグループ化します。
-
タプルのフィールドには、ピリオドと値のインデックス(例:
t.0、t.1)でアクセスできます。 -
The empty tuple
()is referred to as the “unit type” and signifies absence of a return value, akin tovoidin other languages.
配列のイテレート
for ステートメントでは、配列の反復処理がサポートされています(タプルはサポートされていません)。
fn main() {
    let primes = [2, 3, 5, 7, 11, 13, 17, 19];
    for prime in primes {
        for i in 2..prime {
            assert_ne!(prime % i, 0);
        }
    }
}
この機能は IntoIterator トレイトを使用しますが、これはまだ説明していません。
The assert_ne! macro is new here. There are also assert_eq! and assert! macros. These are always checked, while debug-only variants like debug_assert! compile to nothing in release builds.
パターンとデストラクト
When working with tuples and other structured values it’s common to want to extract the inner values into local variables. This can be done manually by directly accessing the inner values:
fn print_tuple(tuple: (i32, i32)) {
    let left = tuple.0;
    let right = tuple.1;
    println!("left: {left}, right: {right}");
}
However, Rust also supports using pattern matching to destructure a larger value into its constituent parts:
fn print_tuple(tuple: (i32, i32)) {
    let (left, right) = tuple;
    println!("left: {left}, right: {right}");
}
- The patterns used here are “irrefutable”, meaning that the compiler can statically verify that the value on the right of
=has the same structure as the pattern. - A variable name is an irrefutable pattern that always matches any value, hence why we can also use
letto declare a single variable. - Rust also supports using patterns in conditionals, allowing for equality comparison and destructuring to happen at the same time. This form of pattern matching will be discussed in more detail later.
- Edit the examples above to show the compiler error when the pattern doesn’t match the value being matched on.
演習: ネストされた配列
配列には他の配列を含めることができます。
#![allow(unused)]
fn main() {
let array = [[1, 2, 3], [4, 5, 6], [7, 8, 9]];
}
What is the type of this variable?
上記のような配列を使用して、行列を転置(行を列に変換)する transpose 関数を記述します。
Copy the code below to https://play.rust-lang.org/ and implement the function. This function only operates on 3x3 matrices.
// TODO: 実装が完了したら、これを削除します。
#![allow(unused_variables, dead_code)]

fn transpose(matrix: [[i32; 3]; 3]) -> [[i32; 3]; 3] {
    unimplemented!()
}

#[test]
fn test_transpose() {
    let matrix = [
        [101, 102, 103], //
        [201, 202, 203],
        [301, 302, 303],
    ];
    let transposed = transpose(matrix);
    assert_eq!(
        transposed,
        [
            [101, 201, 301], //
            [102, 202, 302],
            [103, 203, 303],
        ]
    );
}

fn main() {
    let matrix = [
        [101, 102, 103], // <-- このコメントにより rustfmt で改行を追加
        [201, 202, 203],
        [301, 302, 303],
    ];

    println!("matrix: {:#?}", matrix);
    let transposed = transpose(matrix);
    println!("transposed: {:#?}", transposed);
}
解答
fn transpose(matrix: [[i32; 3]; 3]) -> [[i32; 3]; 3] {
    let mut result = [[0; 3]; 3];
    for i in 0..3 {
        for j in 0..3 {
            result[j][i] = matrix[i][j];
        }
    }
    result
}

#[test]
fn test_transpose() {
    let matrix = [
        [101, 102, 103], //
        [201, 202, 203],
        [301, 302, 303],
    ];
    let transposed = transpose(matrix);
    assert_eq!(
        transposed,
        [
            [101, 201, 301], //
            [102, 202, 302],
            [103, 203, 303],
        ]
    );
}

fn main() {
    let matrix = [
        [101, 102, 103], // <-- このコメントにより rustfmt で改行を追加
        [201, 202, 203],
        [301, 302, 303],
    ];

    println!("matrix: {:#?}", matrix);
    let transposed = transpose(matrix);
    println!("transposed: {:#?}", transposed);
}
参照
This segment should take about 55 minutes. It contains:
| Slide | Duration |
|---|---|
| 共有参照 | 10 minutes |
| 排他参照 | 10 minutes |
| Slices | 10 minutes |
| 文字列 | 10 minutes |
| 演習: ジオメトリ | 15 minutes |
共有参照
A reference provides a way to access another value without taking ownership of the value, and is also called “borrowing”. Shared references are read-only, and the referenced data cannot change.
fn main() {
    let a = 'A';
    let b = 'B';
    let mut r: &char = &a;
    println!("r: {}", *r);
    r = &b;
    println!("r: {}", *r);
}
型 T への共有参照の型は &T です。参照値は & 演算子で作成されます。* 演算子は参照を「逆参照」し、その値を生成します。
Rust はダングリング参照を静的に禁止します。
fn x_axis(x: &i32) -> &(i32, i32) {
    let point = (*x, 0);
    return &point;
}
-
References can never be null in Rust, so null checking is not necessary.
-
参照とは、参照する値を「借用する」ことだと言われていますが、これはポインタに慣れていない受講者にとって理解しやすい説明です。コードでは参照を使用して値にアクセスできますが、その値は元の変数によって「所有」されたままとなります。所有については、コースの 3 日目で詳しく説明します。
-
参照はポインタとして実装されます。主な利点は、参照先よりもはるかに小さくできることです。C または C++ に精通している受講者は、参照をポインタとして認識できます。このコースの後半で、未加工ポインタの使用によるメモリ安全性のバグを Rust で防止する方法について説明します。
-
Rust は参照を自動的に作成しないため、常に
&を付ける必要があります。 -
Rust will auto-dereference in some cases, in particular when invoking methods (try
r.is_ascii()). There is no need for an->operator like in C++. -
この例では、
rは可変であるため、再代入が可能です(r = &b)。これによりrが再バインドされ、他の値を参照するようになります。これは、参照に代入すると参照先の値が変更される C++ とは異なります。 -
共有参照では、値が可変であっても、参照先の値は変更できません。
*r = 'X'と指定してみてください。 -
Rust は、すべての参照のライフタイムを追跡して、十分な存続期間を確保しています。安全な Rust では、ダングリング参照が発生することはありません。
x_axisはpointへの参照を返しますが、関数が戻るとpointの割り当てが解除されるため、コンパイルされません。 -
借用については所有権のところで詳しく説明します。
排他参照
排他参照は可変参照とも呼ばれ、参照先の値を変更できます。型は &mut T です。
fn main() {
    let mut point = (1, 2);
    let x_coord = &mut point.0;
    *x_coord = 20;
    println!("point: {point:?}");
}
要点:
-
「排他」とは、この参照のみを使用して値にアクセスできることを意味します。他の参照(共有または排他)が同時に存在することはできず、排他参照が存在する間は参照先の値にアクセスできません。
x_coordが有効な状態で&point.0を作成するか、point.0を変更してみてください。 -
let mut x_coord: &i32とlet x_coord: &mut i32の違いに注意してください。前者は異なる値にバインドできる共有参照を表すのに対し、後者は可変の値への排他参照を表します。
Slices
スライスは、より大きなコレクションに対するビューを提供します。
fn main() {
    let mut a: [i32; 6] = [10, 20, 30, 40, 50, 60];
    println!("a: {a:?}");

    let s: &[i32] = &a[2..4];

    println!("s: {s:?}");
}
- スライスは、スライスされた型からデータを借用します。
-
スライスを作成するには、
aを借用し、開始インデックスと終了インデックスを角かっこで囲んで指定します。 -
スライスがインデックス 0 から始まる場合、Rust の範囲構文により開始インデックスを省略できます。つまり、
&a[0..a.len()]と&a[..a.len()]は同じです。 -
最後のインデックスについても同じことが言えるので、
&a[2..a.len()]と&a[2..]は同じです。 -
配列全体のスライスを簡単に作成するには、
&a[..]と書くことが出来ます。 -
sは i32 のスライスへの参照です。sの型(&[i32])に配列の長さが含まれなくなったことに注目してください。これにより、さまざまなサイズのスライスに対して計算を実行できます。 -
スライスは常に別のオブジェクトから借用します。この例では、
aは少なくともスライスが存在する間は「存続」 している(スコープ内にある)必要があります。
文字列
We can now understand the two string types in Rust:
&stris a slice of UTF-8 encoded bytes, similar to&[u8].Stringis an owned buffer of UTF-8 encoded bytes, similar toVec<T>.
fn main() {
    let s1: &str = "World";
    println!("s1: {s1}");

    let mut s2: String = String::from("Hello ");
    println!("s2: {s2}");
    s2.push_str(s1);
    println!("s2: {s2}");

    let s3: &str = &s2[s2.len() - s1.len()..];
    println!("s3: {s3}");
}
-
&strintroduces a string slice, which is an immutable reference to UTF-8 encoded string data stored in a block of memory. String literals ("Hello"), are stored in the program’s binary. -
Rust’s
Stringtype is a wrapper around a vector of bytes. As with aVec<T>, it is owned. -
他の多くの型と同様に、
String::from()は文字列リテラルから文字列を作成します。String::new()は新しい空の文字列を作成します。push()メソッドとpush_str()メソッドを使用して、そこに文字列データを追加できます。 -
format!()マクロを使用すると、動的な値から所有文字列を簡単に生成できます。これは println!() と同じ形式指定を受け入れます。 -
&を使用してStringから&strスライスを借用し、必要に応じて範囲を選択できます。文字境界に揃えられていないバイト範囲を選択すると、その式でパニックを起こします。charsイテレータは文字単位で処理するため、正しい文字境界を取得しようとすることよりも、このイテレータを使用するほうが望ましいです。 -
C++ プログラマー向けの説明:
&strは常にメモリ上の有効な文字列を指しているようなC++ の std::string_view と考えられます。Rust のStringは、C++ のstd::stringとおおむね同等です(主な違いは、UTF-8 でエンコードされたバイトのみを含めることができ、短い文字列に対する最適化が行われないことです)。 -
バイト文字列リテラルを使用すると、
&[u8]値を直接作成できます。fn main() { println!("{:?}", b"abc"); println!("{:?}", &[97, 98, 99]); } -
未加工の文字列を使用すると、エスケープを無効にして
&str値を作成できます(r"\n" == "\\n")。二重引用符を埋め込むには、引用符の両側に同量の#を使用します。fn main() { println!(r#"<a href="link.html">link</a>"#); println!("<a href=\"link.html\">link</a>"); }
演習: ジオメトリ
ここでは、点を [f64;3] として表現する 3 次元ジオメトリのユーティリティ関数をいくつか作成します。関数シグネチャは任意で指定してください。
// 座標の二乗を合計して平方根を取り、
// ベクターの大きさを計算します。`sqrt()` メソッドを使用して、`v.sqrt()` と同様に
// 平方根を計算します。


fn magnitude(...) -> f64 {
    todo!()
}

// 大きさを計算し、すべての座標をその大きさで割ることで
// ベクターを正規化します。


fn normalize(...) {
    todo!()
}

// 次の `main` を使用して処理をテストします。

fn main() {
    println!("Magnitude of a unit vector: {}", magnitude(&[0.0, 1.0, 0.0]));

    let mut v = [1.0, 2.0, 9.0];
    println!("Magnitude of {v:?}: {}", magnitude(&v));
    normalize(&mut v);
    println!("Magnitude of {v:?} after normalization: {}", magnitude(&v));
}
解答
/// 指定されたベクターの大きさを計算します。
fn magnitude(vector: &[f64; 3]) -> f64 {
    let mut mag_squared = 0.0;
    for coord in vector {
        mag_squared += coord * coord;
    }
    mag_squared.sqrt()
}

/// 向きを変えずにベクターの大きさを 1.0 に変更します。
fn normalize(vector: &mut [f64; 3]) {
    let mag = magnitude(vector);
    for item in vector {
        *item /= mag;
    }
}

fn main() {
    println!("Magnitude of a unit vector: {}", magnitude(&[0.0, 1.0, 0.0]));

    let mut v = [1.0, 2.0, 9.0];
    println!("Magnitude of {v:?}: {}", magnitude(&v));
    normalize(&mut v);
    println!("Magnitude of {v:?} after normalization: {}", magnitude(&v));
}
ユーザー定義型
This segment should take about 50 minutes. It contains:
| Slide | Duration |
|---|---|
| 名前付き構造体 | 10 minutes |
| タプル構造体 | 10 minutes |
| 列挙型(enums) | 5 minutes |
| 静的 | 5 minutes |
| 型エイリアス | 2 minutes |
| 演習: エレベーターでのイベント | 15 minutes |
名前付き構造体
C や C++ と同様に、Rust はカスタム構造体をサポートしています。
struct Person {
    name: String,
    age: u8,
}

fn describe(person: &Person) {
    println!("{} is {} years old", person.name, person.age);
}

fn main() {
    let mut peter = Person { name: String::from("Peter"), age: 27 };
    describe(&peter);

    peter.age = 28;
    describe(&peter);

    let name = String::from("Avery");
    let age = 39;
    let avery = Person { name, age };
    describe(&avery);

    let jackie = Person { name: String::from("Jackie"), ..avery };
    describe(&jackie);
}
キーポイント:
- 構造体は、C や C++ においてと同じように機能します。
- C++ と同様に、また C とは異なり、型を定義するのに typedef は必要ありません。
- C++ とは異なり、構造体間に継承はありません。
- ここで、構造体にはさまざまな型があることを説明しましょう。
- サイズがゼロの構造体(例:
struct Foo;)は、ある型にトレイトを実装しているものの、値自体に格納するデータがない場合に使用できます。 - 次のスライドでは、フィールド名が重要でない場合に使用されるタプル構造体を紹介します。
- サイズがゼロの構造体(例:
- 適切な名前の変数がすでにある場合は、省略形を使用して構造体を作成できます。
- 構文
..averyを使用すると、明示的にすべてのフィールドを入力しなくても、古い構造体のフィールドの大部分をコピーできます。この構文は、常に最後の要素にする必要があります。
タプル構造体
フィールド名が重要でない場合は、タプル構造体を使用できます。
struct Point(i32, i32);

fn main() {
    let p = Point(17, 23);
    println!("({}, {})", p.0, p.1);
}
これは多くの場合、単一フィールド ラッパー(ニュータイプと呼ばれます)に使用されます。
struct PoundsOfForce(f64);
struct Newtons(f64);

fn compute_thruster_force() -> PoundsOfForce {
    todo!("Ask a rocket scientist at NASA")
}

fn set_thruster_force(force: Newtons) {
    // ...
}

fn main() {
    let force = compute_thruster_force();
    set_thruster_force(force);
}
- ニュータイプは、プリミティブ型の値に関する追加情報をエンコードする優れた方法です。次に例を示します。
- 数値はいくつかの単位で測定されます(上記の例では
Newtons)。 - この値は作成時に検証に合格したため、
PhoneNumber(String)またはOddNumber(u32)を使用するたびに再検証する必要はありません。
- 数値はいくつかの単位で測定されます(上記の例では
- ニュータイプの 1 つのフィールドにアクセスして、
Newtons型にf64の値を追加する方法を示します。- Rust では通常、不明瞭なこと(自動ラップ解除や、整数としてのブール値の使用など)は好まれません。
- 演算子のオーバーロードについては、3 日目(ジェネリクス)で説明します。
- この例は、マーズ クライメイト オービターの失敗を参考にしています。
列挙型(enums)
enum キーワードを使用すると、いくつかの異なるバリアントを持つ型を作成できます。
#[derive(Debug)]
enum Direction {
    Left,
    Right,
}

#[derive(Debug)]
enum PlayerMove {
    Pass,                        // 単純なバリアント
    Run(Direction),              // Tuple variant
    Teleport { x: u32, y: u32 }, // 構造体バリアント
}

fn main() {
    let player_move: PlayerMove = PlayerMove::Run(Direction::Left);
    println!("On this turn: {player_move:?}");
}
キーポイント:
- 列挙型を使用すると、1 つの型で一連の値を収集できます。
Directionはバリアントを持つ型です。Directionには、Direction::LeftとDirection::Rightの 2 つの値があります。PlayerMoveは、3 つのバリアントを持つ型です。Rust はペイロードに加えて判別式を格納することで、実行時にどのバリアントがPlayerMove値に含まれているかを把握できるようにします。- ここで構造体と列挙型を比較することをおすすめします。
- どちらでも、フィールドのないシンプルなバージョン(単位構造体)か、さまざまなフィールドがあるバージョン(バリアント ペイロード)を使用できます。
- 個別の構造体を使用して、列挙型のさまざまなバリアントを実装することもできますが、その場合、それらがすべて列挙型で定義されている場合と同じ型にはなりません。
- Rust は判別式を保存するために最小限のスペースを使用します。
-
必要に応じて、必要最小限のサイズの整数を格納します。
-
許可されたバリアント値がすべてのビットパターンをカバーしていない場合、無効なビットパターンを使用して判別式をエンコードします(「ニッチの最適化」)。たとえば、
Option<&u8>にはNoneバリアントに対する整数へのポインタまたはNULLが格納されます。 -
必要に応じて(たとえば C との互換性を確保するために)判別式を制御できます。
#[repr(u32)] enum Bar { A, // 0 B = 10000, C, // 10001 } fn main() { println!("A: {}", Bar::A as u32); println!("B: {}", Bar::B as u32); println!("C: {}", Bar::C as u32); }reprがない場合、10001 は 2 バイトに収まるため、判別式の型には 2 バイトが使用されます。
-
その他
Rust には、列挙型が占めるスペースを少なくするために使用できる最適化がいくつかあります。
-
null ポインタの最適化: 一部の型で、Rust は
size_of::<T>()がsize_of::<Option<T>>()と等しいことを保証します。以下のサンプルコードは、ビット単位の表現が実際にどのようになるかを示しています。コンパイラはこの表現に関して保証しないので、これはまったく安全ではないことに注意してください。
use std::mem::transmute;

macro_rules! dbg_bits {
    ($e:expr, $bit_type:ty) => {
        println!("- {}: {:#x}", stringify!($e), transmute::<_, $bit_type>($e));
    };
}

fn main() {
    unsafe {
        println!("bool:");
        dbg_bits!(false, u8);
        dbg_bits!(true, u8);

        println!("Option<bool>:");
        dbg_bits!(None::<bool>, u8);
        dbg_bits!(Some(false), u8);
        dbg_bits!(Some(true), u8);

        println!("Option<Option<bool>>:");
        dbg_bits!(Some(Some(false)), u8);
        dbg_bits!(Some(Some(true)), u8);
        dbg_bits!(Some(None::<bool>), u8);
        dbg_bits!(None::<Option<bool>>, u8);

        println!("Option<&i32>:");
        dbg_bits!(None::<&i32>, usize);
        dbg_bits!(Some(&0i32), usize);
    }
}
const
Constants are evaluated at compile time and their values are inlined wherever they are used:
const DIGEST_SIZE: usize = 3;
const ZERO: Option<u8> = Some(42);

fn compute_digest(text: &str) -> [u8; DIGEST_SIZE] {
    let mut digest = [ZERO.unwrap_or(0); DIGEST_SIZE];
    for (idx, &b) in text.as_bytes().iter().enumerate() {
        digest[idx % DIGEST_SIZE] = digest[idx % DIGEST_SIZE].wrapping_add(b);
    }
    digest
}

fn main() {
    let digest = compute_digest("Hello");
    println!("digest: {digest:?}");
}
Rust RFC Book によると、定数変数は使用時にインライン化されます。
コンパイル時に const 値を生成するために呼び出せるのは、const とマークされた関数のみです。ただし、const 関数は実行時に呼び出すことができます。
- Mention that
constbehaves semantically similar to C++’sconstexpr - 実行時に評価される定数が必要になることはあまりありませんが、静的変数を使用するよりも便利で安全です。
static
静的変数はプログラムの実行全体を通じて存続するため、移動しません。
static BANNER: &str = "Welcome to RustOS 3.14";

fn main() {
    println!("{BANNER}");
}
Rust RFC Book で説明されているように、静的変数は使用時にインライン化されず、実際の関連するメモリ位置に存在します。これは安全でないコードや埋め込みコードに有用であり、変数はプログラムの実行全体を通じて存続します。グローバル スコープの値にオブジェクト ID が必要ない場合は、一般的に const が使用されます。
staticis similar to mutable global variables in C++.staticはオブジェクト ID(メモリ内のアドレス)と、内部可変性を持つ型に必要な状態(Mutex<T>など)を提供します。
その他
static 変数はどのスレッドからでもアクセスできるため、Sync である必要があります。内部の可変性は、Mutex やアトミックなどの方法で実現できます。
マクロ std::thread_local を使用して、スレッド ローカルのデータを作成できます。
型エイリアス
型エイリアスは、別の型の名前を作成します。この 2 つの型は同じ意味で使用できます。
enum CarryableConcreteItem {
    Left,
    Right,
}

type Item = CarryableConcreteItem;

// エイリアスは長くて複雑な型に使用すると便利です。
use std::cell::RefCell;
use std::sync::{Arc, RwLock};
type PlayerInventory = RwLock<Vec<Arc<RefCell<Item>>>>;
C プログラマーは、これを typedef と同様のものと考えるでしょう。
演習: エレベーターでのイベント
エレベーター制御システムでイベントを表すデータ構造を作成します。さまざまなイベントを構築するための型と関数を自由に定義して構いません。#[derive(Debug)] を使用して、型を {:?} でフォーマットできるようにします。
この演習に必要なのは、main がエラーなしで実行されるように、データ構造を作成して入力することだけです。このコースの次のパートでは、これらの構造からデータを取得する方法を説明します。
#[derive(Debug)]
/// コントローラが反応する必要があるエレベーター システム内のイベント。
enum Event {
    // TODO: 必要なバリアントを追加する
}

/// 運転方向。
#[derive(Debug)]
enum Direction {
    Up,
    Down,
}

/// かごが所定の階に到着した。
fn car_arrived(floor: i32) -> Event {
    todo!()
}

/// かごのドアが開いた。
fn car_door_opened() -> Event {
    todo!()
}

/// かごのドアが閉まった。
fn car_door_closed() -> Event {
    todo!()
}

/// 所定の階のエレベーター ロビーで方向ボタンが押された。
fn lobby_call_button_pressed(floor: i32, dir: Direction) -> Event {
    todo!()
}

/// エレベーターのかごの階数ボタンが押された。
fn car_floor_button_pressed(floor: i32) -> Event {
    todo!()
}

fn main() {
    println!(
        "A ground floor passenger has pressed the up button: {:?}",
        lobby_call_button_pressed(0, Direction::Up)
    );
    println!("The car has arrived on the ground floor: {:?}", car_arrived(0));
    println!("The car door opened: {:?}", car_door_opened());
    println!(
        "A passenger has pressed the 3rd floor button: {:?}",
        car_floor_button_pressed(3)
    );
    println!("The car door closed: {:?}", car_door_closed());
    println!("The car has arrived on the 3rd floor: {:?}", car_arrived(3));
}
解答
#[derive(Debug)]
/// コントローラが反応する必要があるエレベーター システム内のイベント。
enum Event {
    /// ボタンが押された。
    ButtonPressed(Button),

    /// 車両が所定の階に到着した。
    CarArrived(Floor),

    /// かごのドアが開いた。
    CarDoorOpened,

    /// かごのドアが閉まった。
    CarDoorClosed,
}

/// 階は整数として表される。
type Floor = i32;

/// 運転方向。
#[derive(Debug)]
enum Direction {
    Up,
    Down,
}

/// ユーザーがアクセスできるボタン。
#[derive(Debug)]
enum Button {
    /// 所定の階のエレベーター ロビーにあるボタン。
    LobbyCall(Direction, Floor),

    /// かご内の階数ボタン。
    CarFloor(Floor),
}

/// かごが所定の階に到着した。
fn car_arrived(floor: i32) -> Event {
    Event::CarArrived(floor)
}

/// かごのドアが開いた。
fn car_door_opened() -> Event {
    Event::CarDoorOpened
}

/// かごのドアが閉まった。
fn car_door_closed() -> Event {
    Event::CarDoorClosed
}

/// 所定の階のエレベーター ロビーで方向ボタンが押された。
fn lobby_call_button_pressed(floor: i32, dir: Direction) -> Event {
    Event::ButtonPressed(Button::LobbyCall(dir, floor))
}

/// エレベーターのかごの階数ボタンが押された。
fn car_floor_button_pressed(floor: i32) -> Event {
    Event::ButtonPressed(Button::CarFloor(floor))
}

fn main() {
    println!(
        "A ground floor passenger has pressed the up button: {:?}",
        lobby_call_button_pressed(0, Direction::Up)
    );
    println!("The car has arrived on the ground floor: {:?}", car_arrived(0));
    println!("The car door opened: {:?}", car_door_opened());
    println!(
        "A passenger has pressed the 3rd floor button: {:?}",
        car_floor_button_pressed(3)
    );
    println!("The car door closed: {:?}", car_door_closed());
    println!("The car has arrived on the 3rd floor: {:?}", car_arrived(3));
}
2日目の講座へようこそ
Rust についてかなり多くのことを学んできましたが、今日は Rust の型システムに焦点を当てます。
- パターン マッチング: 構造からのデータの抽出。
- メソッド: 関数と型の関連付け。
- トレイト: 複数の型で共有される挙動。
- ジェネリクス: 他の型での型のパラメータ化。
- 標準ライブラリの型とトレイト: Rust の豊富な標準ライブラリの紹介。
スケジュール
Including 10 minute breaks, this session should take about 2 hours and 10 minutes. It contains:
| Segment | Duration |
|---|---|
| ようこそ | 3 minutes |
| パターンマッチング | 1 hour |
| Methods and Traits | 50 minutes |
パターンマッチング
This segment should take about 1 hour. It contains:
| Slide | Duration |
|---|---|
| Matching Values | 10 minutes |
| 構造体のデストラクト | 4 minutes |
| 列挙型のデストラクト | 4 minutes |
| Let制御フロー | 10 minutes |
| 演習: 式の評価 | 30 minutes |
Matching Values
match キーワードを使用すると、1 つ以上のパターンに対して値を照合できます。上から順に照合が行われ、最初に一致したパターンのみが実行されます。
C や C++ の switch と同様に、パターンには単純な値を指定できます。
#[rustfmt::skip]
fn main() {
    let input = 'x';
    match input {
        'q'                       => println!("Quitting"),
        'a' | 's' | 'w' | 'd'     => println!("Moving around"),
        '0'..='9'                 => println!("Number input"),
        key if key.is_lowercase() => println!("Lowercase: {key}"),
        _                         => println!("Something else"),
    }
}
The _ pattern is a wildcard pattern which matches any value. The expressions must be exhaustive, meaning that it covers every possibility, so _ is often used as the final catch-all case.
一致を式として使用できます。if と同様に、各マッチアームは同じ型にする必要があります。型は、ブロックの最後の式です(存在する場合)。上記の例では、型は () です。
パターンの変数(この例では key)により、マッチアーム内で使用できるバインディングが作成されます。
マッチガードにより、条件が true の場合にのみアームが一致します。
キーポイント:
-
特定の文字がパターンでどのように使用されるかを説明します。
|をorとして指定する..は必要に応じて展開できる1..=5は 5 を含む範囲を表す_はワイルドカードを表す
-
パターンのみでは表現できない複雑な概念を簡潔に表現したい場合、独立した構文機能であるマッチガードは重要かつ必要です。
-
マッチガードは、マッチアーム内の個別の
if式とは異なります。分岐ブロック内(=>の後)のif式は、マッチアームが選択された後に実行されます。そのブロック内でif条件が満たされなかった場合、元のmatch式の他のアームは考慮されません。 -
ガードで定義された条件は、
|が付いたパターン内のすべての式に適用されます。
More To Explore
-
Another piece of pattern syntax you can show students is the
@syntax which binds a part of a pattern to a variable. For example:#![allow(unused)] fn main() { let opt = Some(123); match opt { outer @ Some(inner) => { println!("outer: {outer:?}, inner: {inner}"); } None => {} } }In this example
innerhas the value 123 which it pulled from theOptionvia destructuring,outercaptures the entireSome(inner)expression, so it contains the fullOption::Some(123). This is rarely used but can be useful in more complex patterns.
構造体(structs)
Like tuples, Struct can also be destructured by matching:
struct Foo {
    x: (u32, u32),
    y: u32,
}

#[rustfmt::skip]
fn main() {
    let foo = Foo { x: (1, 2), y: 3 };
    match foo {
        Foo { x: (1, b), y } => println!("x.0 = 1, b = {b}, y = {y}"),
        Foo { y: 2, x: i }   => println!("y = 2, x = {i:?}"),
        Foo { y, .. }        => println!("y = {y}, other fields were ignored"),
    }
}
fooのリテラル値を他のパターンと一致するように変更します。Fooに新しいフィールドを追加し、必要に応じてパターンに変更を加えます。- キャプチャと定数式を区別しづらい場合があります。2 つ目のアームの
2を変数に変更してみて、うまく機能しないことを確認します。これをconstに変更して、再び動作することを確認します。
列挙型(enums)
Like tuples, enums can also be destructured by matching:
パターンは、変数を値の一部にバインドするためにも使用できます。以下のようにして、型の構造を調べることができます。単純な enum から始めましょう。
enum Result {
    Ok(i32),
    Err(String),
}

fn divide_in_two(n: i32) -> Result {
    if n % 2 == 0 {
        Result::Ok(n / 2)
    } else {
        Result::Err(format!("cannot divide {n} into two equal parts"))
    }
}

fn main() {
    let n = 100;
    match divide_in_two(n) {
        Result::Ok(half) => println!("{n} divided in two is {half}"),
        Result::Err(msg) => println!("sorry, an error happened: {msg}"),
    }
}
ここでは、アーム(arm, パターンを並べたもの)を使用して Result 値の分解を行っています。最初のアームでは、half は Ok バリアント内の値にバインドされます。2 つ目のアームでは msg がエラー メッセージにバインドされます。
if/else式は、後でmatchでアンパックされる列挙型を返しています。- 列挙型の定義に 3 つ目のバリアント(列挙型の要素のこと)を追加し、コード実行時にエラーを表示してみましょう。コードが網羅されていない箇所を示し、コンパイラがどのようにヒントを提供しようとしているかを説明します。
- 列挙型バリアントの値には、パターンが一致した場合にのみアクセスできます。
- 検索が網羅的でない場合にどうなるかを示します。すべてのケースが処理されるタイミングを確認することで、Rust コンパイラの利点を強調します。
Let制御フロー
Rust には、他の言語とは異なる制御フロー構造がいくつかあります。これらはパターン マッチングに使用されます。
if let式let else式while let式
if let 式
if let 式 を使用すると、値がパターンに一致するかどうかに応じて異なるコードを実行できます。
use std::time::Duration;

fn sleep_for(secs: f32) {
    if let Ok(duration) = Duration::try_from_secs_f32(secs) {
        std::thread::sleep(duration);
        println!("slept for {duration:?}");
    }
}

fn main() {
    sleep_for(-10.0);
    sleep_for(0.8);
}
let else 式
パターンをマッチして関数から戻るという一般的なケースでは、let else を使用します。「else」ケースは発散する必要があります(return、break、パニックなど、ブロックから抜けるもの以外のすべて)。
fn hex_or_die_trying(maybe_string: Option<String>) -> Result<u32, String> {
    if let Some(s) = maybe_string {
        if let Some(first_byte_char) = s.chars().next() {
            if let Some(digit) = first_byte_char.to_digit(16) {
                Ok(digit)
            } else {
                return Err(String::from("not a hex digit"));
            }
        } else {
            return Err(String::from("got empty string"));
        }
    } else {
        return Err(String::from("got None"));
    }
}

fn main() {
    println!("result: {:?}", hex_or_die_trying(Some(String::from("foo"))));
}
if let に似た while let 派生物もあります。これは、パターンに照らして値をテストします。
fn main() {
    let mut name = String::from("Comprehensive Rust 🦀");
    while let Some(c) = name.pop() {
        println!("character: {c}");
    }
    // (There are more efficient ways to reverse a string!)
}
ここで String::pop は、文字列が空になるまで Some(c) を返し、その後 None を返します。while let を使用すると、すべてのアイテムに対して反復処理を続行できます。
if-let
matchとは異なり、if letではすべての分岐を網羅する必要はないため、matchよりも簡潔になります。- 一般的な使用方法は、
Optionを操作するときにSome値を処理することです。 matchとは異なり、if letはパターン マッチングでガード節をサポートしていません。
let-else
次に示すように、if let は積み重なってしまうことがあります。let-else の構成は、このネストされたコードを平坦にする助けとなります。読みづらいバージョンを受講者向けに書き直して、受講者が変化を確認できるようにします。
書き換えたバージョンは次のとおりです。
#![allow(unused)]
fn main() {
fn hex_or_die_trying(maybe_string: Option<String>) -> Result<u32, String> {
    let Some(s) = maybe_string else {
        return Err(String::from("got None"));
    };

    let Some(first_byte_char) = s.chars().next() else {
        return Err(String::from("got empty string"));
    };

    let Some(digit) = first_byte_char.to_digit(16) else {
        return Err(String::from("not a hex digit"));
    };

    return Ok(digit);
}
}
while-let
- 値がパターンに一致する限り、
while letループが繰り返されることを説明します。 name.pop()でunwrapする値がない場合に中断する if ステートメントを使用して、while letループを無限ループに書き換えることができます。while letは、上記のシナリオの糖衣構文として使用できます。
演習: 式の評価
演算式用の簡単な再帰エバリュエータを作成してみましょう。
An example of a small arithmetic expression could be 10 + 20, which evaluates to 30. We can represent the expression as a tree:
A bigger and more complex expression would be (10 * 9) + ((3 - 4) * 5), which evaluate to 85. We represent this as a much bigger tree:
In code, we will represent the tree with two types:
#![allow(unused)]
fn main() {
/// 2 つのサブ式に対して実行する演算。
#[derive(Debug)]
enum Operation {
    Add,
    Sub,
    Mul,
    Div,
}

/// ツリー形式の式。
#[derive(Debug)]
enum Expression {
    /// 2 つのサブ式に対する演算。
    Op { op: Operation, left: Box<Expression>, right: Box<Expression> },

    /// リテラル値
    Value(i64),
}
}
ここでの Box 型はスマート ポインタです。詳細はこの講座で後ほど説明します。テストで見られるように、式は Box::new で「ボックス化」できます。ボックス化された式を評価するには、逆参照演算子(*)を使用して「ボックス化解除」します(eval(*boxed_expr))。
一部の式は評価できず、エラーが返されます。標準の Result<Value, String> 型は、成功した値(Ok(Value))またはエラー(Err(String))のいずれかを表す列挙型です。この型については、後ほど詳しく説明します。
コードをコピーして Rust プレイグラウンドに貼り付け、eval の実装を開始します。完成したエバリュエータはテストに合格する必要があります。todo!() を使用して、テストを 1 つずつ実施することをおすすめします。#[ignore] を使用して、テストを一時的にスキップすることもできます。
#[test]
#[ignore]
fn test_value() { .. }
#![allow(unused)]
fn main() {
/// 2 つのサブ式に対して実行する演算。
#[derive(Debug)]
enum Operation {
    Add,
    Sub,
    Mul,
    Div,
}

/// ツリー形式の式。
#[derive(Debug)]
enum Expression {
    /// 2 つのサブ式に対する演算。
    Op { op: Operation, left: Box<Expression>, right: Box<Expression> },

    /// リテラル値
    Value(i64),
}

fn eval(e: Expression) -> Result<i64, String> {
    todo!()
}

#[test]
fn test_value() {
    assert_eq!(eval(Expression::Value(19)), Ok(19));
}

#[test]
fn test_sum() {
    assert_eq!(
        eval(Expression::Op {
            op: Operation::Add,
            left: Box::new(Expression::Value(10)),
            right: Box::new(Expression::Value(20)),
        }),
        Ok(30)
    );
}

#[test]
fn test_recursion() {
    let term1 = Expression::Op {
        op: Operation::Mul,
        left: Box::new(Expression::Value(10)),
        right: Box::new(Expression::Value(9)),
    };
    let term2 = Expression::Op {
        op: Operation::Mul,
        left: Box::new(Expression::Op {
            op: Operation::Sub,
            left: Box::new(Expression::Value(3)),
            right: Box::new(Expression::Value(4)),
        }),
        right: Box::new(Expression::Value(5)),
    };
    assert_eq!(
        eval(Expression::Op {
            op: Operation::Add,
            left: Box::new(term1),
            right: Box::new(term2),
        }),
        Ok(85)
    );
}

#[test]
fn test_zeros() {
    assert_eq!(
        eval(Expression::Op {
            op: Operation::Add,
            left: Box::new(Expression::Value(0)),
            right: Box::new(Expression::Value(0))
        }),
        Ok(0)
    );
    assert_eq!(
        eval(Expression::Op {
            op: Operation::Mul,
            left: Box::new(Expression::Value(0)),
            right: Box::new(Expression::Value(0))
        }),
        Ok(0)
    );
    assert_eq!(
        eval(Expression::Op {
            op: Operation::Sub,
            left: Box::new(Expression::Value(0)),
            right: Box::new(Expression::Value(0))
        }),
        Ok(0)
    );
}

#[test]
fn test_error() {
    assert_eq!(
        eval(Expression::Op {
            op: Operation::Div,
            left: Box::new(Expression::Value(99)),
            right: Box::new(Expression::Value(0)),
        }),
        Err(String::from("division by zero"))
    );
}
}
解答
/// 2 つのサブ式に対して実行する演算。
#[derive(Debug)]
enum Operation {
    Add,
    Sub,
    Mul,
    Div,
}

/// ツリー形式の式。
#[derive(Debug)]
enum Expression {
    /// 2 つのサブ式に対する演算。
    Op { op: Operation, left: Box<Expression>, right: Box<Expression> },

    /// リテラル値
    Value(i64),
}

fn eval(e: Expression) -> Result<i64, String> {
    match e {
        Expression::Op { op, left, right } => {
            let left = match eval(*left) {
                Ok(v) => v,
                Err(e) => return Err(e),
            };
            let right = match eval(*right) {
                Ok(v) => v,
                Err(e) => return Err(e),
            };
            Ok(match op {
                Operation::Add => left + right,
                Operation::Sub => left - right,
                Operation::Mul => left * right,
                Operation::Div => {
                    if right == 0 {
                        return Err(String::from("division by zero"));
                    } else {
                        left / right
                    }
                }
            })
        }
        Expression::Value(v) => Ok(v),
    }
}

#[test]
fn test_value() {
    assert_eq!(eval(Expression::Value(19)), Ok(19));
}

#[test]
fn test_sum() {
    assert_eq!(
        eval(Expression::Op {
            op: Operation::Add,
            left: Box::new(Expression::Value(10)),
            right: Box::new(Expression::Value(20)),
        }),
        Ok(30)
    );
}

#[test]
fn test_recursion() {
    let term1 = Expression::Op {
        op: Operation::Mul,
        left: Box::new(Expression::Value(10)),
        right: Box::new(Expression::Value(9)),
    };
    let term2 = Expression::Op {
        op: Operation::Mul,
        left: Box::new(Expression::Op {
            op: Operation::Sub,
            left: Box::new(Expression::Value(3)),
            right: Box::new(Expression::Value(4)),
        }),
        right: Box::new(Expression::Value(5)),
    };
    assert_eq!(
        eval(Expression::Op {
            op: Operation::Add,
            left: Box::new(term1),
            right: Box::new(term2),
        }),
        Ok(85)
    );
}

#[test]
fn test_zeros() {
    assert_eq!(
        eval(Expression::Op {
            op: Operation::Add,
            left: Box::new(Expression::Value(0)),
            right: Box::new(Expression::Value(0))
        }),
        Ok(0)
    );
    assert_eq!(
        eval(Expression::Op {
            op: Operation::Mul,
            left: Box::new(Expression::Value(0)),
            right: Box::new(Expression::Value(0))
        }),
        Ok(0)
    );
    assert_eq!(
        eval(Expression::Op {
            op: Operation::Sub,
            left: Box::new(Expression::Value(0)),
            right: Box::new(Expression::Value(0))
        }),
        Ok(0)
    );
}

#[test]
fn test_error() {
    assert_eq!(
        eval(Expression::Op {
            op: Operation::Div,
            left: Box::new(Expression::Value(99)),
            right: Box::new(Expression::Value(0)),
        }),
        Err(String::from("division by zero"))
    );
}

fn main() {
    let expr = Expression::Op {
        op: Operation::Sub,
        left: Box::new(Expression::Value(20)),
        right: Box::new(Expression::Value(10)),
    };
    println!("expr: {expr:?}");
    println!("result: {:?}", eval(expr));
}
Methods and Traits
This segment should take about 50 minutes. It contains:
| Slide | Duration |
|---|---|
| メソッド | 10 minutes |
| トレイト(trait) | 15 minutes |
| 導出 | 3 minutes |
| 演習: ジェネリックなロガー | 20 minutes |
メソッド
Rust を使用すると、関数を新しい型に関連付けることができます。これは impl ブロックで実行します。
#[derive(Debug)]
struct Race {
    name: String,
    laps: Vec<i32>,
}

impl Race {
    // レシーバなし、静的メソッド
    fn new(name: &str) -> Self {
        Self { name: String::from(name), laps: Vec::new() }
    }

    // 自身に対する排他的な読み取り / 書き込み借用アクセス
    fn add_lap(&mut self, lap: i32) {
        self.laps.push(lap);
    }

    // 自身に対する共有および読み取り専用の借用アクセス
    fn print_laps(&self) {
        println!("Recorded {} laps for {}:", self.laps.len(), self.name);
        for (idx, lap) in self.laps.iter().enumerate() {
            println!("Lap {idx}: {lap} sec");
        }
    }

    // Exclusive ownership of self (covered later)
    fn finish(self) {
        let total: i32 = self.laps.iter().sum();
        println!("Race {} is finished, total lap time: {}", self.name, total);
    }
}

fn main() {
    let mut race = Race::new("Monaco Grand Prix");
    race.add_lap(70);
    race.add_lap(68);
    race.print_laps();
    race.add_lap(71);
    race.print_laps();
    race.finish();
    // race.add_lap(42);
}
self 引数は、「レシーバ」、つまりメソッドが操作するオブジェクトを指定します。メソッドの一般的なレシーバは次のとおりです。
&self: 共有の不変参照を使用して、呼び出し元からオブジェクトを借用します。このオブジェクトは後で再び使用できます。&mut self: 一意の可変参照を使用して、呼び出し元からオブジェクトを借用します。このオブジェクトは後で再び使用できます。self: オブジェクトの所有権を取得し、呼び出し元から遠ざけます。メソッドがオブジェクトの所有者になります。所有権が明示的に送信されない限り、メソッドが戻ると、オブジェクトは破棄(デアロケート)されます。完全な所有権は、必ずしも可変性を意味するわけではありません。mut self: 上記と同じですが、メソッドはオブジェクトを変更できます。- レシーバなし: 構造体の静的メソッドになります。通常は、
newと呼ばれるコンストラクタを作成するために使用されます。
キーポイント:
- メソッドを関数と比較して紹介するとよいでしょう。
- メソッドは型(構造体や列挙型など)のインスタンスで呼び出されます。最初のパラメータはインスタンスを
selfとして表します。 - デベロッパーは、メソッド レシーバ構文でコードを整理する目的で、メソッドを使用することもできます。メソッドを使用することで、すべての実装コードを 1 つの予測可能な場所にまとめることができます。
- メソッドは型(構造体や列挙型など)のインスタンスで呼び出されます。最初のパラメータはインスタンスを
- メソッド レシーバである
selfというキーワードの使用について説明します。self: Selfの略語であることを示し、構造体名の使用方法についても説明することをおすすめします。Selfはimplブロックが存在する型の型エイリアスであり、ブロック内の他の場所で使用できることを説明します。selfは他の構造体と同様に使用され、ドット表記を使用して個々のフィールドを参照できることを説明します。- ここで
finishを 2 回実行して、&selfとselfの違いを示すことをおすすめします。 selfのバリアント以外にも、レシーバ型として許可されている 特別なラッパー型(Box<Self>など)もあります。
トレイト(trait)
Rustでは、型に関しての抽象化をトレイトを用いて行うことができます。トレイトはインターフェースに似ています:
trait Pet {
    /// Return a sentence from this pet.
    fn talk(&self) -> String;

    /// Print a string to the terminal greeting this pet.
    fn greet(&self);
}
-
トレイトは、そのトレイトを実装するために各型に必要な多数のメソッドを定義します。
-
In the “Generics” segment, next, we will see how to build functionality that is generic over all types implementing a trait.
トレイトの実装
trait Pet {
    fn talk(&self) -> String;

    fn greet(&self) {
        println!("Oh you're a cutie! What's your name? {}", self.talk());
    }
}

struct Dog {
    name: String,
    age: i8,
}

impl Pet for Dog {
    fn talk(&self) -> String {
        format!("Woof, my name is {}!", self.name)
    }
}

fn main() {
    let fido = Dog { name: String::from("Fido"), age: 5 };
    fido.greet();
}
-
To implement
TraitforType, you use animpl Trait for Type { .. }block. -
Unlike Go interfaces, just having matching methods is not enough: a
Cattype with atalk()method would not automatically satisfyPetunless it is in animpl Petblock. -
Traits may provide default implementations of some methods. Default implementations can rely on all the methods of the trait. In this case,
greetis provided, and relies ontalk.
スーパートレイト
A trait can require that types implementing it also implement other traits, called supertraits. Here, any type implementing Pet must implement Animal.
trait Animal {
    fn leg_count(&self) -> u32;
}

trait Pet: Animal {
    fn name(&self) -> String;
}

struct Dog(String);

impl Animal for Dog {
    fn leg_count(&self) -> u32 {
        4
    }
}

impl Pet for Dog {
    fn name(&self) -> String {
        self.0.clone()
    }
}

fn main() {
    let puppy = Dog(String::from("Rex"));
    println!("{} has {} legs", puppy.name(), puppy.leg_count());
}
This is sometimes called “trait inheritance” but students should not expect this to behave like OO inheritance. It just specifies an additional requirement on implementations of a trait.
関連型
Associated types are placeholder types which are supplied by the trait implementation.
#[derive(Debug)]
struct Meters(i32);
#[derive(Debug)]
struct MetersSquared(i32);

trait Multiply {
    type Output;
    fn multiply(&self, other: &Self) -> Self::Output;
}

impl Multiply for Meters {
    type Output = MetersSquared;
    fn multiply(&self, other: &Self) -> Self::Output {
        MetersSquared(self.0 * other.0)
    }
}

fn main() {
    println!("{:?}", Meters(10).multiply(&Meters(20)));
}
-
Associated types are sometimes also called “output types”. The key observation is that the implementer, not the caller, chooses this type.
-
Many standard library traits have associated types, including arithmetic operators and
Iterator.
導出
サポートされているトレイトは、次のようにカスタム型に自動的に実装できます。
#[derive(Debug, Clone, Default)]
struct Player {
    name: String,
    strength: u8,
    hit_points: u8,
}

fn main() {
    let p1 = Player::default(); // デフォルト トレイトで `default` コンストラクタを追加します。
    let mut p2 = p1.clone(); // クローン トレイトで `clone` メソッドを追加します。
    p2.name = String::from("EldurScrollz");
    // デバッグ トレイトで、`{:?}` を使用した出力のサポートを追加します。
    println!("{p1:?} vs. {p2:?}");
}
導出はマクロで実装され、多くのクレートには有用な機能を追加するための便利な導出マクロが用意されています。たとえば、serde は #[derive(Serialize)] を使用して、構造体のシリアル化のサポートを導出できます。
Exercise: Logger Trait
トレイト Logger と log メソッドを使用して、シンプルなロギングユーティリティを設計してみましょう。進行状況をログに記録するコードは、その後に &impl Logger を受け取ることができます。この場合、テストではテストログファイルにメッセージが書き込まれますが、本番環境ビルドではログサーバーにメッセージが送信されます。
However, the StdoutLogger given below logs all messages, regardless of verbosity. Your task is to write a VerbosityFilter type that will ignore messages above a maximum verbosity.
これは一般的なパターンです。つまり、トレイト実装をラップして同じトレイトを実装し、その過程で挙動を追加していく構造体です。ロギングユーティリティでは他にどのような種類のラッパーが役立つでしょうか。
pub trait Logger {
    /// 指定された詳細度レベルでメッセージをログに記録します。
    fn log(&self, verbosity: u8, message: &str);
}

struct StdoutLogger;

impl Logger for StdoutLogger {
    fn log(&self, verbosity: u8, message: &str) {
        println!("verbosity={verbosity}: {message}");
    }
}

// TODO: `VerbosityFilter` を定義して実装します。

fn main() {
    let logger = VerbosityFilter { max_verbosity: 3, inner: StdoutLogger };
    logger.log(5, "FYI");
    logger.log(2, "Uhoh");
}
解答
pub trait Logger {
    /// 指定された詳細度レベルでメッセージをログに記録します。
    fn log(&self, verbosity: u8, message: &str);
}

struct StdoutLogger;

impl Logger for StdoutLogger {
    fn log(&self, verbosity: u8, message: &str) {
        println!("verbosity={verbosity}: {message}");
    }
}

/// 指定された詳細度レベルまでのメッセージのみをログに記録。
struct VerbosityFilter {
    max_verbosity: u8,
    inner: StdoutLogger,
}

impl Logger for VerbosityFilter {
    fn log(&self, verbosity: u8, message: &str) {
        if verbosity <= self.max_verbosity {
            self.inner.log(verbosity, message);
        }
    }
}

fn main() {
    let logger = VerbosityFilter { max_verbosity: 3, inner: StdoutLogger };
    logger.log(5, "FYI");
    logger.log(2, "Uhoh");
}
おかえり
Including 10 minute breaks, this session should take about 3 hours and 15 minutes. It contains:
| Segment | Duration |
|---|---|
| ジェネリクス(generics) | 45 minutes |
| 標準ライブラリ内の型 | 1 hour |
| 標準ライブラリ内のトレイト | 1 hour and 10 minutes |
ジェネリクス(generics)
This segment should take about 45 minutes. It contains:
| Slide | Duration |
|---|---|
| ジェネリック関数 | 5 minutes |
| ジェネリックデータ型 | 10 minutes |
| トレイト制約 | 10 minutes |
| impl Trait | 5 minutes |
| dyn Trait | 5 minutes |
| 演習: ジェネリックな min | 10 minutes |
ジェネリック関数
Rust supports generics, which lets you abstract algorithms or data structures (such as sorting or a binary tree) over the types used or stored.
/// `n` の値に応じて `even` または `odd` を選択します。
fn pick<T>(n: i32, even: T, odd: T) -> T {
    if n % 2 == 0 {
        even
    } else {
        odd
    }
}

fn main() {
    println!("picked a number: {:?}", pick(97, 222, 333));
    println!("picked a string: {:?}", pick(28, "dog", "cat"));
}
-
Rust は引数と戻り値の型に基づいて T の型を推測します。
-
In this example we only use the primitive types
i32and&strforT, but we can use any type here, including user-defined types:struct Foo { val: u8, } pick(123, Foo { val: 7 }, Foo { val: 456 }); -
これは C++ テンプレートに似ていますが、Rust はジェネリック関数を部分的にすぐにコンパイルするため、その関数は制約に一致するすべての型に対して有効である必要があります。たとえば、
n == 0の場合はeven + oddを返すようにpickを変更してみてください。整数を使用したpickインスタンス化のみが使用されている場合でも、Rust はそれを無効とみなします。C++ ではこれを行うことができます。 -
Generic code is turned into non-generic code based on the call sites. This is a zero-cost abstraction: you get exactly the same result as if you had hand-coded the data structures without the abstraction.
ジェネリックデータ型
ジェネリクスを使って、具体的なフィールドの型を抽象化することができます:
#[derive(Debug)]
struct Point<T> {
    x: T,
    y: T,
}

impl<T> Point<T> {
    fn coords(&self) -> (&T, &T) {
        (&self.x, &self.y)
    }

    fn set_x(&mut self, x: T) {
        self.x = x;
    }
}

fn main() {
    let integer = Point { x: 5, y: 10 };
    let float = Point { x: 1.0, y: 4.0 };
    println!("{integer:?} and {float:?}");
    println!("coords: {:?}", integer.coords());
}
-
Q: なぜ
Tは2回もimpl<T> Point<T> {}において指定されたのでしょうか?冗長ではありませんか?- なぜなら、これはジェネリクスに対してのジェネリックな実装の箇所だからです。それらは独立してジェネリックです。
- つまり、そのようなメソッドは任意の
Tに対して定義されるということです。 - It is possible to write
impl Point<u32> { .. }.Pointはそれでもなおジェネリックであり、Point<f64>を使うことができます。しかし、このブロックでのメソッドはPoint<u32>に対してのみ利用可能となります。
-
新しい変数
let p = Point { x: 5, y: 10.0 };を宣言してみてください。2 つの変数(TとUなど)を使用して、異なる型の要素を持つポイントを許可するようにコードを更新します。
ジェネリックトレイト
Traits can also be generic, just like types and functions. A trait’s parameters get concrete types when it is used.
#[derive(Debug)]
struct Foo(String);

impl From<u32> for Foo {
    fn from(from: u32) -> Foo {
        Foo(format!("Converted from integer: {from}"))
    }
}

impl From<bool> for Foo {
    fn from(from: bool) -> Foo {
        Foo(format!("Converted from bool: {from}"))
    }
}

fn main() {
    let from_int = Foo::from(123);
    let from_bool = Foo::from(true);
    println!("{from_int:?}, {from_bool:?}");
}
-
The
Fromtrait will be covered later in the course, but its definition in thestddocs is simple. -
Implementations of the trait do not need to cover all possible type parameters. Here,
Foo::from("hello")would not compile because there is noFrom<&str>implementation forFoo. -
Generic traits take types as “input”, while associated types are a kind of “output” type. A trait can have multiple implementations for different input types.
-
In fact, Rust requires that at most one implementation of a trait match for any type T. Unlike some other languages, Rust has no heuristic for choosing the “most specific” match. There is work on adding this support, called specialization.
トレイト制約
ジェネリクスを用いるとき、あるトレイトのメソッドを呼び出せるように、型がそのトレイトを実装していることを要求したいことがよくあります。(脚注:本教材では“Trait bounds“を「トレイト制約」と翻訳しましたが、Rustの日本語翻訳コミュニティでは「トレイト境界」と呼ぶ流派もあり、どちらの翻訳を採用するかについては議論がなされています。)
You can do this with T: Trait:
fn duplicate<T: Clone>(a: T) -> (T, T) {
    (a.clone(), a.clone())
}

// struct NotCloneable;

fn main() {
    let foo = String::from("foo");
    let pair = duplicate(foo);
    println!("{pair:?}");
}
-
Try making a
NonCloneableand passing it toduplicate. -
複数のトレイトが必要な場合は、
+を使って結合します。 -
where節の使い方を示しましょう。受講生はコードを読んでいるときに、このwhere節に遭遇します。fn duplicate<T>(a: T) -> (T, T) where T: Clone, { (a.clone(), a.clone()) }- たくさんのパラメタがある場合に、
where節は関数のシグネチャを整理整頓してくれます。 where節には更に強力な機能があります。- 誰かに聞かれた場合で良いですが、その機能というのは、“:” の左側には
Option<T>のように任意の型を表現できるというものです。
- 誰かに聞かれた場合で良いですが、その機能というのは、“:” の左側には
- たくさんのパラメタがある場合に、
-
なお、Rust はまだ特化(specialization)をサポートしていません。たとえば、元の
duplicateがある場合は、特化されたduplicate(a: u32)を追加することはできません。
impl Trait
トレイト境界と似たように、構文 impl Traitは関数の引数と返り値においてのみ利用可能です:
// 以下の糖衣構文:
//   fn add_42_millions<T: Into<i32>>(x: T) -> i32 {
fn add_42_millions(x: impl Into<i32>) -> i32 {
    x.into() + 42_000_000
}

fn pair_of(x: u32) -> impl std::fmt::Debug {
    (x + 1, x - 1)
}

fn main() {
    let many = add_42_millions(42_i8);
    println!("{many}");
    let many_more = add_42_millions(10_000_000);
    println!("{many_more}");
    let debuggable = pair_of(27);
    println!("debuggable: {debuggable:?}");
}
impl Trait allows you to work with types which you cannot name. The meaning of impl Trait is a bit different in the different positions.
-
パラメタに対しては、
impl Traitは、トレイト境界を持つ匿名のジェネリックパラメタのようなものです。 -
返り値の型に用いる場合は、特定のトレイトを実装する何らかの具象型を返すが、具体的な型名は明示しないということを意味します。このことは公開されるAPIに具象型を晒したくない場合に便利です。
返り値の位置における型推論は困難です。
impl Fooを返す関数は、それが返す具象型はソースコードに書かれることないまま、具象型を選びます。collect<B>() -> Bのようなジェネリック型を返す関数は、Bを満たすどのような型でも返すことがあります。 また、関数の呼び出し元はそのような型を一つを選ぶ必要があるかもしれません。 それは、let x: Vec<_> = foo.collect()としたり、turbofishを用いてfoo.collect::<Vec<_>>()とすることで行えます。
debuggable の型は何でしょうか。let debuggable: () = .. を試して、エラー メッセージの内容を確認してください。
dyn Trait
In addition to using traits for static dispatch via generics, Rust also supports using them for type-erased, dynamic dispatch via trait objects:
struct Dog {
    name: String,
    age: i8,
}
struct Cat {
    lives: i8,
}

trait Pet {
    fn talk(&self) -> String;
}

impl Pet for Dog {
    fn talk(&self) -> String {
        format!("Woof, my name is {}!", self.name)
    }
}

impl Pet for Cat {
    fn talk(&self) -> String {
        String::from("Miau!")
    }
}

// Uses generics and static dispatch.
fn generic(pet: &impl Pet) {
    println!("Hello, who are you? {}", pet.talk());
}

// Uses type-erasure and dynamic dispatch.
fn dynamic(pet: &dyn Pet) {
    println!("Hello, who are you? {}", pet.talk());
}

fn main() {
    let cat = Cat { lives: 9 };
    let dog = Dog { name: String::from("Fido"), age: 5 };

    generic(&cat);
    generic(&dog);

    dynamic(&cat);
    dynamic(&dog);
}
-
Generics, including
impl Trait, use monomorphization to create a specialized instance of the function for each different type that the generic is instantiated with. This means that calling a trait method from within a generic function still uses static dispatch, as the compiler has full type information and can resolve which type’s trait implementation to use. -
When using
dyn Trait, it instead uses dynamic dispatch through a virtual method table (vtable). This means that there’s a single version offn dynamicthat is used regardless of what type ofPetis passed in. -
When using
dyn Trait, the trait object needs to be behind some kind of indirection. In this case it’s a reference, though smart pointer types likeBoxcan also be used (this will be demonstrated on day 3). -
At runtime, a
&dyn Petis represented as a “fat pointer”, i.e. a pair of two pointers: One pointer points to the concrete object that implementsPet, and the other points to the vtable for the trait implementation for that type. When calling thetalkmethod on&dyn Petthe compiler looks up the function pointer fortalkin the vtable and then invokes the function, passing the pointer to theDogorCatinto that function. The compiler doesn’t need to know the concrete type of thePetin order to do this. -
A
dyn Traitis considered to be “type-erased”, because we no longer have compile-time knowledge of what the concrete type is.
演習: ジェネリックな min
In this short exercise, you will implement a generic min function that determines the minimum of two values, using the Ord trait.
use std::cmp::Ordering;

// TODO: `main` で使用する `min` 関数を実装します。

fn main() {
    assert_eq!(min(0, 10), 0);
    assert_eq!(min(500, 123), 123);

    assert_eq!(min('a', 'z'), 'a');
    assert_eq!(min('7', '1'), '1');

    assert_eq!(min("hello", "goodbye"), "goodbye");
    assert_eq!(min("bat", "armadillo"), "armadillo");
}
解答
use std::cmp::Ordering;

fn min<T: Ord>(l: T, r: T) -> T {
    match l.cmp(&r) {
        Ordering::Less | Ordering::Equal => l,
        Ordering::Greater => r,
    }
}

fn main() {
    assert_eq!(min(0, 10), 0);
    assert_eq!(min(500, 123), 123);

    assert_eq!(min('a', 'z'), 'a');
    assert_eq!(min('7', '1'), '1');

    assert_eq!(min("hello", "goodbye"), "goodbye");
    assert_eq!(min("bat", "armadillo"), "armadillo");
}
標準ライブラリ内の型
This segment should take about 1 hour. It contains:
| Slide | Duration |
|---|---|
| 標準ライブラリ | 3 minutes |
| ドキュメント | 5 minutes |
| Option | 10 minutes |
| Result | 5 minutes |
| String | 5 minutes |
| Vec | 5 minutes |
| HashMap | 5 minutes |
| 演習: カウンター | 20 minutes |
このセクションの各スライドでは、時間をかけてドキュメント ページを確認し、より一般的なメソッドをいくつか取り上げてください。
標準ライブラリ
Rust には、Rust のライブラリとプログラムで使用される一般的な型のセットを確立するのに役立つ標準ライブラリが付属しています。2 つのライブラリをスムーズに連携させることができるのは、このように両方とも同じ String 型を使用しているためです。
実際、Rust には標準ライブラリ(core、alloc、std)の複数のレイヤが含まれています。
coreには、libcやアロケータ、さらにはオペレーティング システムの存在にも依存しない、最も基本的な型と関数が含まれます。allocには、Vec、Box、Arcなど、グローバルヒープアロケータを必要とする型が含まれます。- 多くの場合、埋め込みの Rust アプリは
coreのみを使用し、場合によってはallocを使用します。
ドキュメント
Rust には詳細なドキュメントが用意されています。次に例を示します。
- All of the details about loops.
u8のようなプリミティブ型。OptionやBinaryHeapなどの標準ライブラリ型。
Use rustup doc --std or https://std.rs to view the documentation.
実際、独自のコードにドキュメントをつけることができます。
/// 最初の引数が 2 番目の引数で割り切れるかどうかを判定します。
///
/// 2 番目の引数がゼロの場合、結果は false になります。
fn is_divisible_by(lhs: u32, rhs: u32) -> bool {
    if rhs == 0 {
        return false;
    }
    lhs % rhs == 0
}
コンテンツはマークダウンとして扱われます。公開されたすべての Rust ライブラリ クレートは、rustdoc ツールを使用して、docs.rs で自動的にドキュメントがまとめられます。このパターンを使用して、すべての公開アイテムを API でドキュメント化するのが慣用的です。
アイテム内(モジュール内など)からアイテムをドキュメント化するには、「内部ドキュメントのコメント」と呼ばれる //! または /*! .. */ を使用します。
//! このモジュールには、整数の整除に関連する機能が含まれています。
- https://docs.rs/rand で
randクレート用に生成されたドキュメントを受講者に示します。
Option
Option<T> の使用方法についてはすでにいくつか見てきましたが、これは型 T の値を格納するか、何も格納しません。たとえば、String::find は Option<usize> を返します。
fn main() {
    let name = "Löwe 老虎 Léopard Gepardi";
    let mut position: Option<usize> = name.find('é');
    println!("find returned {position:?}");
    assert_eq!(position.unwrap(), 14);
    position = name.find('Z');
    println!("find returned {position:?}");
    assert_eq!(position.expect("Character not found"), 0);
}
-
Optionis widely used, not just in the standard library. -
unwrapはOption内の値を返すか、パニックになります。expectも同様ですが、エラーメッセージを受け取ります。- None でパニックになる場合もありますが、「誤って」None のチェックを忘れることはありません。
- 何かを一緒にハッキングする場合は、あちこちで
unwrap/expectを行うのが一般的ですが、本番環境のコードは通常、Noneをより適切に処理します。
-
The “niche optimization” means that
Option<T>often has the same size in memory asT, if there is some representation that is not a valid value of T. For example, a reference cannot be NULL, soOption<&T>automatically uses NULL to represent theNonevariant, and thus can be stored in the same memory as&T.
Result
Result is similar to Option, but indicates the success or failure of an operation, each with a different enum variant. It is generic: Result<T, E> where T is used in the Ok variant and E appears in the Err variant.
use std::fs::File;
use std::io::Read;

fn main() {
    let file: Result<File, std::io::Error> = File::open("diary.txt");
    match file {
        Ok(mut file) => {
            let mut contents = String::new();
            if let Ok(bytes) = file.read_to_string(&mut contents) {
                println!("Dear diary: {contents} ({bytes} bytes)");
            } else {
                println!("Could not read file content");
            }
        }
        Err(err) => {
            println!("The diary could not be opened: {err}");
        }
    }
}
Optionと同様に、成功した値はResultの内部にあり、デベロッパーはそれを明示的に抽出する必要があります。これにより、エラーチェックが促進されます。エラーが発生してはならない場合は、unwrap()またはexpect()を呼び出すことができます。これもデベロッパーのインテントのシグナルです。Resultのドキュメントを読むことをすすめましょう。この講座では取り上げませんが、言及する価値があります。このドキュメントには、関数型プログラミングに役立つ便利なメソッドや関数が多数含まれています。Resultis the standard type to implement error handling as we will see on Day 4.
String
String is a growable UTF-8 encoded string:
fn main() {
    let mut s1 = String::new();
    s1.push_str("Hello");
    println!("s1: len = {}, capacity = {}", s1.len(), s1.capacity());

    let mut s2 = String::with_capacity(s1.len() + 1);
    s2.push_str(&s1);
    s2.push('!');
    println!("s2: len = {}, capacity = {}", s2.len(), s2.capacity());

    let s3 = String::from("🇨🇭");
    println!("s3: len = {}, number of chars = {}", s3.len(), s3.chars().count());
}
String は Deref<Target = str> を実装します。つまり、String のすべての str メソッドを呼び出すことができます。
String::newは新しい空の文字列を返します。文字列にプッシュするデータの量がわかっている場合はString::with_capacityを使用します。String::lenは、Stringのサイズをバイト単位で返します(文字数とは異なる場合があります)。String::charsは、実際の文字のイテレータを返します。書記素クラスタにより、charは人間が「文字」と見なすものとは異なる場合があります。- 人々が文字列について言及する場合、単に
&strまたはStringのことを話している可能性があります。 - 型が
Deref<Target = T>を実装している場合、コンパイラによりTからメソッドを透過的に呼び出せるようになります。Derefトレイトについてはまだ説明していないため、現時点では主にドキュメントのサイドバーの構造について説明しています。StringはDeref<Target = str>を実装し、strのメソッドへのアクセスを透過的に許可します。let s3 = s1.deref();とlet s3 = &*s1;を記述して比較します。
Stringはバイトのベクターのラッパーとして実装されます。ベクターでサポートされているオペレーションの多くはStringでもサポートされていますが、いくつかの保証が追加されています。Stringにインデックスを付けるさまざまな方法を比較します。- 文字には
s3.chars().nth(i).unwrap()を使用します。ここでiは境界内の場合や境界外の場合を表します。 - 部分文字列には
s3[0..4]を使用します。このスライスは、文字境界にある場合とない場合があります。
- 文字には
- Many types can be converted to a string with the
to_stringmethod. This trait is automatically implemented for all types that implementDisplay, so anything that can be formatted can also be converted to a string.
Vec
Vec は、サイズ変更可能な標準のヒープ割り当てバッファです。
fn main() {
    let mut v1 = Vec::new();
    v1.push(42);
    println!("v1: len = {}, capacity = {}", v1.len(), v1.capacity());

    let mut v2 = Vec::with_capacity(v1.len() + 1);
    v2.extend(v1.iter());
    v2.push(9999);
    println!("v2: len = {}, capacity = {}", v2.len(), v2.capacity());

    // 要素でベクターを初期化する正規マクロ。
    let mut v3 = vec![0, 0, 1, 2, 3, 4];

    // 偶数要素のみを保持します。
    v3.retain(|x| x % 2 == 0);
    println!("{v3:?}");

    // 連続する重複を削除します。
    v3.dedup();
    println!("{v3:?}");
}
Vec は Deref<Target = [T]> を実装しているため、Vec でスライス メソッドを呼び出すことができます。
Vecは、StringおよびHashMapとともにコレクションの一種です。含まれているデータはヒープに格納されるため、コンパイル時にデータ量を把握する必要はありません。データ量は実行時に増加または減少する場合があります。Vec<T>もジェネリック型ですが、Tを明示的に指定する必要はありません。Rust の型推論でいつも行われるように、最初のpush呼び出しでTが確立されています。vec![...]はVec::new()の代わりに使用する正規のマクロで、ベクターへの初期要素の追加をサポートしています。- ベクターにインデックスを付けるには
[]を使用しますが、境界外の場合はパニックが発生します。または、getを使用するとOptionが返されます。pop関数は最後の要素を削除します。 - スライスについては 3 日目に説明します。受講者は現時点では、型
Vecの値により、ドキュメントに記されたすべてのスライスメソッドにアクセスできることだけを知っていれば十分です。
HashMap
HashDoS 攻撃から保護する標準のハッシュマップ:
use std::collections::HashMap;

fn main() {
    let mut page_counts = HashMap::new();
    page_counts.insert("Adventures of Huckleberry Finn", 207);
    page_counts.insert("Grimms' Fairy Tales", 751);
    page_counts.insert("Pride and Prejudice", 303);

    if !page_counts.contains_key("Les Misérables") {
        println!(
            "We know about {} books, but not Les Misérables.",
            page_counts.len()
        );
    }

    for book in ["Pride and Prejudice", "Alice's Adventure in Wonderland"] {
        match page_counts.get(book) {
            Some(count) => println!("{book}: {count} pages"),
            None => println!("{book} is unknown."),
        }
    }

    // 何も見つからなかった場合は、.entry() メソッドを使用して値を挿入します。
    for book in ["Pride and Prejudice", "Alice's Adventure in Wonderland"] {
        let page_count: &mut i32 = page_counts.entry(book).or_insert(0);
        *page_count += 1;
    }

    println!("{page_counts:#?}");
}
-
HashMapはプレリュードで定義されていないため、スコープに含める必要があります。 -
次のコード行を試します。最初の行で、書籍がハッシュマップにあるかどうかを確認し、ない場合は代替値を返します。書籍が見つからなかった場合、2 行目でハッシュマップに代替値を挿入します。
let pc1 = page_counts .get("Harry Potter and the Sorcerer's Stone") .unwrap_or(&336); let pc2 = page_counts .entry("The Hunger Games") .or_insert(374); -
vec!とは異なり、標準のhashmap!マクロはありません。-
しかし、Rust 1.56 以降では、HashMap は
From<[(K, V); N]>を実装しています。これにより、リテラル配列からハッシュマップを簡単に初期化できます。let page_counts = HashMap::from([ ("Harry Potter and the Sorcerer's Stone".to_string(), 336), ("The Hunger Games".to_string(), 374), ]);
-
-
別の方法として、HashMap は、Key-Value タプルを生成する任意の
Iteratorから作成することもできます。 -
この型には、
std::collections::hash_map::Keysなどの「メソッド固有の」戻り値の型がいくつかあります。これらの型は、Rust ドキュメントの検索でよく使用されます。この型のドキュメントと、keysメソッドに戻るのに役立つリンクを受講者に示します。
演習: カウンター
この演習では、非常にシンプルなデータ構造を汎用的なものにします。std::collections::HashMap を使用して、どの値が確認され、各値が何回出現したかを追跡します。
Counter の初期バージョンは、u32 の値でのみ機能するようにハードコードされています。追跡する値の型に対して構造体とそのメソッドをジェネリック化します。これにより、Counter であらゆる型の値を追跡できます。
早めに終わった場合は、entry メソッドを使用して、count メソッドの実装に必要なハッシュ ルックアップの回数を半分にしてみましょう。
use std::collections::HashMap;

/// カウンタは型 T の各値が確認された回数をカウントします。
struct Counter {
    values: HashMap<u32, u64>,
}

impl Counter {
    /// 新しいカウンタを作成します。
    fn new() -> Self {
        Counter {
            values: HashMap::new(),
        }
    }

    /// 指定された値の発生をカウントします。
    fn count(&mut self, value: u32) {
        if self.values.contains_key(&value) {
            *self.values.get_mut(&value).unwrap() += 1;
        } else {
            self.values.insert(value, 1);
        }
    }

    /// 指定された値が確認された回数を返します。
    fn times_seen(&self, value: u32) -> u64 {
        self.values.get(&value).copied().unwrap_or_default()
    }
}

fn main() {
    let mut ctr = Counter::new();
    ctr.count(13);
    ctr.count(14);
    ctr.count(16);
    ctr.count(14);
    ctr.count(14);
    ctr.count(11);

    for i in 10..20 {
        println!("saw {} values equal to {}", ctr.times_seen(i), i);
    }

    let mut strctr = Counter::new();
    strctr.count("apple");
    strctr.count("orange");
    strctr.count("apple");
    println!("got {} apples", strctr.times_seen("apple"));
}
解答
use std::collections::HashMap;
use std::hash::Hash;

/// カウンタは型 T の各値が確認された回数をカウントします。
struct Counter<T> {
    values: HashMap<T, u64>,
}

impl<T: Eq + Hash> Counter<T> {
    /// 新しいカウンタを作成します。
    fn new() -> Self {
        Counter { values: HashMap::new() }
    }

    /// 指定された値の発生をカウントします。
    fn count(&mut self, value: T) {
        *self.values.entry(value).or_default() += 1;
    }

    /// 指定された値が確認された回数を返します。
    fn times_seen(&self, value: T) -> u64 {
        self.values.get(&value).copied().unwrap_or_default()
    }
}

fn main() {
    let mut ctr = Counter::new();
    ctr.count(13);
    ctr.count(14);
    ctr.count(16);
    ctr.count(14);
    ctr.count(14);
    ctr.count(11);

    for i in 10..20 {
        println!("saw {} values equal to {}", ctr.times_seen(i), i);
    }

    let mut strctr = Counter::new();
    strctr.count("apple");
    strctr.count("orange");
    strctr.count("apple");
    println!("got {} apples", strctr.times_seen("apple"));
}
標準ライブラリ内のトレイト
This segment should take about 1 hour and 10 minutes. It contains:
| Slide | Duration |
|---|---|
| 他の言語との比較 | 5 minutes |
| 演算子 | 5 minutes |
| From と Into | 5 minutes |
| キャスト | 5 minutes |
| Read と Write | 5 minutes |
| Default、構造体更新記法 | 5 minutes |
| クロージャ | 10 minutes |
| 演習: ROT13暗号 | 30 minutes |
標準ライブラリ型と同様に、時間をかけて各トレイトのドキュメントを確認します。
このセクションは長いため、途中で休憩を取ってください。
他の言語との比較
これらのトレイトは値の比較をサポートします。すべてのトレイトは、これらのトレイトを実装するフィールドを含む型用に導出できます。
PartialEq と Eq
PartialEq は、必須のメソッド eq と指定されたメソッド ne を持つ部分的な等価関係です。== 演算子と != 演算子は、これらのメソッドを呼び出します。
struct Key {
    id: u32,
    metadata: Option<String>,
}
impl PartialEq for Key {
    fn eq(&self, other: &Self) -> bool {
        self.id == other.id
    }
}
Eq は完全な等価関係(反射的、対称的、推移的)であり、PartialEq を意味します。完全な等価関係を必要とする関数は、トレイト境界として Eq を使用します。
PartialOrd と Ord
PartialOrd は partial_cmp メソッドを使って部分的な順序を定義します。これは、<、<=、>=、> 演算子を実装するために使用されます。
use std::cmp::Ordering;
#[derive(Eq, PartialEq)]
struct Citation {
    author: String,
    year: u32,
}
impl PartialOrd for Citation {
    fn partial_cmp(&self, other: &Self) -> Option<Ordering> {
        match self.author.partial_cmp(&other.author) {
            Some(Ordering::Equal) => self.year.partial_cmp(&other.year),
            author_ord => author_ord,
        }
    }
}
Ord は全順序を示し、cmp は Ordering を返します。
PartialEq は異なる型の間で実装できますが、Eq は反射的であるため、実装できません。
struct Key {
    id: u32,
    metadata: Option<String>,
}
impl PartialEq<u32> for Key {
    fn eq(&self, other: &u32) -> bool {
        self.id == *other
    }
}
実際には、これらのトレイトを導出することは一般的ですが、実装するのは一般的ではありません。
演算子
演算子のオーバーロードは、std::ops 内のトレイトを介して実装されます。
#[derive(Debug, Copy, Clone)]
struct Point {
    x: i32,
    y: i32,
}

impl std::ops::Add for Point {
    type Output = Self;

    fn add(self, other: Self) -> Self {
        Self { x: self.x + other.x, y: self.y + other.y }
    }
}

fn main() {
    let p1 = Point { x: 10, y: 20 };
    let p2 = Point { x: 100, y: 200 };
    println!("{p1:?} + {p2:?} = {:?}", p1 + p2);
}
議論のポイント:
&PointにAddを実装できます。これはどのような状況で役に立ちますか?- 回答:
Add:addはselfを使用します。演算子をオーバーロードする型TがCopyでない場合は、&Tの演算子もオーバーロードすることを検討する必要があります。これにより、呼び出し箇所での不要なクローン作成を回避できます。
- 回答:
Outputが関連型であるのはなぜですか?これをメソッドの型パラメータにできるでしょうか?- 短い回答: 関数型のパラメータは呼び出し元によって制御されますが、関連型(
Outputなど)はトレイトの実装者によって制御されます。
- 短い回答: 関数型のパラメータは呼び出し元によって制御されますが、関連型(
- 2 種類の型に対して
Addを実装できます。たとえば、impl Add<(i32, i32)> for PointはPointにタプルを追加します。
The Not trait (! operator) is notable because it does not “boolify” like the same operator in C-family languages; instead, for integer types it negates each bit of the number, which arithmetically is equivalent to subtracting it from -1: !5 == -6.
From と Into
Types implement From and Into to facilitate type conversions. Unlike as, these traits correspond to lossless, infallible conversions.
fn main() {
    let s = String::from("hello");
    let addr = std::net::Ipv4Addr::from([127, 0, 0, 1]);
    let one = i16::from(true);
    let bigger = i32::from(123_i16);
    println!("{s}, {addr}, {one}, {bigger}");
}
From が実装されると、Into が自動的に実装されます。
fn main() {
    let s: String = "hello".into();
    let addr: std::net::Ipv4Addr = [127, 0, 0, 1].into();
    let one: i16 = true.into();
    let bigger: i32 = 123_i16.into();
    println!("{s}, {addr}, {one}, {bigger}");
}
- このように
Intoも実装されるため、型にはFromのみを実装するのが一般的です。 - 「
Stringに変換できるすべて」のような関数引数の入力型を宣言する場合、このルールは逆となり、Intoを使用する必要があります。関数は、Fromを実装する型と、Intoのみ を実装する型を受け入れます。
キャスト
Rust には 暗黙的 な型変換はありませんが、as による明示的なキャストはサポートされています。これらのキャストは通常、それらが定義されている C セマンティクスに従います。
fn main() {
    let value: i64 = 1000;
    println!("as u16: {}", value as u16);
    println!("as i16: {}", value as i16);
    println!("as u8: {}", value as u8);
}
as の結果は Rust で 常に 定義され、プラットフォーム間で一貫しています。これは、正負の符号を変えたり、より小さな型にキャストしたりする際に得られる直感に反しているかもしれません。ドキュメントを確認し、明確にするためにコメントを記述してください。
as を使用したキャストは比較的扱いにくく、誤って使用することが少なくありません。また、将来のメンテナンス作業で、使用される型や型の値の範囲が変更された際に、わかりにくいバグが発生する可能性があります。キャストは、無条件の切り捨てを示すことを目的としている場合にのみ、最適に使用されます(たとえば、上位ビットの内容に関係なく、as u32 で u64 の下位 32 ビットを選択する場合)。
絶対に正しいキャスト(例: u32 から u64 へのキャスト)では、キャストが実際に完璧であることを確認するために、as ではなく From または Into を使用することをおすすめします。正しくない可能性があるキャストについては、絶対に正しいキャストとは異なる方法でそれらを処理したい場合に、TryFrom と TryInto を使用できます。
このスライドの後で休憩を取ることを検討してください。
as は C++ の静的キャストに似ています。データが失われる可能性がある状況で as を使用することは、一般的に推奨されません。使用する場合は、少なくとも説明のコメントを記述することをおすすめします。
これは、整数をusize にキャストしてインデックスとして使用する場合に一般的です。
Read と Write
Read と BufRead を使用することで、u8 ソースを抽象化できます。
use std::io::{BufRead, BufReader, Read, Result};

fn count_lines<R: Read>(reader: R) -> usize {
    let buf_reader = BufReader::new(reader);
    buf_reader.lines().count()
}

fn main() -> Result<()> {
    let slice: &[u8] = b"foo\nbar\nbaz\n";
    println!("lines in slice: {}", count_lines(slice));

    let file = std::fs::File::open(std::env::current_exe()?)?;
    println!("lines in file: {}", count_lines(file));
    Ok(())
}
同様に、Write を使用すると、u8 シンクを抽象化できます。
use std::io::{Result, Write};

fn log<W: Write>(writer: &mut W, msg: &str) -> Result<()> {
    writer.write_all(msg.as_bytes())?;
    writer.write_all("\n".as_bytes())
}

fn main() -> Result<()> {
    let mut buffer = Vec::new();
    log(&mut buffer, "Hello")?;
    log(&mut buffer, "World")?;
    println!("Logged: {buffer:?}");
    Ok(())
}
Default トレイト
Default トレイトは、型のデフォルト値を生成します。
#[derive(Debug, Default)]
struct Derived {
    x: u32,
    y: String,
    z: Implemented,
}

#[derive(Debug)]
struct Implemented(String);

impl Default for Implemented {
    fn default() -> Self {
        Self("John Smith".into())
    }
}

fn main() {
    let default_struct = Derived::default();
    println!("{default_struct:#?}");

    let almost_default_struct =
        Derived { y: "Y is set!".into(), ..Derived::default() };
    println!("{almost_default_struct:#?}");

    let nothing: Option<Derived> = None;
    println!("{:#?}", nothing.unwrap_or_default());
}
- 直接実装することも、
#[derive(Default)]で導出することもできます。 - 導出による実装では、すべてのフィールドがデフォルト値に設定された値が生成されます。
- つまり、構造体内のすべての型にも
Defaultを実装する必要があります。
- つまり、構造体内のすべての型にも
- 標準の Rust 型は多くの場合、妥当な値(
0、""など)のDefaultを実装します。 - 部分的な構造体の初期化は、デフォルトで適切に機能します。
- Rust 標準ライブラリは、型が
Defaultを実装できることを認識しており、それを使用するコンビニエンス メソッドを提供しています。 ..構文は、構造体更新記法と呼ばれています。
クロージャ
クロージャやラムダ式には、名前を付けることができない型があります。ただし、これらは特別な Fn、FnMut、FnOnce トレイトを備えています。
fn apply_and_log(func: impl FnOnce(i32) -> i32, func_name: &str, input: i32) {
    println!("Calling {func_name}({input}): {}", func(input))
}

fn main() {
    let n = 3;
    let add_3 = |x| x + n;
    apply_and_log(&add_3, "add_3", 10);
    apply_and_log(&add_3, "add_3", 20);

    let mut v = Vec::new();
    let mut accumulate = |x: i32| {
        v.push(x);
        v.iter().sum::<i32>()
    };
    apply_and_log(&mut accumulate, "accumulate", 4);
    apply_and_log(&mut accumulate, "accumulate", 5);

    let multiply_sum = |x| x * v.into_iter().sum::<i32>();
    apply_and_log(multiply_sum, "multiply_sum", 3);
}
An Fn (e.g. add_3) neither consumes nor mutates captured values. It can be called needing only a shared reference to the closure, which means the closure can be executed repeatedly and even concurrently.
An FnMut (e.g. accumulate) might mutate captured values. The closure object is accessed via exclusive reference, so it can be called repeatedly but not concurrently.
If you have an FnOnce (e.g. multiply_sum), you may only call it once. Doing so consumes the closure and any values captured by move.
FnMut は FnOnce のサブタイプで、Fn は FnMut と FnOnce のサブタイプです。つまり、FnOnce が呼び出される場合は常に FnMut を使用でき、FnMut または FnOnce が呼び出される場合は常に Fn を使用できます。
クロージャを受け取る関数を定義する場合、可能であれば(1 回だけ呼び出す)FnOnce を使用し、次に FnMut、最後に Fn を使用するようにします。これにより、呼び出し元に最も柔軟に対応できます。
In contrast, when you have a closure, the most flexible you can have is Fn (which can be passed to a consumer of any of the 3 closure traits), then FnMut, and lastly FnOnce.
The compiler also infers Copy (e.g. for add_3) and Clone (e.g. multiply_sum), depending on what the closure captures. Function pointers (references to fn items) implement Copy and Fn.
By default, closures will capture each variable from an outer scope by the least demanding form of access they can (by shared reference if possible, then exclusive reference, then by move). The move keyword forces capture by value.
fn make_greeter(prefix: String) -> impl Fn(&str) {
    return move |name| println!("{} {}", prefix, name);
}

fn main() {
    let hi = make_greeter("Hi".to_string());
    hi("Greg");
}
演習: ROT13暗号
この例では、古典的な 「ROT13」暗号を実装します。このコードをプレイグラウンドにコピーし、欠落しているビットを実装してください。結果が有効な UTF-8 のままになるように、ASCII アルファベット文字のみをローテーションします。
use std::io::Read;

struct RotDecoder<R: Read> {
    input: R,
    rot: u8,
}

// `RotDecoder` の `Read` トレイトを実装します。

fn main() {
    let mut rot =
        RotDecoder { input: "Gb trg gb gur bgure fvqr!".as_bytes(), rot: 13 };
    let mut result = String::new();
    rot.read_to_string(&mut result).unwrap();
    println!("{}", result);
}

#[cfg(test)]
mod test {
    use super::*;

    #[test]
    fn joke() {
        let mut rot =
            RotDecoder { input: "Gb trg gb gur bgure fvqr!".as_bytes(), rot: 13 };
        let mut result = String::new();
        rot.read_to_string(&mut result).unwrap();
        assert_eq!(&result, "To get to the other side!");
    }

    #[test]
    fn binary() {
        let input: Vec<u8> = (0..=255u8).collect();
        let mut rot = RotDecoder::<&[u8]> { input: input.as_ref(), rot: 13 };
        let mut buf = [0u8; 256];
        assert_eq!(rot.read(&mut buf).unwrap(), 256);
        for i in 0..=255 {
            if input[i] != buf[i] {
                assert!(input[i].is_ascii_alphabetic());
                assert!(buf[i].is_ascii_alphabetic());
            }
        }
    }
}
それぞれが 13 文字ずつローテーションされる 2 つの RotDecoder インスタンスを連結するとどうなるでしょうか。
解答
use std::io::Read;

struct RotDecoder<R: Read> {
    input: R,
    rot: u8,
}

impl<R: Read> Read for RotDecoder<R> {
    fn read(&mut self, buf: &mut [u8]) -> std::io::Result<usize> {
        let size = self.input.read(buf)?;
        for b in &mut buf[..size] {
            if b.is_ascii_alphabetic() {
                let base = if b.is_ascii_uppercase() { 'A' } else { 'a' } as u8;
                *b = (*b - base + self.rot) % 26 + base;
            }
        }
        Ok(size)
    }
}

fn main() {
    let mut rot =
        RotDecoder { input: "Gb trg gb gur bgure fvqr!".as_bytes(), rot: 13 };
    let mut result = String::new();
    rot.read_to_string(&mut result).unwrap();
    println!("{}", result);
}

#[cfg(test)]
mod test {
    use super::*;

    #[test]
    fn joke() {
        let mut rot =
            RotDecoder { input: "Gb trg gb gur bgure fvqr!".as_bytes(), rot: 13 };
        let mut result = String::new();
        rot.read_to_string(&mut result).unwrap();
        assert_eq!(&result, "To get to the other side!");
    }

    #[test]
    fn binary() {
        let input: Vec<u8> = (0..=255u8).collect();
        let mut rot = RotDecoder::<&[u8]> { input: input.as_ref(), rot: 13 };
        let mut buf = [0u8; 256];
        assert_eq!(rot.read(&mut buf).unwrap(), 256);
        for i in 0..=255 {
            if input[i] != buf[i] {
                assert!(input[i].is_ascii_alphabetic());
                assert!(buf[i].is_ascii_alphabetic());
            }
        }
    }
}
3 日目のトレーニングにようこそ
本日の内容:
- メモリ管理、ライフタイム、借用チェッカー: Rust がメモリの安全性を確保する仕組み。
- スマートポインタ: 標準ライブラリのポインタ型。
スケジュール
Including 10 minute breaks, this session should take about 2 hours and 20 minutes. It contains:
| Segment | Duration |
|---|---|
| ようこそ | 3 minutes |
| メモリ管理 | 1 hour |
| スマートポインタ | 55 minutes |
メモリ管理
This segment should take about 1 hour. It contains:
| Slide | Duration |
|---|---|
| プログラム メモリの見直し | 5 minutes |
| メモリ管理のアプローチ | 10 minutes |
| 所有権 | 5 minutes |
| ムーブセマンティクス | 5 minutes |
| Clone | 2 minutes |
| Copy 型 | 5 minutes |
| Drop | 10 minutes |
| 演習: ビルダー型 | 20 minutes |
プログラム メモリの見直し
プログラムは、次の 2 つの方法でメモリを割り当てます。
-
スタック: ローカル変数用の連続したメモリ領域。
- 値のサイズは固定されており、コンパイル時に判明しています。
- 非常に高速: スタック ポインタを移動するだけです。
- 関数呼び出しによって行われるため、管理が容易です。
- メモリ局所性に優れています。
-
ヒープ: 関数呼び出しに依存しない値の保持領域。
- 値のサイズは動的で、実行時に決定されます。
- スタックよりやや低速で、何らかののブックキーピングが必要です。
- メモリの局所性が保証されません。
例
String を作成すると、スタックには固定サイズのメタデータが配置され、ヒープにはサイズが動的に決定されるデータ(実際の文字列)が配置されます。
fn main() {
    let s1 = String::from("Hello");
}
-
StringはVecにより実現されているため、容量と長さがあり、可変であればヒープ上の再割り当てによって拡張できることを説明します。 -
受講者から尋ねられた場合は、システム アロケータを使用してメモリ領域がヒープから割り当てられること、Allocator API を使用してカスタム アロケータを実装できることを説明してください。
その他
unsafe Rust を使用してメモリ レイアウトを調べることが出来ます。ただし、これは当然ながら安全でないことを指摘する必要があります。
fn main() {
    let mut s1 = String::from("Hello");
    s1.push(' ');
    s1.push_str("world");
    // 自宅では行わないでください。これは説明のみを目的としています。
    // String はそのレイアウトを保証しないため、未定義の動作が
    // 発生する可能性があります。
    unsafe {
        let (capacity, ptr, len): (usize, usize, usize) = std::mem::transmute(s1);
        println!("capacity = {capacity}, ptr = {ptr:#x}, len = {len}");
    }
}
メモリ管理のアプローチ
伝統的に、言語は大きく 2 つのカテゴリに分類されます。
- 手動でのメモリ管理による完全な制御: C、C++、Pascal など
- プログラマーがヒープメモリを割り当てまたは解放するタイミングを決定します。
- プログラマーは、ポインタがまだ有効なメモリを指しているかどうかを判断する必要があります。
- 調査によると、プログラマーは判断を誤ることがあります。
- 実行時の自動メモリ管理による完全な安全性: Java、Python、Go、Haskell など
- ランタイム システムにより、メモリは参照できなくなるまで解放されません。
- Typically implemented with reference counting or garbage collection.
Rust ではこの 2 つを融合することで、新たに以下の特徴を提供します。
コンパイル時の適切なメモリ管理の適用による、完全な制御と安全性。
これは、明示的な所有権の概念によって実現されます。
このスライドは、他の言語を習得済みの受講者に、その文脈の中で Rust を理解してもらうことを目的としています。
-
C では、
mallocとfreeを使用してヒープを手動で管理する必要があります。よくあるエラーとしては、freeの呼び出しを忘れる、同じポインタに対して複数回呼び出す、ポイントしているメモリが解放された後にポインタを逆参照する、などがあります。 -
C++ にはスマート ポインタ(
unique_ptr、shared_ptrなど)のツールがあり、デストラクタの呼び出しに関する言語保証を利用して、関数が戻ったときにメモリが解放されるようにします。これらのツールを誤用して C と同様のバグを作成することがよくあります。 -
Java、Go、Pythonでは、アクセスできなくなったメモリの特定と破棄をガーベジコレクタに依存します。これにより、あらゆるポインタの逆参照が可能になり、解放後の使用などのバグがなくなります。ただし、GC (ガーベジコレクション) にはランタイムコストがかかり、適切なチューニングが困難です。
Rust の所有権と借用モデルは、多くの場合、割り当てオペレーションと解放オペレーションを正確に必要な場所で行うことにより、ゼロコストで C のパフォーマンスを実現できます。また、C++ のスマートポインタに似たツールも用意されています。必要に応じて、参照カウントなどの他のオプションを利用できます。また、ランタイムガベージコレクションをサポートするためのサードパーティのクレートも使用できます(このクラスでは扱いません)。
所有権
すべての変数バインディングには有効なスコープがあり、スコープ外で変数を使用するとエラーになります。
struct Point(i32, i32);

fn main() {
    {
        let p = Point(3, 4);
        println!("x: {}", p.0);
    }
    println!("y: {}", p.1);
}
これを、変数が値を 所有 していると表現します。すべての Rustの値所有者は常に 1 人です。
スコープから外れると変数が破棄 (drop) され、データが解放されます。ここでデストラクタを実行してリソースを解放できます。
ガベージ コレクションの実装に精通している受講者は、ガベージ コレクタが一連の「ルート」から開始して到達可能なすべてのメモリを見つけることを知っています。Rust の「単一オーナー」の原則も、同様の考え方に基づいています。
ムーブセマンティクス
代入すると、変数間で 所有権 が移動します。
fn main() {
    let s1: String = String::from("Hello!");
    let s2: String = s1;
    println!("s2: {s2}");
    // println!("s1: {s1}");
}
s1をs2に代入すると、所有権が移動します。s1がスコープ外になると、何も所有してないからです(何も所有しません)。s2がスコープ外になると、文字列データは解放されます。
s2 に移動する前:
s2 に移動した後:
次の例のように、関数に値を渡すと、その値は関数パラメータに代入されます。これにより、所有権が移動します。
fn say_hello(name: String) {
    println!("Hello {name}")
}

fn main() {
    let name = String::from("Alice");
    say_hello(name);
    // say_hello(name);
}
-
これは、
std::moveを使用しない限り(かつムーブ コンストラクタが定義されていない限り)値をコピーする、C++ のデフォルトとは逆であることを説明します。 -
移動するのは所有権のみです。データ自体を操作するためにマシンコードが生成されるかどうかは最適化の問題であり、そのようなコピーのためのマシンコードは積極的に最適化されてなくなります。
-
単純な値(整数など)には
Copyのマークを付けることができます(後のスライドを参照)。 -
Rust では、クローンは明示的に
cloneを使用して行われます。
say_hello の例の内容は次のとおりです。
say_helloの最初の呼び出しで、mainはnameの所有権を放棄します。その後はmain内でnameが使用できなくなります。nameに割り当てられたヒープメモリは、say_hello関数の最後で解放されます。mainがnameを参照として渡し(&name)、say_helloがパラメータとして参照を受け入れる場合、mainは所有権を保持できます。- または、
mainが最初の呼び出しでnameのクローン(name.clone())を渡すこともできます。 - Rust では、ムーブ セマンティクスをデフォルトにし、クローンをプログラマに明示的に行わせています。これにより、C++ に比べて意図せずコピーを作成するリスクが低減されています。
その他
Defensive Copies in Modern C++
最新の C++ では、この問題を別の方法で解決します。
std::string s1 = "Cpp";
std::string s2 = s1;  // s1 にデータを複製します。
s1からのヒープデータが複製され、s2は自身の独立したコピーを取得します。s1とs2がスコープ外になると、それぞれ自身のメモリを解放します。
コピー代入前:
コピー代入後:
要点:
-
C++ のアプローチは、Rust とは若干異なります。
=を使用するとデータがコピーされるため、文字列データのクローンを作成する必要があるためです。そうしないと、いずれかの文字列がスコープ外になったときに二重解放が発生します。 -
C++ には
std::moveもありますが、これは値をムーブできるタイミングを示すために使用されます。この例でs2 = std::move(s1)となっていた場合は、ヒープ割り当ては行われません。ムーブ後、s1は有効であるものの、未指定の状態になります。Rust とは異なり、プログラマーはs1を引き続き使用できます。 -
Rust とは異なり、C++ の
=は、コピーまたは移動される型によって決定される任意のコードを実行できます。
Clone
値のコピーを作成したい場合は、Clone トレイトを使用できます。
fn say_hello(name: String) {
    println!("Hello {name}")
}

fn main() {
    let name = String::from("Alice");
    say_hello(name.clone());
    say_hello(name);
}
-
The idea of
Cloneis to make it easy to spot where heap allocations are occurring. Look for.clone()and a few others likevec!orBox::new. -
借用チェッカーが通らない場合に「とりあえずクローンを作成して切り抜けておいて」、あとからクローンのないコードへの最適化を試みるのもよくあることです。
-
clonegenerally performs a deep copy of the value, meaning that if you e.g. clone an array, all of the elements of the array are cloned as well. -
The behavior for
cloneis user-defined, so it can perform custom cloning logic if needed.
Copy 型
言語としてのデフォルトはムーブセマンティクスですが、特定の型ではデフォルトでコピーが行われます。
fn main() {
    let x = 42;
    let y = x;
    println!("x: {x}"); // would not be accessible if not Copy
    println!("y: {y}");
}
これらの型は Copy トレイトを実装しているからです。
あなたが定義した独自の型のデフォルトをコピーセマンティクスにすることが出来ます。
#[derive(Copy, Clone, Debug)]
struct Point(i32, i32);

fn main() {
    let p1 = Point(3, 4);
    let p2 = p1;
    println!("p1: {p1:?}");
    println!("p2: {p2:?}");
}
- 代入後は、
p1とp2の両方が独自のデータを所有します。 p1.clone()を使用してデータを明示的にコピーすることもできます。
コピーとクローン作成は同じではありません。
- コピーとは、メモリ領域のビット単位コピーのことであり、任意のオブジェクトでは機能しません。
- コピーではカスタムロジックは使用できません(C++ のコピーコンストラクタとは異なります)。
- クローン作成はより一般的なオペレーションであり、
Cloneトレイトを実装することでカスタム動作も可能になります。 Dropトレイトを実装している型では、コピーは出来ません。
上記の例で、次の方法を試してください。
Stringフィールドをstruct Pointに追加します。StringがCopy型ではないため、コンパイルできなくなります。derive属性からCopyを削除します。p1のprintln!でコンパイラ エラーが発生します。- 代わりに
p1のクローンを作成すれば解決できることを示します。
その他
- Shared references are
Copy/Clone, mutable references are not. This is because Rust requires that mutable references be exclusive, so while it’s valid to make a copy of a shared reference, creating a copy of a mutable reference would violate Rust’s borrowing rules.
Drop トレイト
Drop を実装している値では、スコープから外れるときに実行するコードを指定できます。
struct Droppable {
    name: &'static str,
}

impl Drop for Droppable {
    fn drop(&mut self) {
        println!("Dropping {}", self.name);
    }
}

fn main() {
    let a = Droppable { name: "a" };
    {
        let b = Droppable { name: "b" };
        {
            let c = Droppable { name: "c" };
            let d = Droppable { name: "d" };
            println!("Exiting block B");
        }
        println!("Exiting block A");
    }
    drop(a);
    println!("Exiting main");
}
std::mem::dropはstd::ops::Drop::dropと同じではありません。- スコープ外になると、値は自動的にドロップされます。
- 値がドロップされる際、
std::ops::Dropを実装している場合は、そのDrop::drop実装が呼び出されます。 - その後、
Dropを実装しているかどうかにかかわらず、すべてのフィールドもドロップされます。 std::mem::dropは、任意の値を受け取る空の関数にすぎません。重要なのは、この関数が値の所有権を取得することで、スコープの最後で値がドロップされることです。これは、スコープ外になる前に値を明示的にドロップするための便利な方法です。- この方法は、
dropで何らかの処理(ロックの解放、ファイルのクローズなど)を行うオブジェクトに使用すると便利です。
- この方法は、
議論のポイント:
Drop::dropがselfをパラメータとして取らないのはなぜですか?- 短い回答: その場合、ブロックの最後に
std::mem::dropが呼び出されるため、別のDrop::dropが呼び出され、スタック オーバーフローが発生します。
- 短い回答: その場合、ブロックの最後に
drop(a)をa.drop()に置き換えてみてください。
演習: ビルダー型
この例では、すべてのデータを持つ複雑なデータ型を実装します。「ビルダー パターン」で便利な関数を使用して、新しい値を 1 つずつ構築できるようにします。
抜けている部分を記入してください。
#[derive(Debug)]
enum Language {
    Rust,
    Java,
    Perl,
}

#[derive(Clone, Debug)]
struct Dependency {
    name: String,
    version_expression: String,
}

/// ソフトウェア パッケージの表現。
#[derive(Debug)]
struct Package {
    name: String,
    version: String,
    authors: Vec<String>,
    dependencies: Vec<Dependency>,
    language: Option<Language>,
}

impl Package {
    /// このパッケージの表現を依存関係として返し、
    /// 他のパッケージのビルドに使用します。
    fn as_dependency(&self) -> Dependency {
        todo!("1")
    }
}

/// パッケージのビルダー。`build()` を使用して `Package` 自体を作成します。
struct PackageBuilder(Package);

impl PackageBuilder {
    fn new(name: impl Into<String>) -> Self {
        todo!("2")
    }

    /// パッケージのバージョンを設定します。
    fn version(mut self, version: impl Into<String>) -> Self {
        self.0.version = version.into();
        self
    }

    /// パッケージ作成者を設定します。
    fn authors(mut self, authors: Vec<String>) -> Self {
        todo!("3")
    }

    /// 依存関係を追加します。
    fn dependency(mut self, dependency: Dependency) -> Self {
        todo!("4")
    }

    /// 言語を設定します。設定しない場合、言語はデフォルトで None になります。
    fn language(mut self, language: Language) -> Self {
        todo!("5")
    }

    fn build(self) -> Package {
        self.0
    }
}

fn main() {
    let base64 = PackageBuilder::new("base64").version("0.13").build();
    println!("base64: {base64:?}");
    let log =
        PackageBuilder::new("log").version("0.4").language(Language::Rust).build();
    println!("log: {log:?}");
    let serde = PackageBuilder::new("serde")
        .authors(vec!["djmitche".into()])
        .version(String::from("4.0"))
        .dependency(base64.as_dependency())
        .dependency(log.as_dependency())
        .build();
    println!("serde: {serde:?}");
}
解答
#[derive(Debug)]
enum Language {
    Rust,
    Java,
    Perl,
}

#[derive(Clone, Debug)]
struct Dependency {
    name: String,
    version_expression: String,
}

/// ソフトウェア パッケージの表現。
#[derive(Debug)]
struct Package {
    name: String,
    version: String,
    authors: Vec<String>,
    dependencies: Vec<Dependency>,
    language: Option<Language>,
}

impl Package {
    /// このパッケージの表現を依存関係として返し、
    /// 他のパッケージのビルドに使用します。
    fn as_dependency(&self) -> Dependency {
        Dependency {
            name: self.name.clone(),
            version_expression: self.version.clone(),
        }
    }
}

/// パッケージのビルダー。`build()` を使用して `Package` 自体を作成します。
struct PackageBuilder(Package);

impl PackageBuilder {
    fn new(name: impl Into<String>) -> Self {
        Self(Package {
            name: name.into(),
            version: "0.1".into(),
            authors: vec![],
            dependencies: vec![],
            language: None,
        })
    }

    /// パッケージのバージョンを設定します。
    fn version(mut self, version: impl Into<String>) -> Self {
        self.0.version = version.into();
        self
    }

    /// パッケージ作成者を設定します。
    fn authors(mut self, authors: Vec<String>) -> Self {
        self.0.authors = authors;
        self
    }

    /// 依存関係を追加します。
    fn dependency(mut self, dependency: Dependency) -> Self {
        self.0.dependencies.push(dependency);
        self
    }

    /// 言語を設定します。設定しない場合、言語はデフォルトで None になります。
    fn language(mut self, language: Language) -> Self {
        self.0.language = Some(language);
        self
    }

    fn build(self) -> Package {
        self.0
    }
}

fn main() {
    let base64 = PackageBuilder::new("base64").version("0.13").build();
    println!("base64: {base64:?}");
    let log =
        PackageBuilder::new("log").version("0.4").language(Language::Rust).build();
    println!("log: {log:?}");
    let serde = PackageBuilder::new("serde")
        .authors(vec!["djmitche".into()])
        .version(String::from("4.0"))
        .dependency(base64.as_dependency())
        .dependency(log.as_dependency())
        .build();
    println!("serde: {serde:?}");
}
スマートポインタ
This segment should take about 55 minutes. It contains:
| Slide | Duration |
|---|---|
| Box | 10 minutes |
| Rc | 5 minutes |
| 所有されたトレイトオブジェクト | 10 minutes |
| 演習: バイナリツリー | 30 minutes |
Box<T>
Box は、ヒープ上のデータへの所有ポインタです。
fn main() {
    let five = Box::new(5);
    println!("five: {}", *five);
}
Box<T> は Deref<Target = T> を実装しているため、Box<T> に対して T のメソッドを直接呼び出すことができます。
Recursive data types or data types with dynamic sizes cannot be stored inline without a pointer indirection. Box accomplishes that indirection:
#[derive(Debug)]
enum List<T> {
    /// 空でないリスト: 最初の要素とリストの残り。
    Element(T, Box<List<T>>),
    /// 空のリスト。
    Nil,
}

fn main() {
    let list: List<i32> =
        List::Element(1, Box::new(List::Element(2, Box::new(List::Nil))));
    println!("{list:?}");
}
-
Boxは C++ のstd::unique_ptrと似ていますが、null ではないことが保証されている点が異なります。 -
Boxは次のような場合に役立ちます。- have a type whose size can’t be known at compile time, but the Rust compiler wants to know an exact size.
- 大量のデータの所有権をムーブしたい場合。スタック上の大量のデータがコピーされないようにするには、代わりに
Boxによりヒープ上にデータを格納し、ポインタのみが移動されるようにします。
-
仮に
Boxを使用せずにListをListに直接埋め込もうとすると、コンパイラはメモリ内の構造体の固定サイズを計算しようとしません(Listは無限サイズになります)。 -
Boxがこの問題を解決できるのは、そのサイズが通常のポインタと同じであり、単にヒープ内の List の次の要素を指すだけだけだからです。 -
Remove the
Boxin the List definition and show the compiler error. We get the message “recursive without indirection”, because for data recursion, we have to use indirection, aBoxor reference of some kind, instead of storing the value directly. -
Though
Boxlooks likestd::unique_ptrin C++, it cannot be empty/null. This makesBoxone of the types that allow the compiler to optimize storage of some enums (the “niche optimization”).
Rc
Rc は、参照カウントされた共有ポインタです。複数の場所から同じデータを参照する必要がある場合に使用します。
use std::rc::Rc;

fn main() {
    let a = Rc::new(10);
    let b = Rc::clone(&a);

    println!("a: {a}");
    println!("b: {b}");
}
- See
ArcandMutexif you are in a multi-threaded context. - 共有ポインタを
Weakポインタにダウングレード (downgrade) すると、ドロップされるサイクルを作成できます。
Rcのカウントは、参照がある限り有効であることを保証します。- Rust の
Rcは C++ のstd::shared_ptrに似ています。 Rc::cloneの動作は軽量です。同じ割り当て領域へのポインタを作成し、参照カウントを増やすだけです。デープクローンを作成しないので、性能上の問題箇所をコードから探す場合には通常無視することが出来ます。make_mutは、必要に応じて内部の値のクローンを作成し(「clone-on-write」)、可変参照を返します。Rc::strong_countを使用して参照カウントを確認します。Rc::downgradeは、(多くの場合、RefCellと組み合わせて)適切にドロップされるサイクルを作成するための弱参照カウント (weakly reference-counted) オブジェクトを提供します。
所有されたトレイトオブジェクト
We previously saw how trait objects can be used with references, e.g &dyn Pet. However, we can also use trait objects with smart pointers like Box to create an owned trait object: Box<dyn Pet>.
struct Dog {
    name: String,
    age: i8,
}
struct Cat {
    lives: i8,
}

trait Pet {
    fn talk(&self) -> String;
}

impl Pet for Dog {
    fn talk(&self) -> String {
        format!("Woof, my name is {}!", self.name)
    }
}

impl Pet for Cat {
    fn talk(&self) -> String {
        String::from("Miau!")
    }
}

fn main() {
    let pets: Vec<Box<dyn Pet>> = vec![
        Box::new(Cat { lives: 9 }),
        Box::new(Dog { name: String::from("Fido"), age: 5 }),
    ];
    for pet in pets {
        println!("Hello, who are you? {}", pet.talk());
    }
}
petsを割り当てた後のメモリレイアウト:
- 同じトレイトを実装する型であってもそのサイズは異なることがあります。そのため、上の例でVec
と書くことはできません。 dyn Petはコンパイラに、この型がPetトレイトを実装する動的なサイズの型であることを伝えます。- 上の例では
petsはスタックに確保され、ベクターのデータはヒープ上にあります。二つのベクターの要素は ファットポインタ です:- ファットポインタはdouble-widthポインタです。これは二つの要素からなります:実際のオブジェクトへのポインタと、そのオブジェクトの
Petの実装のための仮想関数テーブル (vtable)です。 - “Fido“と名付けられた
Dogのデータはnameとageのフィールドに対応します。(訳注: “Fido“とはよくある犬の愛称で、日本語でいう「ポチ」のような名前です。)例のCatにはlivesフィールドがあります。(訳注: ここでCatがlivesというフィールドを持ち、9で初期化しているのは“A cat has nine lives” —猫は9つの命を持つ—ということわざに由来します。)
- ファットポインタはdouble-widthポインタです。これは二つの要素からなります:実際のオブジェクトへのポインタと、そのオブジェクトの
- 上の例において、下のコードによる出力結果を比べてみましょう:
println!("{} {}", std::mem::size_of::<Dog>(), std::mem::size_of::<Cat>());
println!("{} {}", std::mem::size_of::<&Dog>(), std::mem::size_of::<&Cat>());
println!("{}", std::mem::size_of::<&dyn Pet>());
println!("{}", std::mem::size_of::<Box<dyn Pet>>());
演習: バイナリツリー
バイナリツリーは、すべてのノードに 2 つの子(左と右)があるツリー型のデータ構造です。ここでは、各ノードが値を格納するツリーを作成します。ある特定のノード N について、N の左側のサブツリー内のすべてのノードにはより小さい値が含まれ、N の右側のサブツリー内のすべてのノードにはより大きい値が含まれます。
次の型を実装して、指定されたテストが通るようにします。
追加の実習: バイナリツリーに値を順番に返すイテレータを実装します。
/// バイナリツリーのノード。
#[derive(Debug)]
struct Node<T: Ord> {
    value: T,
    left: Subtree<T>,
    right: Subtree<T>,
}

/// 空の可能性のあるサブツリー。
#[derive(Debug)]
struct Subtree<T: Ord>(Option<Box<Node<T>>>);

/// バイナリツリーを使用して一連の値を格納するコンテナ。
///
/// 同じ値が複数回追加された場合、その値は 1 回だけ格納される。
#[derive(Debug)]
pub struct BinaryTree<T: Ord> {
    root: Subtree<T>,
}

impl<T: Ord> BinaryTree<T> {
    fn new() -> Self {
        Self { root: Subtree::new() }
    }

    fn insert(&mut self, value: T) {
        self.root.insert(value);
    }

    fn has(&self, value: &T) -> bool {
        self.root.has(value)
    }

    fn len(&self) -> usize {
        self.root.len()
    }
}

// Implement `new`, `insert`, `len`, and `has` for `Subtree`.

#[cfg(test)]
mod tests {
    use super::*;

    #[test]
    fn len() {
        let mut tree = BinaryTree::new();
        assert_eq!(tree.len(), 0);
        tree.insert(2);
        assert_eq!(tree.len(), 1);
        tree.insert(1);
        assert_eq!(tree.len(), 2);
        tree.insert(2); // 固有のアイテムではない
        assert_eq!(tree.len(), 2);
    }

    #[test]
    fn has() {
        let mut tree = BinaryTree::new();
        fn check_has(tree: &BinaryTree<i32>, exp: &[bool]) {
            let got: Vec<bool> =
                (0..exp.len()).map(|i| tree.has(&(i as i32))).collect();
            assert_eq!(&got, exp);
        }

        check_has(&tree, &[false, false, false, false, false]);
        tree.insert(0);
        check_has(&tree, &[true, false, false, false, false]);
        tree.insert(4);
        check_has(&tree, &[true, false, false, false, true]);
        tree.insert(4);
        check_has(&tree, &[true, false, false, false, true]);
        tree.insert(3);
        check_has(&tree, &[true, false, false, true, true]);
    }

    #[test]
    fn unbalanced() {
        let mut tree = BinaryTree::new();
        for i in 0..100 {
            tree.insert(i);
        }
        assert_eq!(tree.len(), 100);
        assert!(tree.has(&50));
    }
}
解答
use std::cmp::Ordering;

/// バイナリツリーのノード。
#[derive(Debug)]
struct Node<T: Ord> {
    value: T,
    left: Subtree<T>,
    right: Subtree<T>,
}

/// 空の可能性のあるサブツリー。
#[derive(Debug)]
struct Subtree<T: Ord>(Option<Box<Node<T>>>);

/// バイナリツリーを使用して一連の値を格納するコンテナ。
///
/// 同じ値が複数回追加された場合、その値は 1 回だけ格納される。
#[derive(Debug)]
pub struct BinaryTree<T: Ord> {
    root: Subtree<T>,
}

impl<T: Ord> BinaryTree<T> {
    fn new() -> Self {
        Self { root: Subtree::new() }
    }

    fn insert(&mut self, value: T) {
        self.root.insert(value);
    }

    fn has(&self, value: &T) -> bool {
        self.root.has(value)
    }

    fn len(&self) -> usize {
        self.root.len()
    }
}

impl<T: Ord> Subtree<T> {
    fn new() -> Self {
        Self(None)
    }

    fn insert(&mut self, value: T) {
        match &mut self.0 {
            None => self.0 = Some(Box::new(Node::new(value))),
            Some(n) => match value.cmp(&n.value) {
                Ordering::Less => n.left.insert(value),
                Ordering::Equal => {}
                Ordering::Greater => n.right.insert(value),
            },
        }
    }

    fn has(&self, value: &T) -> bool {
        match &self.0 {
            None => false,
            Some(n) => match value.cmp(&n.value) {
                Ordering::Less => n.left.has(value),
                Ordering::Equal => true,
                Ordering::Greater => n.right.has(value),
            },
        }
    }

    fn len(&self) -> usize {
        match &self.0 {
            None => 0,
            Some(n) => 1 + n.left.len() + n.right.len(),
        }
    }
}

impl<T: Ord> Node<T> {
    fn new(value: T) -> Self {
        Self { value, left: Subtree::new(), right: Subtree::new() }
    }
}

fn main() {
    let mut tree = BinaryTree::new();
    tree.insert("foo");
    assert_eq!(tree.len(), 1);
    tree.insert("bar");
    assert!(tree.has(&"foo"));
}

#[cfg(test)]
mod tests {
    use super::*;

    #[test]
    fn len() {
        let mut tree = BinaryTree::new();
        assert_eq!(tree.len(), 0);
        tree.insert(2);
        assert_eq!(tree.len(), 1);
        tree.insert(1);
        assert_eq!(tree.len(), 2);
        tree.insert(2); // 固有のアイテムではない
        assert_eq!(tree.len(), 2);
    }

    #[test]
    fn has() {
        let mut tree = BinaryTree::new();
        fn check_has(tree: &BinaryTree<i32>, exp: &[bool]) {
            let got: Vec<bool> =
                (0..exp.len()).map(|i| tree.has(&(i as i32))).collect();
            assert_eq!(&got, exp);
        }

        check_has(&tree, &[false, false, false, false, false]);
        tree.insert(0);
        check_has(&tree, &[true, false, false, false, false]);
        tree.insert(4);
        check_has(&tree, &[true, false, false, false, true]);
        tree.insert(4);
        check_has(&tree, &[true, false, false, false, true]);
        tree.insert(3);
        check_has(&tree, &[true, false, false, true, true]);
    }

    #[test]
    fn unbalanced() {
        let mut tree = BinaryTree::new();
        for i in 0..100 {
            tree.insert(i);
        }
        assert_eq!(tree.len(), 100);
        assert!(tree.has(&50));
    }
}
おかえり
Including 10 minute breaks, this session should take about 1 hour and 55 minutes. It contains:
| Segment | Duration |
|---|---|
| 借用 | 55 minutes |
| ライフタイム | 50 minutes |
借用
This segment should take about 55 minutes. It contains:
| Slide | Duration |
|---|---|
| 値の借用 | 10 minutes |
| 借用チェック | 10 minutes |
| Borrow Errors | 3 minutes |
| 内部可変性 | 10 minutes |
| 演習: 健康に関する統計 | 20 minutes |
値の借用
前に説明したように、関数を呼び出すときに所有権を移動する代わりに、関数で値を借用できます。
#[derive(Debug)]
struct Point(i32, i32);

fn add(p1: &Point, p2: &Point) -> Point {
    Point(p1.0 + p2.0, p1.1 + p2.1)
}

fn main() {
    let p1 = Point(3, 4);
    let p2 = Point(10, 20);
    let p3 = add(&p1, &p2);
    println!("{p1:?} + {p2:?} = {p3:?}");
}
add関数は 2 つのポイントを 借用 し、新しいポイントを返します。- 呼び出し元は入力の所有権を保持します。
このスライドでは、1 日目の参照に関する資料を振り返りですが、少し対象を広げ、関数の引数と戻り値も含めています。
その他
Notes on stack returns and inlining:
-
Demonstrate that the return from
addis cheap because the compiler can eliminate the copy operation, by inlining the call to add into main. Change the above code to print stack addresses and run it on the Playground or look at the assembly in Godbolt. In the “DEBUG” optimization level, the addresses should change, while they stay the same when changing to the “RELEASE” setting:#[derive(Debug)] struct Point(i32, i32); fn add(p1: &Point, p2: &Point) -> Point { let p = Point(p1.0 + p2.0, p1.1 + p2.1); println!("&p.0: {:p}", &p.0); p } pub fn main() { let p1 = Point(3, 4); let p2 = Point(10, 20); let p3 = add(&p1, &p2); println!("&p3.0: {:p}", &p3.0); println!("{p1:?} + {p2:?} = {p3:?}"); } -
The Rust compiler can do automatic inlining, that can be disabled on a function level with
#[inline(never)]. -
Once disabled, the printed address will change on all optimization levels. Looking at Godbolt or Playground, one can see that in this case, the return of the value depends on the ABI, e.g. on amd64 the two i32 that is making up the point will be returned in 2 registers (eax and edx).
借用チェック
Rust の 借用チェッカー は、値を借用する方法に制限を設けます。任意の値に対して、常に次の制限が課されます。
- 値への共有参照を 1 つ以上持つことが出来ます。または、
- 値への排他参照を 1 つだけ持つことが出来ます。
fn main() {
    let mut a: i32 = 10;
    let b: &i32 = &a;

    {
        let c: &mut i32 = &mut a;
        *c = 20;
    }

    println!("a: {a}");
    println!("b: {b}");
}
- 要件は、競合する参照が同じ時点に存在しないことです。参照がどこで外されていても構いません。
- 上記のコードは、
aがcを通じて可変として借用されていると同時に、bを通じて不変として借用されているため、コンパイルできません。 bのprintln!ステートメントをcを導入するスコープの前に移動して、コードをコンパイル出来るようにします。- この変更後、コンパイラは c を通じたa の可変参照よりも前にしかbが使われていないことを認識します。これは「ノンレキシカル ライフタイム(“non-lexical lifetimes”)」と呼ばれる借用チェッカーの機能です。
- 排他参照制約は非常に強力です。Rust はこの制約を使用して、データへの競合が発生しないようにするとともに、コードを最適化しています。たとえば、共有参照を通して得られる値は、その参照が存続する間、安全にレジスタにキャッシュすることが出来ます
- 借用チェッカーは、構造体内の異なるフィールドへの排他参照を同時に取得するなど、多くの一般的なパターンに対応するように設計されています。しかし、状況によっては借用チェッカーがコードを正しく理解できず、「借用チェッカーとの戦い」に発展することが多くあります。
Borrow Errors
As a concrete example of how these borrowing rules prevent memory errors, consider the case of modifying a collection while there are references to its elements:
fn main() {
    let mut vec = vec![1, 2, 3, 4, 5];
    let elem = &vec[2];
    vec.push(6);
    println!("{elem}");
}
Similarly, consider the case of iterator invalidation:
fn main() {
    let mut vec = vec![1, 2, 3, 4, 5];
    for elem in &vec {
        vec.push(elem * 2);
    }
}
- In both of these cases, modifying the collection by pushing new elements into it can potentially invalidate existing references to the collection’s elements if the collection has to reallocate.
内部可変性
場合によっては、共有(読み取り専用)参照の背後にあるデータを変更する必要があります。たとえば、共有データ構造に内部キャッシュがあり、そのキャッシュを読み取り専用メソッドから更新する必要がある場合があります。
「内部可変性」パターンは、共有参照を通した排他的(可変)アクセスを可能にします。標準ライブラリには、これを安全に行うための方法がいくつか用意されており、通常はランタイム チェックを実行することで安全性を確保します。
Cell
Cell wraps a value and allows getting or setting the value using only a shared reference to the Cell. However, it does not allow any references to the inner value. Since there are no references, borrowing rules cannot be broken.
use std::cell::Cell;

fn main() {
    // Note that `cell` is NOT declared as mutable.
    let cell = Cell::new(5);

    cell.set(123);
    println!("{}", cell.get());
}
RefCell
RefCell allows accessing and mutating a wrapped value by providing alternative types Ref and RefMut that emulate &T/&mut T without actually being Rust references.
These types perform dynamic checks using a counter in the RefCell to prevent existence of a RefMut alongside another Ref/RefMut.
By implementing Deref (and DerefMut for RefMut), these types allow calling methods on the inner value without allowing references to escape.
use std::cell::RefCell;

fn main() {
    // Note that `cell` is NOT declared as mutable.
    let cell = RefCell::new(5);

    {
        let mut cell_ref = cell.borrow_mut();
        *cell_ref = 123;

        // This triggers an error at runtime.
        // let other = cell.borrow();
        // println!("{}", *other);
    }

    println!("{cell:?}");
}
このスライドで重要なのは、Rust には、共有参照の背後にあるデータを変更する安全な方法が用意されているということです。安全性を確保するにはさまざまな方法がありますが、ここでは RefCell と Cell を取り上げます。
-
RefCellは、ランタイム チェックとともに Rust の通常の借用ルール(複数の共有参照または単一の排他参照)を適用します。この場合、すべての借用は非常に短く、重複しないため、チェックは常に成功します。- The extra block in the
RefCellexample is to end the borrow created by the call toborrow_mutbefore we print the cell. Trying to print a borrowedRefCelljust shows the message"{borrowed}".
- The extra block in the
-
Cellは安全性を確保するためのよりシンプルな手段であり、&selfを受け取るsetメソッドを備えています。ランタイム チェックは必要ありませんが、値を移動する必要があり、それによってコストが発生することがあります。 -
Both
RefCellandCellare!Sync, which means&RefCelland&Cellcan’t be passed between threads. This prevents two threads trying to access the cell at once.
演習: 健康に関する統計
健康管理システムの実装の一環として、ユーザーの健康に関する統計情報を追跡する必要があります。
impl ブロックのスタブ関数と、User 構造体の定義がある状態から開始します。User 構造体の impl ブロックにおいてスタブ化された関数を実装することです。
以下のコードを https://play.rust-lang.org/ にコピーし、実体がないメソッドの中身を実装します。
// TODO: 実装が完了したら、これを削除します。
#![allow(unused_variables, dead_code)]


#![allow(dead_code)]
pub struct User {
    name: String,
    age: u32,
    height: f32,
    visit_count: usize,
    last_blood_pressure: Option<(u32, u32)>,
}

pub struct Measurements {
    height: f32,
    blood_pressure: (u32, u32),
}

pub struct HealthReport<'a> {
    patient_name: &'a str,
    visit_count: u32,
    height_change: f32,
    blood_pressure_change: Option<(i32, i32)>,
}

impl User {
    pub fn new(name: String, age: u32, height: f32) -> Self {
        Self { name, age, height, visit_count: 0, last_blood_pressure: None }
    }

    pub fn visit_doctor(&mut self, measurements: Measurements) -> HealthReport {
        todo!("Update a user's statistics based on measurements from a visit to the doctor")
    }
}

fn main() {
    let bob = User::new(String::from("Bob"), 32, 155.2);
    println!("I'm {} and my age is {}", bob.name, bob.age);
}

#[test]
fn test_visit() {
    let mut bob = User::new(String::from("Bob"), 32, 155.2);
    assert_eq!(bob.visit_count, 0);
    let report =
        bob.visit_doctor(Measurements { height: 156.1, blood_pressure: (120, 80) });
    assert_eq!(report.patient_name, "Bob");
    assert_eq!(report.visit_count, 1);
    assert_eq!(report.blood_pressure_change, None);
    assert!((report.height_change - 0.9).abs() < 0.00001);

    let report =
        bob.visit_doctor(Measurements { height: 156.1, blood_pressure: (115, 76) });

    assert_eq!(report.visit_count, 2);
    assert_eq!(report.blood_pressure_change, Some((-5, -4)));
    assert_eq!(report.height_change, 0.0);
}
解答
#![allow(dead_code)]
pub struct User {
    name: String,
    age: u32,
    height: f32,
    visit_count: usize,
    last_blood_pressure: Option<(u32, u32)>,
}

pub struct Measurements {
    height: f32,
    blood_pressure: (u32, u32),
}

pub struct HealthReport<'a> {
    patient_name: &'a str,
    visit_count: u32,
    height_change: f32,
    blood_pressure_change: Option<(i32, i32)>,
}

impl User {
    pub fn new(name: String, age: u32, height: f32) -> Self {
        Self { name, age, height, visit_count: 0, last_blood_pressure: None }
    }

    pub fn visit_doctor(&mut self, measurements: Measurements) -> HealthReport {
        self.visit_count += 1;
        let bp = measurements.blood_pressure;
        let report = HealthReport {
            patient_name: &self.name,
            visit_count: self.visit_count as u32,
            height_change: measurements.height - self.height,
            blood_pressure_change: match self.last_blood_pressure {
                Some(lbp) => {
                    Some((bp.0 as i32 - lbp.0 as i32, bp.1 as i32 - lbp.1 as i32))
                }
                None => None,
            },
        };
        self.height = measurements.height;
        self.last_blood_pressure = Some(bp);
        report
    }
}

fn main() {
    let bob = User::new(String::from("Bob"), 32, 155.2);
    println!("I'm {} and my age is {}", bob.name, bob.age);
}

#[test]
fn test_visit() {
    let mut bob = User::new(String::from("Bob"), 32, 155.2);
    assert_eq!(bob.visit_count, 0);
    let report =
        bob.visit_doctor(Measurements { height: 156.1, blood_pressure: (120, 80) });
    assert_eq!(report.patient_name, "Bob");
    assert_eq!(report.visit_count, 1);
    assert_eq!(report.blood_pressure_change, None);
    assert!((report.height_change - 0.9).abs() < 0.00001);

    let report =
        bob.visit_doctor(Measurements { height: 156.1, blood_pressure: (115, 76) });

    assert_eq!(report.visit_count, 2);
    assert_eq!(report.blood_pressure_change, Some((-5, -4)));
    assert_eq!(report.height_change, 0.0);
}
ライフタイム
This segment should take about 50 minutes. It contains:
| Slide | Duration |
|---|---|
| 関数とライフタイム | 10 minutes |
| ライフタイムの省略 | 5 minutes |
| 構造体のライフタイム | 5 minutes |
| 演習: Protobufの解析 | 30 minutes |
関数とライフタイム
参照にはライフタイムがあり、これは参照する値よりも「長く存続」してはなりません。これは借用チェッカーによって検証されます。
これまで見てきたとおり、ライフタイムは暗黙に扱えますが、&'a Point、&'document str のように明示的に指定することもできます。ライフタイムは ' で始まり、'a が一般的なデフォルト名です。&'a Point は、「少なくともライフタイム a の間は有効な、借用した Point」とと解釈します。
ライフタイムは常にコンパイラによって推測されます。自分でライフタイムを割り当てることはできません。明示的なライフタイム アノテーションを使用すると、あいまいなところに制約を課すことができます。それに対し、コンパイラはその制約を満たすライフタイムを設定できることを検証します。
関数に値を渡し、関数から値を返すことを考慮する場合、ライフタイムはより複雑になります。
#[derive(Debug)]
struct Point(i32, i32);

fn left_most(p1: &Point, p2: &Point) -> &Point {
    if p1.0 < p2.0 {
        p1
    } else {
        p2
    }
}

fn main() {
    let p1: Point = Point(10, 10);
    let p2: Point = Point(20, 20);
    let p3 = left_most(&p1, &p2); // p3 のライフタイムは?
    println!("p3: {p3:?}");
}
この例では、コンパイラは p3 のライフライムを推測するこが出来ませんん。関数本体の内部を見ると、p3 のライフタイムは p1 と p2 のいずれか短いしかし想定できることがわかります。ただし、型と同様に、Rust では関数の引数や戻り値にライフタイムの明示的なアノテーションが必要です。
left_most に 'a を適切に追加します。
fn left_most<'a>(p1: &'a Point, p2: &'a Point) -> &'a Point {これは、「p1 と p2 の両方が 'a より長く存続すると、戻り値は少なくとも 'a の間存続する」という意味になります。
一般的なケースでは、次のスライドで説明するようにライフタイムを省略できます。
関数とライフタイム
関数の引数や戻り値のライフタイムは完全に指定する必要がありますが、Rust ではほとんどの場合、いくつかの簡単なルールにより、ライフタイムを省略できます。これは推論ではなく、構文の省略形にすぎません。
- ライフタイム アノテーションが付いていない各引数には、1 つのライフタイムが与えられます。
- 引数のライフタイムが 1 つしかない場合、アノテーションのない戻り値すべてにそのライフタイムが与えられます。
- 引数のライフタイムが複数あり、最初のライフタイムが
selfである場合、アノテーションのない戻り値すべてにそのライフタイムが与えられます。
#[derive(Debug)]
struct Point(i32, i32);

fn cab_distance(p1: &Point, p2: &Point) -> i32 {
    (p1.0 - p2.0).abs() + (p1.1 - p2.1).abs()
}

fn nearest<'a>(points: &'a [Point], query: &Point) -> Option<&'a Point> {
    let mut nearest = None;
    for p in points {
        if let Some((_, nearest_dist)) = nearest {
            let dist = cab_distance(p, query);
            if dist < nearest_dist {
                nearest = Some((p, dist));
            }
        } else {
            nearest = Some((p, cab_distance(p, query)));
        };
    }
    nearest.map(|(p, _)| p)
}

fn main() {
    let points = &[Point(1, 0), Point(1, 0), Point(-1, 0), Point(0, -1)];
    println!("{:?}", nearest(points, &Point(0, 2)));
}
この例では、cab_distance に関するライフタイムの記述は省略されています。
nearest 関数は、明示的なアノテーションを必要とする複数の参照を引数に含む関数のもう一つの例です。
返されるライフタイムについて嘘のアノテーションを付けるようにシグネチャを調整してみましょう。
fn nearest<'a, 'q>(points: &'a [Point], query: &'q Point) -> Option<&'q Point> {そうするとコンパイルが通らなくなります。これは、すなわち、コンパイラがアノテーションの妥当性をチェックしているということを示すものです。ただし、これは生のポインタ(安全ではない)には当てはまりません。アンセーフRustを使用する場合に、これはよくあるエラーの原因となっています。
ライフタイムをどのような場合に使うべきか、受講者から質問を受けるかもしれません。Rust の借用では常にライフタイムを使用します。ほとんどの場合、省略や型推論 により、ライフタイムを記述する必要はありません。より複雑なケースでは、ライフタイム アノテーションを使用することであいまいさを解決できます。多くの場合、特にプロトタイピングでは、必要に応じて値をクローニングして所有データを処理する方が簡単です。
データ構造とライフタイム
データ型が借用データを内部に保持する場合、ライフタイムアノテーションを付ける必要があります。
#[derive(Debug)]
struct Highlight<'doc>(&'doc str);

fn erase(text: String) {
    println!("Bye {text}!");
}

fn main() {
    let text = String::from("The quick brown fox jumps over the lazy dog.");
    let fox = Highlight(&text[4..19]);
    let dog = Highlight(&text[35..43]);
    // 消去(テキスト);
    println!("{fox:?}");
    println!("{dog:?}");
}
- 上記の例では、
Highlightのアノテーションにより、内包される&strの参照先のデータは、少なくともそのデータを使用するHighlightのインスタンスが存在する限り存続しなければならなくなります。 fox(またはdog)のライフタイムが終了する前にtextが使用されると、借用チェッカーはエラーをスローします。- 消費したデータが含まれる型では、ユーザーは元のデータを保持せざるを得なくなります。これは軽量のビューを作成する場合に便利ですが、一般的には使いにくくなります。
- 可能であれば、データ構造がデータを直接所有できるようにします。
- 内部に複数の参照がある構造体には、複数のライフタイム アノテーションが含まれる場合があります。これが必要になるのは、構造体自体のライフタイムだけでなく、参照同士のライフタイムの関係を記述する必要がある場合です。これは非常に高度なユースケースです。
演習: Protobufの解析
この演習では、protobuf バイナリ エンコード用のパーサーを作成します。見かけよりも簡単ですので、心配はいりません。これは、データのスライスを渡す一般的な解析パターンを示しています。基になるデータ自体がコピーされることはありません。
protobuf メッセージを完全に解析するには、フィールド番号でインデックス付けされたフィールドの型を知る必要があります。これは通常、proto ファイルで提供されます。この演習では、フィールドごとに呼び出される関数の match ステートメントに、その情報をエンコードします。
次の proto を使用します。
message PhoneNumber {
  optional string number = 1;
  optional string type = 2;
}

message Person {
  optional string name = 1;
  optional int32 id = 2;
  repeated PhoneNumber phones = 3;
}
proto メッセージは、連続するフィールドとしてエンコードされます。それぞれが後ろに値を伴う「タグ」として実装されます。タグにはフィールド番号(例: Person メッセージの id フィールドには 2)と、バイト ストリームからペイロードがどのように決定されるかを定義するワイヤータイプが含まれます。
タグを含む整数は、VARINT と呼ばれる可変長エンコードで表されます。幸いにも、parse_varint は以下ですでに定義されています。また、このコードでは、Person フィールドと PhoneNumber フィールドを処理し、メッセージを解析してこれらのコールバックに対する一連の呼び出しに変換するコールバックも定義しています。
残る作業は、parse_field 関数と、Person および PhoneNumber の ProtoMessage トレイトを実装するだけです。
/// ワイヤー上で見えるワイヤータイプ。
enum WireType {
    /// Varint WireType は、値が単一の VARINT であることを示します。
    Varint,
    /// The I64 WireType indicates that the value is precisely 8 bytes in
    /// little-endian order containing a 64-bit signed integer or double type.
    //I64,  -- not needed for this exercise
    /// The Len WireType indicates that the value is a length represented as a
    /// VARINT followed by exactly that number of bytes.
    Len,
    // The I32 WireType indicates that the value is precisely 4 bytes in
    // little-endian order containing a 32-bit signed integer or float type.
    //I32,  -- not needed for this exercise
}

#[derive(Debug)]
/// ワイヤータイプに基づいて型指定されたフィールドの値。
enum FieldValue<'a> {
    Varint(u64),
    //I64(i64)、  -- この演習では不要
    Len(&'a [u8]),
    //I32(i32),  -- not needed for this exercise
}

#[derive(Debug)]
/// フィールド番号とその値を含むフィールド。
struct Field<'a> {
    field_num: u64,
    value: FieldValue<'a>,
}

trait ProtoMessage<'a>: Default {
    fn add_field(&mut self, field: Field<'a>);
}

impl From<u64> for WireType {
    fn from(value: u64) -> Self {
        match value {
            0 => WireType::Varint,
            //1 => WireType::I64、  -- この演習では不要
            2 => WireType::Len,
            //5 => WireType::I32,  -- not needed for this exercise
            _ => panic!("Invalid wire type: {value}"),
        }
    }
}

impl<'a> FieldValue<'a> {
    fn as_str(&self) -> &'a str {
        let FieldValue::Len(data) = self else {
            panic!("Expected string to be a `Len` field");
        };
        std::str::from_utf8(data).expect("Invalid string")
    }

    fn as_bytes(&self) -> &'a [u8] {
        let FieldValue::Len(data) = self else {
            panic!("Expected bytes to be a `Len` field");
        };
        data
    }

    fn as_u64(&self) -> u64 {
        let FieldValue::Varint(value) = self else {
            panic!("Expected `u64` to be a `Varint` field");
        };
        *value
    }
}

/// VARINT を解析し、解析した値と残りのバイトを返します。
fn parse_varint(data: &[u8]) -> (u64, &[u8]) {
    for i in 0..7 {
        let Some(b) = data.get(i) else {
            panic!("Not enough bytes for varint");
        };
        if b & 0x80 == 0 {
            // これは VARINT の最後のバイトであるため、
            // u64 に変換して返します。
            let mut value = 0u64;
            for b in data[..=i].iter().rev() {
                value = (value << 7) | (b & 0x7f) as u64;
            }
            return (value, &data[i + 1..]);
        }
    }

    // 7 バイトを超える値は無効です。
    panic!("Too many bytes for varint");
}

/// タグをフィールド番号と WireType に変換します。
fn unpack_tag(tag: u64) -> (u64, WireType) {
    let field_num = tag >> 3;
    let wire_type = WireType::from(tag & 0x7);
    (field_num, wire_type)
}


/// フィールドを解析して残りのバイトを返します。
fn parse_field(data: &[u8]) -> (Field, &[u8]) {
    let (tag, remainder) = parse_varint(data);
    let (field_num, wire_type) = unpack_tag(tag);
    let (fieldvalue, remainder) = match wire_type {
        _ => todo!("ワイヤータイプに応じて、フィールドを構築し、必要な量のバイトを消費します。")
    };
    todo!("フィールドと、未消費のバイトを返します。")
}

/// 指定されたデータ内のメッセージを解析し、メッセージのフィールドごとに
/// `T::add_field` を呼び出します。
///
/// 入力全体が消費されます。
fn parse_message<'a, T: ProtoMessage<'a>>(mut data: &'a [u8]) -> T {
    let mut result = T::default();
    while !data.is_empty() {
        let parsed = parse_field(data);
        result.add_field(parsed.0);
        data = parsed.1;
    }
    result
}

#[derive(Debug, Default)]
struct PhoneNumber<'a> {
    number: &'a str,
    type_: &'a str,
}

#[derive(Debug, Default)]
struct Person<'a> {
    name: &'a str,
    id: u64,
    phone: Vec<PhoneNumber<'a>>,
}

// TODO: Person と PhoneNumber の ProtoMessage を実装します。

fn main() {
    let person: Person = parse_message(&[
        0x0a, 0x07, 0x6d, 0x61, 0x78, 0x77, 0x65, 0x6c, 0x6c, 0x10, 0x2a, 0x1a,
        0x16, 0x0a, 0x0e, 0x2b, 0x31, 0x32, 0x30, 0x32, 0x2d, 0x35, 0x35, 0x35,
        0x2d, 0x31, 0x32, 0x31, 0x32, 0x12, 0x04, 0x68, 0x6f, 0x6d, 0x65, 0x1a,
        0x18, 0x0a, 0x0e, 0x2b, 0x31, 0x38, 0x30, 0x30, 0x2d, 0x38, 0x36, 0x37,
        0x2d, 0x35, 0x33, 0x30, 0x38, 0x12, 0x06, 0x6d, 0x6f, 0x62, 0x69, 0x6c,
        0x65,
    ]);
    println!("{:#?}", person);
}
- In this exercise there are various cases where protobuf parsing might fail, e.g. if you try to parse an
i32when there are fewer than 4 bytes left in the data buffer. In normal Rust code we’d handle this with theResultenum, but for simplicity in this exercise we panic if any errors are encountered. On day 4 we’ll cover error handling in Rust in more detail.
解答
/// ワイヤー上で見えるワイヤータイプ。
enum WireType {
    /// Varint WireType は、値が単一の VARINT であることを示します。
    Varint,
    /// The I64 WireType indicates that the value is precisely 8 bytes in
    /// little-endian order containing a 64-bit signed integer or double type.
    //I64,  -- not needed for this exercise
    /// The Len WireType indicates that the value is a length represented as a
    /// VARINT followed by exactly that number of bytes.
    Len,
    // The I32 WireType indicates that the value is precisely 4 bytes in
    // little-endian order containing a 32-bit signed integer or float type.
    //I32,  -- not needed for this exercise
}

#[derive(Debug)]
/// ワイヤータイプに基づいて型指定されたフィールドの値。
enum FieldValue<'a> {
    Varint(u64),
    //I64(i64)、  -- この演習では不要
    Len(&'a [u8]),
    //I32(i32),  -- not needed for this exercise
}

#[derive(Debug)]
/// フィールド番号とその値を含むフィールド。
struct Field<'a> {
    field_num: u64,
    value: FieldValue<'a>,
}

trait ProtoMessage<'a>: Default {
    fn add_field(&mut self, field: Field<'a>);
}

impl From<u64> for WireType {
    fn from(value: u64) -> Self {
        match value {
            0 => WireType::Varint,
            //1 => WireType::I64、  -- この演習では不要
            2 => WireType::Len,
            //5 => WireType::I32,  -- not needed for this exercise
            _ => panic!("Invalid wire type: {value}"),
        }
    }
}

impl<'a> FieldValue<'a> {
    fn as_str(&self) -> &'a str {
        let FieldValue::Len(data) = self else {
            panic!("Expected string to be a `Len` field");
        };
        std::str::from_utf8(data).expect("Invalid string")
    }

    fn as_bytes(&self) -> &'a [u8] {
        let FieldValue::Len(data) = self else {
            panic!("Expected bytes to be a `Len` field");
        };
        data
    }

    fn as_u64(&self) -> u64 {
        let FieldValue::Varint(value) = self else {
            panic!("Expected `u64` to be a `Varint` field");
        };
        *value
    }
}

/// VARINT を解析し、解析した値と残りのバイトを返します。
fn parse_varint(data: &[u8]) -> (u64, &[u8]) {
    for i in 0..7 {
        let Some(b) = data.get(i) else {
            panic!("Not enough bytes for varint");
        };
        if b & 0x80 == 0 {
            // これは VARINT の最後のバイトであるため、
            // u64 に変換して返します。
            let mut value = 0u64;
            for b in data[..=i].iter().rev() {
                value = (value << 7) | (b & 0x7f) as u64;
            }
            return (value, &data[i + 1..]);
        }
    }

    // 7 バイトを超える値は無効です。
    panic!("Too many bytes for varint");
}

/// タグをフィールド番号と WireType に変換します。
fn unpack_tag(tag: u64) -> (u64, WireType) {
    let field_num = tag >> 3;
    let wire_type = WireType::from(tag & 0x7);
    (field_num, wire_type)
}

/// フィールドを解析して残りのバイトを返します。
fn parse_field(data: &[u8]) -> (Field, &[u8]) {
    let (tag, remainder) = parse_varint(data);
    let (field_num, wire_type) = unpack_tag(tag);
    let (fieldvalue, remainder) = match wire_type {
        WireType::Varint => {
            let (value, remainder) = parse_varint(remainder);
            (FieldValue::Varint(value), remainder)
        }
        WireType::Len => {
            let (len, remainder) = parse_varint(remainder);
            let len: usize = len.try_into().expect("len not a valid `usize`");
            if remainder.len() < len {
                panic!("Unexpected EOF");
            }
            let (value, remainder) = remainder.split_at(len);
            (FieldValue::Len(value), remainder)
        }
    };
    (Field { field_num, value: fieldvalue }, remainder)
}

/// 指定されたデータ内のメッセージを解析し、メッセージのフィールドごとに
/// `T::add_field` を呼び出します。
///
/// 入力全体が消費されます。
fn parse_message<'a, T: ProtoMessage<'a>>(mut data: &'a [u8]) -> T {
    let mut result = T::default();
    while !data.is_empty() {
        let parsed = parse_field(data);
        result.add_field(parsed.0);
        data = parsed.1;
    }
    result
}

#[derive(PartialEq)]
#[derive(Debug, Default)]
struct PhoneNumber<'a> {
    number: &'a str,
    type_: &'a str,
}

#[derive(PartialEq)]
#[derive(Debug, Default)]
struct Person<'a> {
    name: &'a str,
    id: u64,
    phone: Vec<PhoneNumber<'a>>,
}

impl<'a> ProtoMessage<'a> for Person<'a> {
    fn add_field(&mut self, field: Field<'a>) {
        match field.field_num {
            1 => self.name = field.value.as_str(),
            2 => self.id = field.value.as_u64(),
            3 => self.phone.push(parse_message(field.value.as_bytes())),
            _ => {} // それ以外をすべてスキップ
        }
    }
}

impl<'a> ProtoMessage<'a> for PhoneNumber<'a> {
    fn add_field(&mut self, field: Field<'a>) {
        match field.field_num {
            1 => self.number = field.value.as_str(),
            2 => self.type_ = field.value.as_str(),
            _ => {} // それ以外をすべてスキップ
        }
    }
}

fn main() {
    let person: Person = parse_message(&[
        0x0a, 0x07, 0x6d, 0x61, 0x78, 0x77, 0x65, 0x6c, 0x6c, 0x10, 0x2a, 0x1a,
        0x16, 0x0a, 0x0e, 0x2b, 0x31, 0x32, 0x30, 0x32, 0x2d, 0x35, 0x35, 0x35,
        0x2d, 0x31, 0x32, 0x31, 0x32, 0x12, 0x04, 0x68, 0x6f, 0x6d, 0x65, 0x1a,
        0x18, 0x0a, 0x0e, 0x2b, 0x31, 0x38, 0x30, 0x30, 0x2d, 0x38, 0x36, 0x37,
        0x2d, 0x35, 0x33, 0x30, 0x38, 0x12, 0x06, 0x6d, 0x6f, 0x62, 0x69, 0x6c,
        0x65,
    ]);
    println!("{:#?}", person);
}

#[cfg(test)]
mod tests {
    use super::*;

    #[test]
    fn test_id() {
        let person_id: Person = parse_message(&[0x10, 0x2a]);
        assert_eq!(person_id, Person { name: "", id: 42, phone: vec![] });
    }

    #[test]
    fn test_name() {
        let person_name: Person = parse_message(&[
            0x0a, 0x0e, 0x62, 0x65, 0x61, 0x75, 0x74, 0x69, 0x66, 0x75, 0x6c, 0x20,
            0x6e, 0x61, 0x6d, 0x65,
        ]);
        assert_eq!(
            person_name,
            Person { name: "beautiful name", id: 0, phone: vec![] }
        );
    }

    #[test]
    fn test_just_person() {
        let person_name_id: Person =
            parse_message(&[0x0a, 0x04, 0x45, 0x76, 0x61, 0x6e, 0x10, 0x16]);
        assert_eq!(person_name_id, Person { name: "Evan", id: 22, phone: vec![] });
    }

    #[test]
    fn test_phone() {
        let phone: Person = parse_message(&[
            0x0a, 0x00, 0x10, 0x00, 0x1a, 0x16, 0x0a, 0x0e, 0x2b, 0x31, 0x32, 0x33,
            0x34, 0x2d, 0x37, 0x37, 0x37, 0x2d, 0x39, 0x30, 0x39, 0x30, 0x12, 0x04,
            0x68, 0x6f, 0x6d, 0x65,
        ]);
        assert_eq!(
            phone,
            Person {
                name: "",
                id: 0,
                phone: vec![PhoneNumber { number: "+1234-777-9090", type_: "home" },],
            }
        );
    }
}
4 日目のトレーニングにようこそ
本日は、Rust での大規模なソフトウェアのビルドに関連するトピックを取り上げます。
- イテレータ:
Iteratorトレイトの詳細。 - モジュールと可視性。
- Testing.
- エラー処理: パニック、
Result、try 演算子?。 - アンセーフRust: 安全な Rust では記述できない場合の回避策。
スケジュール
Including 10 minute breaks, this session should take about 2 hours and 40 minutes. It contains:
| Segment | Duration |
|---|---|
| ようこそ | 3 minutes |
| イテレータ | 45 minutes |
| モジュール | 40 minutes |
| テスト | 45 minutes |
イテレータ
This segment should take about 45 minutes. It contains:
| Slide | Duration |
|---|---|
| Iterator | 5 minutes |
| IntoIterator | 5 minutes |
| FromIterator | 5 minutes |
| 演習: イテレータのメソッドチェーン | 30 minutes |
Iterator
Iterator トレイトは、コレクション内の一連の要素に対して順番に処理を適用することを可能にします。このトレイトはnextメソッドを必要とし、それにより多くのメソッドを提供します。多くの標準ライブラリ型で Iterator が実装されていますが、自分で実装することもできます。
struct Fibonacci {
    curr: u32,
    next: u32,
}

impl Iterator for Fibonacci {
    type Item = u32;

    fn next(&mut self) -> Option<Self::Item> {
        let new_next = self.curr + self.next;
        self.curr = self.next;
        self.next = new_next;
        Some(self.curr)
    }
}

fn main() {
    let fib = Fibonacci { curr: 0, next: 1 };
    for (i, n) in fib.enumerate().take(5) {
        println!("fib({i}): {n}");
    }
}
-
Iteratorトレイトは、コレクションに対する多くの一般的な関数型プログラミング オペレーション(例:map、filter、reduceなど)を実装します。このトレイトのドキュメントにおいて、これらのすべてのオペレーションに関する説明を確認できます。Rust では、これらの関数により、同等の命令型実装と同じくらい効率的なコードが生成されます。 -
IntoIteratorは、forループを実現するためのトレイトです。コレクション型(Vec<T>など)と、それらに対する参照(&Vec<T>、&[T]など)において実装されています。また、範囲を表す型においても実装されています。for i in some_vec { .. }を使用してベクターを反復処理できるのに、some_vec.next()が存在しないのはこのためです。
IntoIterator
Iterator トレイトは、イテレータを作成した後に反復処理を行う方法を示します。関連するトレイト IntoIterator は、ある型に対するイテレータを作成する方法を定義します。これは for ループによって自動的に使用されます。
struct Grid {
    x_coords: Vec<u32>,
    y_coords: Vec<u32>,
}

impl IntoIterator for Grid {
    type Item = (u32, u32);
    type IntoIter = GridIter;
    fn into_iter(self) -> GridIter {
        GridIter { grid: self, i: 0, j: 0 }
    }
}

struct GridIter {
    grid: Grid,
    i: usize,
    j: usize,
}

impl Iterator for GridIter {
    type Item = (u32, u32);

    fn next(&mut self) -> Option<(u32, u32)> {
        if self.i >= self.grid.x_coords.len() {
            self.i = 0;
            self.j += 1;
            if self.j >= self.grid.y_coords.len() {
                return None;
            }
        }
        let res = Some((self.grid.x_coords[self.i], self.grid.y_coords[self.j]));
        self.i += 1;
        res
    }
}

fn main() {
    let grid = Grid { x_coords: vec![3, 5, 7, 9], y_coords: vec![10, 20, 30, 40] };
    for (x, y) in grid {
        println!("point = {x}, {y}");
    }
}
IntoIteratorのドキュメントをクリックしてご覧ください。IntoIterator のすべての実装で、次の 2 つの型を宣言する必要があります。
Item: 反復処理する型(i8など)。IntoIter:into_iterメソッドによって返されるIterator型。
IntoIterとItemは関連があり、イテレータはItemと同じ型を持つ必要があります。すなわち、Option<Item>を返します。
この例は、x 座標と y 座標のすべての組み合わせを反復処理しています。
main でグリッドを 2 回反復処理してみましょう。これはなぜ失敗するのでしょうか。IntoIterator::into_iter は self の所有権を取得することに着目してください。
この問題を修正するには、&Grid に IntoIterator を実装し、Grid への参照を GridIter に保存します。
標準ライブラリ型でも同じ問題が発生する可能性があります。for e in some_vector は、some_vector の所有権を取得し、そのベクターの所有要素を反復処理します。some_vector の要素への参照を反復処理するには、代わりに for e in &some_vector を使用します。
FromIterator
FromIterator を使用すると、Iterator からコレクションを作成できます。
fn main() {
    let primes = vec![2, 3, 5, 7];
    let prime_squares = primes.into_iter().map(|p| p * p).collect::<Vec<_>>();
    println!("prime_squares: {prime_squares:?}");
}
Iterator の実装
fn collect<B>(self) -> B
where
    B: FromIterator<Self::Item>,
    Self: Sized
このメソッドで B を指定するには、次の 2 つの方法があります。
- 「turbofish」を使用する場合: 例えば、上記における、
some_iterator.collect::<COLLECTION_TYPE>()。ここで使用されている_ はRustにVecの要素の方を推測させるためのものです。 - 型推論を使用する場合:
let prime_squares: Vec<_> = some_iterator.collect()。この形式を使用するように例を書き換えてください。
Vec や HashMap などに FromIterator の基本的な実装が用意されています。また、Iterator<Item = Result<V, E>> を Result<Vec<V>, E> に変換できるものなど、より特化した実装もあります。
演習: イテレータのメソッドチェーン
この演習では、複雑な計算を実装するためにIterator トレイトで提供されているメソッドをいくつかを探して使用する必要があります。
次のコードを https://play.rust-lang.org/ にコピーし、テストが通るようにしてください。イテレータ式を使用し、その結果をcollectすることで戻り値を生成します。
#![allow(unused)]
fn main() {
/// `values`において、`offset`だけ離れた要素間の差を計算します。
/// なお、`values`の末尾要素の次は先頭へ戻ることとします。
///
/// 結果の要素 `n` は `values[(n+offset)%len] - values[n]` です。
fn offset_differences(offset: usize, values: Vec<i32>) -> Vec<i32> {
    unimplemented!()
}

#[test]
fn test_offset_one() {
    assert_eq!(offset_differences(1, vec![1, 3, 5, 7]), vec![2, 2, 2, -6]);
    assert_eq!(offset_differences(1, vec![1, 3, 5]), vec![2, 2, -4]);
    assert_eq!(offset_differences(1, vec![1, 3]), vec![2, -2]);
}

#[test]
fn test_larger_offsets() {
    assert_eq!(offset_differences(2, vec![1, 3, 5, 7]), vec![4, 4, -4, -4]);
    assert_eq!(offset_differences(3, vec![1, 3, 5, 7]), vec![6, -2, -2, -2]);
    assert_eq!(offset_differences(4, vec![1, 3, 5, 7]), vec![0, 0, 0, 0]);
    assert_eq!(offset_differences(5, vec![1, 3, 5, 7]), vec![2, 2, 2, -6]);
}

#[test]
fn test_degenerate_cases() {
    assert_eq!(offset_differences(1, vec![0]), vec![0]);
    assert_eq!(offset_differences(1, vec![1]), vec![0]);
    let empty: Vec<i32> = vec![];
    assert_eq!(offset_differences(1, empty), vec![]);
}
}
解答
/// `values`において、`offset`だけ離れた要素間の差を計算します。
/// なお、`values`の末尾要素の次は先頭へ戻ることとします。
///
/// 結果の要素 `n` は `values[(n+offset)%len] - values[n]` です。
fn offset_differences(offset: usize, values: Vec<i32>) -> Vec<i32> {
    let a = (&values).into_iter();
    let b = (&values).into_iter().cycle().skip(offset);
    a.zip(b).map(|(a, b)| *b - *a).collect()
}

#[test]
fn test_offset_one() {
    assert_eq!(offset_differences(1, vec![1, 3, 5, 7]), vec![2, 2, 2, -6]);
    assert_eq!(offset_differences(1, vec![1, 3, 5]), vec![2, 2, -4]);
    assert_eq!(offset_differences(1, vec![1, 3]), vec![2, -2]);
}

#[test]
fn test_larger_offsets() {
    assert_eq!(offset_differences(2, vec![1, 3, 5, 7]), vec![4, 4, -4, -4]);
    assert_eq!(offset_differences(3, vec![1, 3, 5, 7]), vec![6, -2, -2, -2]);
    assert_eq!(offset_differences(4, vec![1, 3, 5, 7]), vec![0, 0, 0, 0]);
    assert_eq!(offset_differences(5, vec![1, 3, 5, 7]), vec![2, 2, 2, -6]);
}

#[test]
fn test_degenerate_cases() {
    assert_eq!(offset_differences(1, vec![0]), vec![0]);
    assert_eq!(offset_differences(1, vec![1]), vec![0]);
    let empty: Vec<i32> = vec![];
    assert_eq!(offset_differences(1, empty), vec![]);
}

fn main() {}
モジュール
This segment should take about 40 minutes. It contains:
| Slide | Duration |
|---|---|
| モジュール | 3 minutes |
| ファイルシステム階層 | 5 minutes |
| 可視性 | 5 minutes |
| use、super、self | 10 minutes |
| 演習: GUI ライブラリのモジュール | 15 minutes |
モジュール
impl ブロックで関数を型の名前空間に所属させる方法はすでに見てきました。
同様に、mod を使用して型と関数の名前空間を指定できます。
mod foo {
    pub fn do_something() {
        println!("In the foo module");
    }
}

mod bar {
    pub fn do_something() {
        println!("In the bar module");
    }
}

fn main() {
    foo::do_something();
    bar::do_something();
}
- パッケージ(package)は機能を提供するものであり、一つ以上のクレートをビルドする方法を記述した
Cargo.tomlファイルを含むものです。 - バイナリクレートの場合は実行可能ファイルを生成し、ライブラリクレートの場合はライブラリを生成します。
- モジュールによって構成とスコープが定義されます。このセクションではモジュールに焦点を当てます。
ファイルシステム階層
モジュールの定義内容を省略すると、Rust はそれを別のファイルで探します。
mod garden;
This tells Rust that the garden module content is found at src/garden.rs. Similarly, a garden::vegetables module can be found at src/garden/vegetables.rs.
crate ルートは以下の場所にあります。
src/lib.rs(ライブラリ クレートの場合)src/main.rs(バイナリ クレートの場合)
ファイルで定義されたモジュールに対して、「内部ドキュメント用コメント」を使用して説明を加えることもできます。これらのコメントは、それが含まれるアイテム(この場合はモジュール)に対する説明になります。
//! このモジュールは畑を実装します(パフォーマンスの高い発芽の
//! 実装を含む)。

// このモジュールから型を再エクスポートします。
pub use garden::Garden;
pub use seeds::SeedPacket;

/// 指定された種をまきます。
pub fn sow(seeds: Vec<SeedPacket>) {
    todo!()
}

/// 十分に実っている畑で作物を収穫します。
pub fn harvest(garden: &mut Garden) {
    todo!()
}
-
Rust 2018 より前では、モジュールを
module.rsではなくmodule/mod.rsに配置する必要がありました。これは 2018 以降のエディションでも依然としてサポートされています。 -
filename/mod.rsの代わりにfilename.rsが導入された主な理由は、mod.rsという名前のファイルが多くあると、それらをIDEで区別するのが難しい場合があるからです。 -
より深いネストでは、メイン モジュールがファイルであっても、フォルダを使用できます。
src/ ├── main.rs ├── top_module.rs └── top_module/ └── sub_module.rs -
Rust がモジュールを検索する場所は、コンパイラ ディレクティブで変更できます。
#[path = "some/path.rs"]
mod some_module;
これは、たとえば Go でよく行われているように、
some_module_test.rsという名前のファイルにモジュールのテストを配置する場合に便利です。
可視性
モジュールはプライバシーの境界です。
- モジュール アイテムはデフォルトでプライベートです(実装の詳細は表示されません)。
- 親アイテムと兄弟アイテムは常に見えます。
- 言い換えれば、あるアイテムがモジュール
fooから見える場合、そのアイテムはfooのすべての子孫から見えます。
mod outer {
    fn private() {
        println!("outer::private");
    }

    pub fn public() {
        println!("outer::public");
    }

    mod inner {
        fn private() {
            println!("outer::inner::private");
        }

        pub fn public() {
            println!("outer::inner::public");
            super::private();
        }
    }
}

fn main() {
    outer::public();
}
- モジュールを公開するには
pubキーワードを使用します。
また、高度な pub(...) 指定子を使用して、公開範囲を制限することもできます。
- Rust リファレンス をご覧ください。
pub(crate)の可視性を設定するのは一般的なパターンです。- それほど一般的ではありませんが、特定のパスに対して可視性を指定することが出来ます。
- どのような場合も、祖先モジュール(およびそのすべての子孫)に可視性を与える必要があります。
use、super、self
モジュールは、use を使用して別のモジュールのシンボルをスコープに取り込むことができます。次のような記述はモジュールの先頭においてよく見られます。
use std::collections::HashSet;
use std::process::abort;
パス
パスは次のように解決されます。
-
相対パスの場合:
fooまたはself::fooは、現在のモジュール内のfooを参照します。super::fooは、親モジュール内のfooを参照します。
-
絶対パスの場合:
crate::fooは、現在のクレートのルート内のfooを参照します。bar::fooは、barクレート内のfooを参照します。
-
シンボルは、より短いパスで「再エクスポート」するのが一般的です。たとえば、クレート内の最上位の
lib.rsに、以下のように記述します。mod storage; pub use storage::disk::DiskStorage; pub use storage::network::NetworkStorage;これにより、短く使いやすいパスを使用して、
DiskStorageとNetworkStorageを他のクレートで使用できるようになります。 -
ほとんどの場合、
useを指定する必要があるのはモジュール内で実際に直接使用されるアイテムのみです。ただし、あるトレイトを実装する型がすでにスコープに含まれている場合でも、そのトレイトのメソッドを呼び出すには、そのトレイトがスコープに含まれている必要があります。たとえば、Readトレイトを実装する型でread_to_stringメソッドを使用するには、use std::io::Readという記述が必要になります。 -
useステートメントにはuse std::io::*というようにワイルドカードを含めることができます。この方法は、どのアイテムがインポートされるのかが明確ではなく、時間の経過とともに変化する可能性があるため、おすすめしません。
演習: GUI ライブラリのモジュール
この演習では、小規模な GUI ライブラリ実装を再編成します。このライブラリでは、Widget トレイト、そのトレイトのいくつかの実装、main 関数を定義しています。
通常は、各型または密接に関連する型のセットを個別のモジュールに配置するので、ウィジェット タイプごとに独自のモジュールを用意する必要があります。
Cargo Setup
Rust プレイグラウンドは 1 つのファイルしかサポートしていないため、ローカル ファイル システムで Cargo プロジェクトを作成する必要があります。
cargo init gui-modules
cd gui-modules
cargo run
生成された src/main.rs を編集して mod ステートメントを追加し、src ディレクトリにファイルを追加します。
ソース
GUI ライブラリの単一モジュール実装は次のとおりです。
pub trait Widget {
    /// `self` の自然な幅。
    fn width(&self) -> usize;

    /// ウィジェットをバッファに描画します。
    fn draw_into(&self, buffer: &mut dyn std::fmt::Write);

    /// ウィジェットを標準出力に描画します。
    fn draw(&self) {
        let mut buffer = String::new();
        self.draw_into(&mut buffer);
        println!("{buffer}");
    }
}

pub struct Label {
    label: String,
}

impl Label {
    fn new(label: &str) -> Label {
        Label { label: label.to_owned() }
    }
}

pub struct Button {
    label: Label,
}

impl Button {
    fn new(label: &str) -> Button {
        Button { label: Label::new(label) }
    }
}

pub struct Window {
    title: String,
    widgets: Vec<Box<dyn Widget>>,
}

impl Window {
    fn new(title: &str) -> Window {
        Window { title: title.to_owned(), widgets: Vec::new() }
    }

    fn add_widget(&mut self, widget: Box<dyn Widget>) {
        self.widgets.push(widget);
    }

    fn inner_width(&self) -> usize {
        std::cmp::max(
            self.title.chars().count(),
            self.widgets.iter().map(|w| w.width()).max().unwrap_or(0),
        )
    }
}

impl Widget for Window {
    fn width(&self) -> usize {
        // 枠線用に 4 つのパディングを追加します。
        self.inner_width() + 4
    }

    fn draw_into(&self, buffer: &mut dyn std::fmt::Write) {
        let mut inner = String::new();
        for widget in &self.widgets {
            widget.draw_into(&mut inner);
        }

        let inner_width = self.inner_width();

        // TODO: Result<(), std::fmt::Error> を返すように draw_into を変更します。次に、.unwrap() の代わりに
        // ? 演算子を使用します。
        writeln!(buffer, "+-{:-<inner_width$}-+", "").unwrap();
        writeln!(buffer, "| {:^inner_width$} |", &self.title).unwrap();
        writeln!(buffer, "+={:=<inner_width$}=+", "").unwrap();
        for line in inner.lines() {
            writeln!(buffer, "| {:inner_width$} |", line).unwrap();
        }
        writeln!(buffer, "+-{:-<inner_width$}-+", "").unwrap();
    }
}

impl Widget for Button {
    fn width(&self) -> usize {
        self.label.width() + 8 // パディングを少し追加します。
    }

    fn draw_into(&self, buffer: &mut dyn std::fmt::Write) {
        let width = self.width();
        let mut label = String::new();
        self.label.draw_into(&mut label);

        writeln!(buffer, "+{:-<width$}+", "").unwrap();
        for line in label.lines() {
            writeln!(buffer, "|{:^width$}|", &line).unwrap();
        }
        writeln!(buffer, "+{:-<width$}+", "").unwrap();
    }
}

impl Widget for Label {
    fn width(&self) -> usize {
        self.label.lines().map(|line| line.chars().count()).max().unwrap_or(0)
    }

    fn draw_into(&self, buffer: &mut dyn std::fmt::Write) {
        writeln!(buffer, "{}", &self.label).unwrap();
    }
}

fn main() {
    let mut window = Window::new("Rust GUI Demo 1.23");
    window.add_widget(Box::new(Label::new("This is a small text GUI demo.")));
    window.add_widget(Box::new(Button::new("Click me!")));
    window.draw();
}
自分にとって自然な方法でコードを分割し、必要な mod、use、pub 宣言に慣れるよう受講者に促します。その後、どの構成が最も慣用的であるかについて話し合います。
解答
src
├── main.rs
├── widgets
│   ├── button.rs
│   ├── label.rs
│   └── window.rs
└── widgets.rs
// ---- src/widgets.rs ----
mod button;
mod label;
mod window;

pub trait Widget {
    /// `self` の自然な幅。
    fn width(&self) -> usize;

    /// ウィジェットをバッファに描画します。
    fn draw_into(&self, buffer: &mut dyn std::fmt::Write);

    /// ウィジェットを標準出力に描画します。
    fn draw(&self) {
        let mut buffer = String::new();
        self.draw_into(&mut buffer);
        println!("{buffer}");
    }
}

pub use button::Button;
pub use label::Label;
pub use window::Window;
// ---- src/widgets/label.rs ----
use super::Widget;
pub struct Label {
label: String,
}
impl Label {
pub fn new(label: &str) -> Label {
Label { label: label.to_owned() }
}
}
impl Widget for Label {
fn width(&self) -> usize {
// ANCHOR_END: Label-width
self.label.lines().map(|line| line.chars().count()).max().unwrap_or(0)
}
// ANCHOR: Label-draw_into
fn draw_into(&self, buffer: &mut dyn std::fmt::Write) {
// ANCHOR_END: Label-draw_into
writeln!(buffer, "{}", &self.label).unwrap();
}
}// ---- src/widgets/button.rs ----
use super::{Label, Widget};
pub struct Button {
label: Label,
}
impl Button {
pub fn new(label: &str) -> Button {
Button { label: Label::new(label) }
}
}
impl Widget for Button {
fn width(&self) -> usize {
// ANCHOR_END: Button-width
self.label.width() + 8 // パディングを少し追加します。
}
// ANCHOR: Button-draw_into
fn draw_into(&self, buffer: &mut dyn std::fmt::Write) {
// ANCHOR_END: Button-draw_into
let width = self.width();
let mut label = String::new();
self.label.draw_into(&mut label);
writeln!(buffer, "+{:-<width$}+", "").unwrap();
for line in label.lines() {
writeln!(buffer, "|{:^width$}|", &line).unwrap();
}
writeln!(buffer, "+{:-<width$}+", "").unwrap();
}
}// ---- src/widgets/window.rs ----
use super::Widget;
pub struct Window {
title: String,
widgets: Vec<Box<dyn Widget>>,
}
impl Window {
pub fn new(title: &str) -> Window {
Window { title: title.to_owned(), widgets: Vec::new() }
}
pub fn add_widget(&mut self, widget: Box<dyn Widget>) {
self.widgets.push(widget);
}
fn inner_width(&self) -> usize {
std::cmp::max(
self.title.chars().count(),
self.widgets.iter().map(|w| w.width()).max().unwrap_or(0),
)
}
}
impl Widget for Window {
fn width(&self) -> usize {
// ANCHOR_END: Window-width
// 枠線に 4 つのパディングを追加します。
self.inner_width() + 4
}
// ANCHOR: Window-draw_into
fn draw_into(&self, buffer: &mut dyn std::fmt::Write) {
// ANCHOR_END: Window-draw_into
let mut inner = String::new();
for widget in &self.widgets {
widget.draw_into(&mut inner);
}
let inner_width = self.inner_width();
// TODO: エラー処理について学習した後で、
// Result<(), std::fmt::Error> を返すように draw_into を変更できます。次に、ここで
// .unwrap() の代わりに ? 演算子を使用します。
writeln!(buffer, "+-{:-<inner_width$}-+", "").unwrap();
writeln!(buffer, "| {:^inner_width$} |", &self.title).unwrap();
writeln!(buffer, "+={:=<inner_width$}=+", "").unwrap();
for line in inner.lines() {
writeln!(buffer, "| {:inner_width$} |", line).unwrap();
}
writeln!(buffer, "+-{:-<inner_width$}-+", "").unwrap();
}
}// ---- src/main.rs ----
mod widgets;
use widgets::Widget;
fn main() {
let mut window = widgets::Window::new("Rust GUI Demo 1.23");
window
.add_widget(Box::new(widgets::Label::new("This is a small text GUI demo.")));
window.add_widget(Box::new(widgets::Button::new("Click me!")));
window.draw();
}テスト
This segment should take about 45 minutes. It contains:
| Slide | Duration |
|---|---|
| テストモジュール | 5 minutes |
| 他のタイプのテスト | 5 minutes |
| コンパイラの Lints と Clippy | 3 minutes |
| 演習: Luhnアルゴリズム | 30 minutes |
ユニットテスト
Rust と Cargo には、シンプルな単体テスト フレームワークが付属しています。
-
単体テストはコードのあらゆる場所に記述可能です。
-
統合テストは
tests/ディレクトリ内に記述します。
テストには #[test] のマークが付きます。多くの場合、単体テストは通常ネストされたtestsモジュールに配置され、#[cfg(test)]によりテストのビルド時にのみコンパイルされるようになります。
fn first_word(text: &str) -> &str {
    match text.find(' ') {
        Some(idx) => &text[..idx],
        None => &text,
    }
}

#[cfg(test)]
mod tests {
    use super::*;

    #[test]
    fn test_empty() {
        assert_eq!(first_word(""), "");
    }

    #[test]
    fn test_single_word() {
        assert_eq!(first_word("Hello"), "Hello");
    }

    #[test]
    fn test_multiple_words() {
        assert_eq!(first_word("Hello World"), "Hello");
    }
}- これにより、プライベート ヘルパーの単体テストを行えます。
#[cfg(test)]属性が付与されたコードはcargo testの実行時にのみ有効になります。
結果を表示するには、プレイグラウンドでテストを実行します。
他のタイプのテスト
インテグレーションテスト
ライブラリをクライアントとしてテストする場合は、統合テストを使用します。
tests/ の下に .rs ファイルを作成します。
// tests/my_library.rs
use my_library::init;

#[test]
fn test_init() {
    assert!(init().is_ok());
}
これらのテストでは、クレートの公開 API にのみアクセスできます。
ドキュメンテーションテスト
Rust には、ドキュメントのテストに関する機能が組み込まれています。
#![allow(unused)]
fn main() {
/// 指定した長さに文字列を短縮します。
///
/// ```
/// # use playground::shorten_string;
/// assert_eq!(shorten_string("Hello World", 5), "Hello");
/// assert_eq!(shorten_string("Hello World", 20), "Hello World");
/// ```
pub fn shorten_string(s: &str, length: usize) -> &str {
    &s[..std::cmp::min(length, s.len())]
}
}
///コメント内のコードブロックは、自動的に Rust コードとみなされます。- コードは
cargo testの一環としてコンパイルされ、実行されます。 - コードに
#を追加すると、ドキュメントには表示されなくなりますが、コンパイルと実行は引き続き行われます。 - Rust プレイグラウンド で上記のコードをテストします。
コンパイラの Lints と Clippy
Rust コンパイラは、読みやすいエラーおよびlintメッセージを生成します。Clippy では、さらに多くの lint がグループにまとめられており、プロジェクトごとに有効にできます。
#[deny(clippy::cast_possible_truncation)]
fn main() {
    let x = 3;
    while (x < 70000) {
        x *= 2;
    }
    println!("X probably fits in a u16, right? {}", x as u16);
}
コードサンプルを実行してエラー メッセージを確認します。ここにも lint が表示されていますが、コードのコンパイルが一度コンパイル出来ると表示されなくなります。これらの lint を表示するには、プレイグラウンド サイトに切り替えます。
lint を解決した後、プレイグラウンド サイトで clippy を実行して、Clippy の警告を表示します。Clippy には、lint に関する広範なドキュメントがあり、新しい lint(デフォルトでエラーになるリント を含む)が常に追加されています。
help: ... が付くエラーや警告は、cargo fix またはエディタを使用して修正できます。
演習: Luhnアルゴリズム
Luhn アルゴリズム は、クレジット カード番号の検証に使用されます。このアルゴリズムは文字列を入力として受け取り、以下の処理を行ってクレジット カード番号を検証します。
-
Ignore all spaces. Reject numbers with fewer than two digits.
-
右から左に見ていきながら、それぞれ2桁目の数字を 2 倍にします。数値
1234の場合、3と1を 2 倍にします。数値98765の場合、6と8を 2 倍にします。 -
桁を 2 倍にした後、結果が 9 より大きい場合はその桁を合計します。したがって、
7を 2 倍すると14になり、1 + 4 = 5になります。 -
2 倍にしていない数字と 2 倍にした数字をすべて合計します。
-
クレジット カード番号は、合計が
0で終わる場合に有効です。
The provided code provides a buggy implementation of the luhn algorithm, along with two basic unit tests that confirm that most of the algorithm is implemented correctly.
以下のコードを https://play.rust-lang.org/ にコピーし、提供された実装のバグを発見するための追加のテストを記述し、見つけたバグを修正してください。
#![allow(unused)]
fn main() {
pub fn luhn(cc_number: &str) -> bool {
    let mut sum = 0;
    let mut double = false;

    for c in cc_number.chars().rev() {
        if let Some(digit) = c.to_digit(10) {
            if double {
                let double_digit = digit * 2;
                sum +=
                    if double_digit > 9 { double_digit - 9 } else { double_digit };
            } else {
                sum += digit;
            }
            double = !double;
        } else {
            continue;
        }
    }

    sum % 10 == 0
}

#[cfg(test)]
mod test {
    use super::*;

    #[test]
    fn test_valid_cc_number() {
        assert!(luhn("4263 9826 4026 9299"));
        assert!(luhn("4539 3195 0343 6467"));
        assert!(luhn("7992 7398 713"));
    }

    #[test]
    fn test_invalid_cc_number() {
        assert!(!luhn("4223 9826 4026 9299"));
        assert!(!luhn("4539 3195 0343 6476"));
        assert!(!luhn("8273 1232 7352 0569"));
    }
}
}
解答
// これは問題に記述されているバグのあるバージョンです。
#[cfg(never)]
pub fn luhn(cc_number: &str) -> bool {
    let mut sum = 0;
    let mut double = false;

    for c in cc_number.chars().rev() {
        if let Some(digit) = c.to_digit(10) {
            if double {
                let double_digit = digit * 2;
                sum +=
                    if double_digit > 9 { double_digit - 9 } else { double_digit };
            } else {
                sum += digit;
            }
            double = !double;
        } else {
            continue;
        }
    }

    sum % 10 == 0
}

// これは解答で、以下のすべてのテストに合格します。
pub fn luhn(cc_number: &str) -> bool {
    let mut sum = 0;
    let mut double = false;
    let mut digits = 0;

    for c in cc_number.chars().rev() {
        if let Some(digit) = c.to_digit(10) {
            digits += 1;
            if double {
                let double_digit = digit * 2;
                sum +=
                    if double_digit > 9 { double_digit - 9 } else { double_digit };
            } else {
                sum += digit;
            }
            double = !double;
        } else if c.is_whitespace() {
            // New: accept whitespace.
            continue;
        } else {
            // New: reject all other characters.
            return false;
        }
    }

    // New: check that we have at least two digits
    digits >= 2 && sum % 10 == 0
}

fn main() {
    let cc_number = "1234 5678 1234 5670";
    println!(
        "Is {cc_number} a valid credit card number? {}",
        if luhn(cc_number) { "yes" } else { "no" }
    );
}

#[cfg(test)]
mod test {
    use super::*;

    #[test]
    fn test_valid_cc_number() {
        assert!(luhn("4263 9826 4026 9299"));
        assert!(luhn("4539 3195 0343 6467"));
        assert!(luhn("7992 7398 713"));
    }

    #[test]
    fn test_invalid_cc_number() {
        assert!(!luhn("4223 9826 4026 9299"));
        assert!(!luhn("4539 3195 0343 6476"));
        assert!(!luhn("8273 1232 7352 0569"));
    }

    #[test]
    fn test_non_digit_cc_number() {
        assert!(!luhn("foo"));
        assert!(!luhn("foo 0 0"));
    }

    #[test]
    fn test_empty_cc_number() {
        assert!(!luhn(""));
        assert!(!luhn(" "));
        assert!(!luhn("  "));
        assert!(!luhn("    "));
    }

    #[test]
    fn test_single_digit_cc_number() {
        assert!(!luhn("0"));
    }

    #[test]
    fn test_two_digit_cc_number() {
        assert!(luhn(" 0 0 "));
    }
}
おかえり
Including 10 minute breaks, this session should take about 2 hours and 20 minutes. It contains:
| Segment | Duration |
|---|---|
| エラー処理 | 1 hour and 5 minutes |
| Unsafe Rust | 1 hour and 5 minutes |
エラー処理
This segment should take about 1 hour and 5 minutes. It contains:
| Slide | Duration |
|---|---|
| パニック(panic) | 3 minutes |
| Result | 5 minutes |
| Try演算子 | 5 minutes |
| Try変換 | 5 minutes |
| Errorトレイト | 5 minutes |
| thiserror | 5 minutes |
| anyhow | 5 minutes |
| 演習: Result を使用した書き換え | 30 minutes |
パニック(panic)
Rust は「パニック」を使用して致命的なエラーを処理します。
実行時に致命的なエラーが発生すると、Rust はパニックをトリガーします。
fn main() {
    let v = vec![10, 20, 30];
    println!("v[100]: {}", v[100]);
}
- パニックは、回復不能なエラーや予期しないエラーに使用するためのものです。
- パニックはプログラムにバグがあることの兆候です。
- ランタイム エラー(境界チェックの失敗など)は、パニックになる場合があります。
- アサーション(
assert!など)は失敗時にパニックになります。 - 特定の目的でパニックさせてあい場合には、
panic!マクロを使用できます。
- パニックが発生すると、スタックが「アンワインド」され、関数がリターンされたかのように値がドロップされます。
- クラッシュが許容されない場合は、パニックが発生しない API(
Vec::getなど)を使用します。
デフォルトでは、パニックが発生するとスタックはアンワインドされます。アンワインドは以下のようにキャッチできます。
use std::panic;

fn main() {
    let result = panic::catch_unwind(|| "No problem here!");
    println!("{result:?}");

    let result = panic::catch_unwind(|| {
        panic!("oh no!");
    });
    println!("{result:?}");
}
- キャッチは一般的ではないため、
catch_unwindを使用して例外処理を実装しようとしないでください。 - これは、1 つのリクエストがクラッシュした場合でも実行し続ける必要があるサーバーで有用です。
- これは、
Cargo.tomlでpanic = 'abort'が設定されている場合は機能しません。
Result
Our primary mechanism for error handling in Rust is the Result enum, which we briefly saw when discussing standard library types.
use std::fs::File;
use std::io::Read;

fn main() {
    let file: Result<File, std::io::Error> = File::open("diary.txt");
    match file {
        Ok(mut file) => {
            let mut contents = String::new();
            if let Ok(bytes) = file.read_to_string(&mut contents) {
                println!("Dear diary: {contents} ({bytes} bytes)");
            } else {
                println!("Could not read file content");
            }
        }
        Err(err) => {
            println!("The diary could not be opened: {err}");
        }
    }
}
-
Resulthas two variants:Okwhich contains the success value, andErrwhich contains an error value of some kind. -
Whether or not a function can produce an error is encoded in the function’s type signature by having the function return a
Resultvalue. -
Like with
Option, there is no way to forget to handle an error: You cannot access either the success value or the error value without first pattern matching on theResultto check which variant you have. Methods likeunwrapmake it easier to write quick-and-dirty code that doesn’t do robust error handling, but means that you can always see in your source code where proper error handling is being skipped.
その他
It may be helpful to compare error handling in Rust to error handling conventions that students may be familiar with from other programming languages.
例外
-
Many languages use exceptions, e.g. C++, Java, Python.
-
In most languages with exceptions, whether or not a function can throw an exception is not visible as part of its type signature. This generally means that you can’t tell when calling a function if it may throw an exception or not.
-
Exceptions generally unwind the call stack, propagating upward until a
tryblock is reached. An error originating deep in the call stack may impact an unrelated function further up.
Error Numbers
-
Some languages have functions return an error number (or some other error value) separately from the successful return value of the function. Examples include C and Go.
-
Depending on the language it may be possible to forget to check the error value, in which case you may be accessing an uninitialized or otherwise invalid success value.
Try演算子
connection-refused や file-not-found などのランタイム エラーは Result 型で処理されますが、すべての呼び出しでこの型を照合するのは面倒な場合があります。try 演算子 ? は、呼び出し元にエラーを返すのに使用されます。これにより、一般的な以下のコードを、はるかにシンプルなコードに変換できます。
match some_expression {
    Ok(value) => value,
    Err(err) => return Err(err),
}
変換後のコード:
some_expression?この演算子を使用することで、エラー処理コードを簡素化できます。
use std::io::Read;
use std::{fs, io};

fn read_username(path: &str) -> Result<String, io::Error> {
    let username_file_result = fs::File::open(path);
    let mut username_file = match username_file_result {
        Ok(file) => file,
        Err(err) => return Err(err),
    };

    let mut username = String::new();
    match username_file.read_to_string(&mut username) {
        Ok(_) => Ok(username),
        Err(err) => Err(err),
    }
}

fn main() {
    //fs::write("config.dat", "alice").unwrap();
    let username = read_username("config.dat");
    println!("username or error: {username:?}");
}
? を使用して read_username 関数を簡素化します。
要点:
username変数は、Ok(string)またはErr(error)のいずれかになります。fs::write呼び出しを使用して、さまざまなシナリオ(ファイルがない、空のファイル、ユーザー名のあるファイルなど)をテストします。- Note that
maincan return aResult<(), E>as long as it implementsstd::process::Termination. In practice, this means thatEimplementsDebug. The executable will print theErrvariant and return a nonzero exit status on error.
Try変換
? を実際に展開すると、前述のコードよりも少し複雑なコードになります。
expression?上のコードは、以下と同じように動作します。
match expression {
    Ok(value) => value,
    Err(err)  => return Err(From::from(err)),
}
ここでの From::from 呼び出しは、エラー型を関数が返す型に変換しようとしていることを意味します。これにより、エラーを上位レベルのエラーに簡単にカプセル化できます。
例
use std::error::Error;
use std::io::Read;
use std::{fmt, fs, io};

#[derive(Debug)]
enum ReadUsernameError {
    IoError(io::Error),
    EmptyUsername(String),
}

impl Error for ReadUsernameError {}

impl fmt::Display for ReadUsernameError {
    fn fmt(&self, f: &mut fmt::Formatter) -> fmt::Result {
        match self {
            Self::IoError(e) => write!(f, "I/O error: {e}"),
            Self::EmptyUsername(path) => write!(f, "Found no username in {path}"),
        }
    }
}

impl From<io::Error> for ReadUsernameError {
    fn from(err: io::Error) -> Self {
        Self::IoError(err)
    }
}

fn read_username(path: &str) -> Result<String, ReadUsernameError> {
    let mut username = String::with_capacity(100);
    fs::File::open(path)?.read_to_string(&mut username)?;
    if username.is_empty() {
        return Err(ReadUsernameError::EmptyUsername(String::from(path)));
    }
    Ok(username)
}

fn main() {
    //std::fs::write("config.dat", "").unwrap();
    let username = read_username("config.dat");
    println!("username or error: {username:?}");
}
? 演算子は、関数の戻り値の型と互換性のある値を返す必要があります。つまり、Result の場合、エラー型に互換性がなければなりません。Result<T, ErrorOuter> を返す関数は、ErrorOuter と ErrorInner が同じ型であるか、ErrorOuter が From<ErrorInner> を実装している場合にのみ、型 Result<U, ErrorInner> の値に ? を使用できます。
特に変換が 1 か所でのみ発生する場合は、From を実装する代わりに Result::map_err を使用するのが一般的です。
Optionには互換性の要件はありません。Option<T>を返す関数は、任意のT型とU型に対して、?演算子をOption
Result を返す関数では Option に ? を使用できません。その逆も同様です。ただし、Option::ok_or は Option を Result に変換でき、Result::ok は Result を Option に変換できます。
動的なエラー型
さまざまな可能性をカバーする独自の列挙型を記述することなく、あらゆる種類のエラーを返せるようにしたい場合があります。std::error::Error トレイトを使用すると、あらゆるエラーを含めることができるトレイト オブジェクトを簡単に作成できます。
use std::error::Error;
use std::fs;
use std::io::Read;

fn read_count(path: &str) -> Result<i32, Box<dyn Error>> {
    let mut count_str = String::new();
    fs::File::open(path)?.read_to_string(&mut count_str)?;
    let count: i32 = count_str.parse()?;
    Ok(count)
}

fn main() {
    fs::write("count.dat", "1i3").unwrap();
    match read_count("count.dat") {
        Ok(count) => println!("Count: {count}"),
        Err(err) => println!("Error: {err}"),
    }
}
read_count 関数は、std::io::Error(ファイル オペレーションから)または std::num::ParseIntError(String::parse から)を返すことができます。
エラーをボックス化することでコードを節約できますが、プログラムで異なるエラーケースを異なる方法で適切に処理する機能が失われます。そのため、ライブラリの公開 API で Box<dyn Error> を使用することは通常おすすめしませんが、エラー メッセージをどこかに表示したいだけのプログラムでは適切な選択肢となりえます。
Make sure to implement the std::error::Error trait when defining a custom error type so it can be boxed.
thiserror
The thiserror crate provides macros to help avoid boilerplate when defining error types. It provides derive macros that assist in implementing From<T>, Display, and the Error trait.
use std::io::Read;
use std::{fs, io};
use thiserror::Error;

#[derive(Debug, Error)]
enum ReadUsernameError {
    #[error("I/O error: {0}")]
    IoError(#[from] io::Error),
    #[error("Found no username in {0}")]
    EmptyUsername(String),
}

fn read_username(path: &str) -> Result<String, ReadUsernameError> {
    let mut username = String::with_capacity(100);
    fs::File::open(path)?.read_to_string(&mut username)?;
    if username.is_empty() {
        return Err(ReadUsernameError::EmptyUsername(String::from(path)));
    }
    Ok(username)
}

fn main() {
    //fs::write("config.dat", "").unwrap();
    match read_username("config.dat") {
        Ok(username) => println!("Username: {username}"),
        Err(err) => println!("Error: {err:?}"),
    }
}
Error導出マクロはthiserrorによって提供されます。このマクロには、エラー型を簡潔に定義するのに役立つ属性が数多く用意されています。#[error]からのメッセージは、Displayトレイトを導出するために使用されます。- Note that the (
thiserror::)Errorderive macro, while it has the effect of implementing the (std::error::)Errortrait, is not the same this; traits and macros do not share a namespace.
anyhow
The anyhow crate provides a rich error type with support for carrying additional contextual information, which can be used to provide a semantic trace of what the program was doing leading up to the error.
This can be combined with the convenience macros from thiserror to avoid writing out trait impls explicitly for custom error types.
use anyhow::{bail, Context, Result};
use std::fs;
use std::io::Read;
use thiserror::Error;

#[derive(Clone, Debug, Eq, Error, PartialEq)]
#[error("Found no username in {0}")]
struct EmptyUsernameError(String);

fn read_username(path: &str) -> Result<String> {
    let mut username = String::with_capacity(100);
    fs::File::open(path)
        .with_context(|| format!("Failed to open {path}"))?
        .read_to_string(&mut username)
        .context("Failed to read")?;
    if username.is_empty() {
        bail!(EmptyUsernameError(path.to_string()));
    }
    Ok(username)
}

fn main() {
    //fs::write("config.dat", "").unwrap();
    match read_username("config.dat") {
        Ok(username) => println!("Username: {username}"),
        Err(err) => println!("Error: {err:?}"),
    }
}
anyhow::Errorは基本的にBox<dyn Error>のラッパーとなっています。そのため、ライブラリの公開 API としては一般的には適していませんが、アプリでは広く使用されています。anyhow::Result<V>はResult<V, anyhow::Error>の型エイリアスです。- Functionality provided by
anyhow::Errormay be familiar to Go developers, as it provides similar behavior to the Goerrortype andResult<T, anyhow::Error>is much like a Go(T, error)(with the convention that only one element of the pair is meaningful). anyhow::Contextは、標準のResult型とOption型に実装されたトレイトです。これらの型で.context()と.with_context()を有効にするには、use anyhow::Contextが必要です。
その他
anyhow::Errorhas support for downcasting, much likestd::any::Any; the specific error type stored inside can be extracted for examination if desired withError::downcast.
演習: Result を使用した書き換え
The following implements a very simple parser for an expression language. However, it handles errors by panicking. Rewrite it to instead use idiomatic error handling and propagate errors to a return from main. Feel free to use thiserror and anyhow.
Hint: start by fixing error handling in the
parsefunction. Once that is working correctly, updateTokenizerto implementIterator<Item=Result<Token, TokenizerError>>and handle that in the parser.
use std::iter::Peekable;
use std::str::Chars;

/// 算術演算子。
#[derive(Debug, PartialEq, Clone, Copy)]
enum Op {
    Add,
    Sub,
}

/// 式言語のトークン
#[derive(Debug, PartialEq)]
enum Token {
    Number(String),
    Identifier(String),
    Operator(Op),
}

/// 式言語の式
#[derive(Debug, PartialEq)]
enum Expression {
    /// 変数への参照。
    Var(String),
    /// リテラル数値。
    Number(u32),
    /// バイナリ演算。
    Operation(Box<Expression>, Op, Box<Expression>),
}

fn tokenize(input: &str) -> Tokenizer {
    return Tokenizer(input.chars().peekable());
}

struct Tokenizer<'a>(Peekable<Chars<'a>>);

impl<'a> Tokenizer<'a> {
    fn collect_number(&mut self, first_char: char) -> Token {
        let mut num = String::from(first_char);
        while let Some(&c @ '0'..='9') = self.0.peek() {
            num.push(c);
            self.0.next();
        }
        Token::Number(num)
    }

    fn collect_identifier(&mut self, first_char: char) -> Token {
        let mut ident = String::from(first_char);
        while let Some(&c @ ('a'..='z' | '_' | '0'..='9')) = self.0.peek() {
            ident.push(c);
            self.0.next();
        }
        Token::Identifier(ident)
    }
}

impl<'a> Iterator for Tokenizer<'a> {
    type Item = Token;

    fn next(&mut self) -> Option<Token> {
        let c = self.0.next()?;
        match c {
            '0'..='9' => Some(self.collect_number(c)),
            'a'..='z' => Some(self.collect_identifier(c)),
            '+' => Some(Token::Operator(Op::Add)),
            '-' => Some(Token::Operator(Op::Sub)),
            _ => panic!("Unexpected character {c}"),
        }
    }
}

fn parse(input: &str) -> Expression {
    let mut tokens = tokenize(input);

    fn parse_expr<'a>(tokens: &mut Tokenizer<'a>) -> Expression {
        let Some(tok) = tokens.next() else {
            panic!("Unexpected end of input");
        };
        let expr = match tok {
            Token::Number(num) => {
                let v = num.parse().expect("Invalid 32-bit integer");
                Expression::Number(v)
            }
            Token::Identifier(ident) => Expression::Var(ident),
            Token::Operator(_) => panic!("Unexpected token {tok:?}"),
        };
        // バイナリ演算が存在する場合はパースします。
        match tokens.next() {
            None => expr,
            Some(Token::Operator(op)) => Expression::Operation(
                Box::new(expr),
                op,
                Box::new(parse_expr(tokens)),
            ),
            Some(tok) => panic!("Unexpected token {tok:?}"),
        }
    }

    parse_expr(&mut tokens)
}

fn main() {
    let expr = parse("10+foo+20-30");
    println!("{expr:?}");
}
解答
use thiserror::Error;
use std::iter::Peekable;
use std::str::Chars;

/// 算術演算子。
#[derive(Debug, PartialEq, Clone, Copy)]
enum Op {
    Add,
    Sub,
}

/// 式言語のトークン
#[derive(Debug, PartialEq)]
enum Token {
    Number(String),
    Identifier(String),
    Operator(Op),
}

/// 式言語の式
#[derive(Debug, PartialEq)]
enum Expression {
    /// 変数への参照。
    Var(String),
    /// リテラル数値。
    Number(u32),
    /// バイナリ演算。
    Operation(Box<Expression>, Op, Box<Expression>),
}

fn tokenize(input: &str) -> Tokenizer {
    return Tokenizer(input.chars().peekable());
}

#[derive(Debug, Error)]
enum TokenizerError {
    #[error("Unexpected character '{0}' in input")]
    UnexpectedCharacter(char),
}

struct Tokenizer<'a>(Peekable<Chars<'a>>);

impl<'a> Tokenizer<'a> {
    fn collect_number(&mut self, first_char: char) -> Token {
        let mut num = String::from(first_char);
        while let Some(&c @ '0'..='9') = self.0.peek() {
            num.push(c);
            self.0.next();
        }
        Token::Number(num)
    }

    fn collect_identifier(&mut self, first_char: char) -> Token {
        let mut ident = String::from(first_char);
        while let Some(&c @ ('a'..='z' | '_' | '0'..='9')) = self.0.peek() {
            ident.push(c);
            self.0.next();
        }
        Token::Identifier(ident)
    }
}

impl<'a> Iterator for Tokenizer<'a> {
    type Item = Result<Token, TokenizerError>;

    fn next(&mut self) -> Option<Result<Token, TokenizerError>> {
        let c = self.0.next()?;
        match c {
            '0'..='9' => Some(Ok(self.collect_number(c))),
            'a'..='z' | '_' => Some(Ok(self.collect_identifier(c))),
            '+' => Some(Ok(Token::Operator(Op::Add))),
            '-' => Some(Ok(Token::Operator(Op::Sub))),
            _ => Some(Err(TokenizerError::UnexpectedCharacter(c))),
        }
    }
}

#[derive(Debug, Error)]
enum ParserError {
    #[error("Tokenizer error: {0}")]
    TokenizerError(#[from] TokenizerError),
    #[error("Unexpected end of input")]
    UnexpectedEOF,
    #[error("Unexpected token {0:?}")]
    UnexpectedToken(Token),
    #[error("Invalid number")]
    InvalidNumber(#[from] std::num::ParseIntError),
}

fn parse(input: &str) -> Result<Expression, ParserError> {
    let mut tokens = tokenize(input);

    fn parse_expr<'a>(
        tokens: &mut Tokenizer<'a>,
    ) -> Result<Expression, ParserError> {
        let tok = tokens.next().ok_or(ParserError::UnexpectedEOF)??;
        let expr = match tok {
            Token::Number(num) => {
                let v = num.parse()?;
                Expression::Number(v)
            }
            Token::Identifier(ident) => Expression::Var(ident),
            Token::Operator(_) => return Err(ParserError::UnexpectedToken(tok)),
        };
        // バイナリ演算が存在する場合はパースします。
        Ok(match tokens.next() {
            None => expr,
            Some(Ok(Token::Operator(op))) => Expression::Operation(
                Box::new(expr),
                op,
                Box::new(parse_expr(tokens)?),
            ),
            Some(Err(e)) => return Err(e.into()),
            Some(Ok(tok)) => return Err(ParserError::UnexpectedToken(tok)),
        })
    }

    parse_expr(&mut tokens)
}

fn main() -> anyhow::Result<()> {
    let expr = parse("10+foo+20-30")?;
    println!("{expr:?}");
    Ok(())
}
Unsafe Rust
This segment should take about 1 hour and 5 minutes. It contains:
| Slide | Duration |
|---|---|
| アンセーフ | 5 minutes |
| 生ポインタの参照外し | 10 minutes |
| 可変なstatic変数 | 5 minutes |
| 共用体 | 5 minutes |
| Unsafe関数の呼び出し | 5 minutes |
| Unsafeなトレイトの実装 | 5 minutes |
| 演習: FFIラッパー | 30 minutes |
Unsafe Rust
Rust 言語は 2 つの部分で構成されています。
- 安全な Rust: メモリセーフで、未定義の動作は起こりえません。
- アンセーフRust: 前提条件に違反した場合、未定義の動作がトリガーされる可能性があります。
このコースでは主に安全な Rust を見てきましたが、安全でない Rust とは何かを理解しておくことが重要です。
アンセーフなコードは通常、小規模で分離されており、その正確性は慎重に文書化されている必要があります。通常は安全な抽象化レイヤでラップされています。
アンセーフRustでは、次の 5 つの新機能を利用できます。
- 生ポインタの参照外し。
- 可変の静的変数へのアクセスまたは変更。
unionフィールドへのアクセス。extern関数を含むunsafe関数の呼び出し。unsafeトレイトの実装。
次に、安全でない機能について簡単に説明します。詳しくは、Rust Book の第 19.1 章と、Rustonomicon をご覧ください。
アンセーフRustは、コードが正しくないことを意味するものではありません。デベロッパーが一部のコンパイラ安全性機能をオフにし、自分で正しいコードを記述しなければならないことを意味します。また、コンパイラがRustのメモリ安全性に関するルールを強制しなくなるということを意味します。
生ポインタの参照外し
ポインタの作成は安全ですが、参照外しには unsafe が必要です。
fn main() {
    let mut s = String::from("careful!");

    let r1 = &raw mut s;
    let r2 = r1 as *const String;

    // SAFETY: r1 and r2 were obtained from references and so are guaranteed to
    // be non-null and properly aligned, the objects underlying the references
    // from which they were obtained are live throughout the whole unsafe
    // block, and they are not accessed either through the references or
    // concurrently through any other pointers.
    unsafe {
        println!("r1 is: {}", *r1);
        *r1 = String::from("uhoh");
        println!("r2 is: {}", *r2);
    }

    // 安全でないため、NOT SAFE。このような記述をしないでください。
    /*
    let r3: &String = unsafe { &*r1 };
    drop(s);
    println!("r3 is: {}", *r3);
    */
}
unsafeブロックごとにコメントを記述し、そのブロック内のコードが行うアンセーフな操作がどのように安全性要件を満たしているのかを記述することをおすすめします(Android Rust スタイルガイドでも必須とされています)。
ポインタ参照外しの場合、これはポインタが valid でなければならないことを意味します。つまり、次のようになります。
- ポインタは null 以外でなければならないこと。
- ポインタは、(割り当てられた単一のオブジェクトの境界内で)参照外し可能でなければならない。
- オブジェクトが解放されていないこと。
- 同じロケーションに同時アクセスすることがないこと。
- 参照をキャストしてポインタを取得した場合、基になるオブジェクトが存続しなければならず、他のいかなる参照を通してもそのメモリにアクセスがないこと
ほとんどの場合、ポインタも適切にアラインされる必要があります。
“NOT SAFE“というコメントがあるところは、よくあるUBバグの例を示しています。*r1 のライフタイムは 'static であるため、r3 の型は &'static String となり、s より長く存続します。ポインタからの参照の作成には細心の注意が必要です。
可変なstatic変数
不変の静的変数は安全に読み取ることができます。
static HELLO_WORLD: &str = "Hello, world!";

fn main() {
    println!("HELLO_WORLD: {HELLO_WORLD}");
}
ただし、データ競合が発生する可能性があるため、可変静的変数の読み取りと書き込みは安全ではありません。
static mut COUNTER: u32 = 0;

fn add_to_counter(inc: u32) {
    // SAFETY: There are no other threads which could be accessing `COUNTER`.
    unsafe {
        COUNTER += inc;
    }
}

fn main() {
    add_to_counter(42);

    // SAFETY: There are no other threads which could be accessing `COUNTER`.
    unsafe {
        println!("COUNTER: {COUNTER}");
    }
}
-
このプログラムはシングルスレッドなので安全です。しかし、Rust コンパイラは保守的で、最悪の事態を想定します。
unsafeを削除すると、複数のスレッドから静的変数を変更することは未定義の動作であることを説明するメッセージがコンパイラにより表示されるはずです。 -
一般的に、可変静的変数を使用することはおすすめしませんが、ヒープ アロケータの実装や一部の C API の操作など、低レベルの
no_stdコードでは適している場合もあります。
共用体
共用体は列挙型に似ていますが、アクティブ フィールドを自分でトラッキングする必要があります。
#[repr(C)]
union MyUnion {
    i: u8,
    b: bool,
}

fn main() {
    let u = MyUnion { i: 42 };
    println!("int: {}", unsafe { u.i });
    println!("bool: {}", unsafe { u.b }); // 未定義の動作
}
Rust では、通常は列挙型を使用できるため、共用体はほとんど必要ありません。共用体は、C ライブラリ API とのやり取りで必要になることがあります。
バイトを別の型として再解釈したい場合は、std::mem::transmute か、zerocopy クレートのような安全なラッパーを使用することをおすすめします。
Unsafe関数の呼び出し
Unsafe関数の呼び出し
未定義の動作を回避するために満たす必要がある追加の前提条件がある関数またはメソッドは、unsafe とマークできます。
extern "C" {
    fn abs(input: i32) -> i32;
}

fn main() {
    let emojis = "🗻∈🌏";

    // SAFETY: The indices are in the correct order, within the bounds of the
    // string slice, and lie on UTF-8 sequence boundaries.
    unsafe {
        println!("emoji: {}", emojis.get_unchecked(0..4));
        println!("emoji: {}", emojis.get_unchecked(4..7));
        println!("emoji: {}", emojis.get_unchecked(7..11));
    }

    println!("char count: {}", count_chars(unsafe { emojis.get_unchecked(0..7) }));

    // SAFETY: `abs` doesn't deal with pointers and doesn't have any safety
    // requirements.
    unsafe {
        println!("Absolute value of -3 according to C: {}", abs(-3));
    }

    // UTF-8 エンコード要件を満たさない場合、メモリの安全性が損なわれます。
    // println!("emoji: {}", unsafe { emojis.get_unchecked(0..3) });
    // println!("char count: {}", count_chars(unsafe {
    // emojis.get_unchecked(0..3) }));
}

fn count_chars(s: &str) -> usize {
    s.chars().count()
}
Unsafe関数の書き方
未定義の動作を回避するために特定の条件が必要な場合は、独自の関数を unsafe とマークできます。
/// 指定されたポインタが指す値をスワップします。
///
/// # Safety
///
/// ポインタが有効で、適切にアラインされている必要があります。
unsafe fn swap(a: *mut u8, b: *mut u8) {
    let temp = *a;
    *a = *b;
    *b = temp;
}

fn main() {
    let mut a = 42;
    let mut b = 66;

    // SAFETY: ...
    unsafe {
        swap(&mut a, &mut b);
    }

    println!("a = {}, b = {}", a, b);
}
Unsafe関数の呼び出し
get_unchecked, like most _unchecked functions, is unsafe, because it can create UB if the range is incorrect. abs is unsafe for a different reason: it is an external function (FFI). Calling external functions is usually only a problem when those functions do things with pointers which might violate Rust’s memory model, but in general any C function might have undefined behaviour under any arbitrary circumstances.
この例の "C" は ABI です(他の ABI も使用できます)。
Unsafe関数の書き方
実際には、swap 関数ではポインタは使用しません。これは参照を使用することで安全に実行できます。
アンセーフな関数内では、アンセーフなコードをunsafeブロックなしに記述することができます。これは #[deny(unsafe_op_in_unsafe_fn)] で禁止できます。追加するとどうなるか見てみましょう。これは、今後の Rust エディションで変更される可能性があります。
Unsafeなトレイトの実装
関数と同様に、未定義の動作を回避するために実装で特定の条件を保証する必要がある場合は、トレイトを unsafe としてマークできます。
For example, the zerocopy crate has an unsafe trait that looks something like this:
use std::{mem, slice};

/// ...
/// # Safety
/// 型には定義された表現が必要で、パディングがあってはなりません。
pub unsafe trait IntoBytes {
    fn as_bytes(&self) -> &[u8] {
        let len = mem::size_of_val(self);
        unsafe { slice::from_raw_parts((&raw const self).cast::<u8>(), len) }
    }
}

// SAFETY: `u32` has a defined representation and no padding.
unsafe impl IntoBytes for u32 {}
Rustdoc には、トレイトを安全に実装するための要件について説明した # Safety セクションが必要です。
The actual safety section for IntoBytes is rather longer and more complicated.
組み込みの Send トレイトと Sync トレイトはアンセーフです。
安全なFFIラッパ
Rust は、外部関数インターフェース(FFI)を介した関数呼び出しを強力にサポートしています。これを使用して、ディレクトリ内のファイル名を読み取るために Cプログラムで使用する libc 関数の安全なラッパーを作成します。
以下のマニュアル ページをご覧ください。
std::ffi モジュールも参照してください。ここには、この演習で必要な文字列型が多数掲載されています。
以下のすべての型間で変換を行います。
&strからCString: 末尾の\0文字にも領域を割り当てる必要があります。CStringから*const i8: C 関数を呼び出すためのポインタが必要です。*const i8から&CStr: 末尾の\0文字を検出できるものが必要です。&CStrから&[u8]: バイトのスライスは「不明なデータ」用の汎用的な インターフェースです。&[u8]から&OsStr:&OsStrはOsStringに変換するための中間ステップであり、OsStrExtを使用して作成します。&OsStr内のデータを返し、さらに再びreaddirを呼び出せるようにするためには&OsStr内のデータをクローンする必要があります。
Nomicon にも、FFI に関する有益な章があります。
以下のコードを https://play.rust-lang.org/ にコピーし、不足している関数とメソッドを記入します。
// TODO: 実装が完了したら、これを削除します。
#![allow(unused_imports, unused_variables, dead_code)]

mod ffi {
    use std::os::raw::{c_char, c_int};
    #[cfg(not(target_os = "macos"))]
    use std::os::raw::{c_long, c_uchar, c_ulong, c_ushort};

    // オペーク型。https://doc.rust-lang.org/nomicon/ffi.html をご覧ください。
    #[repr(C)]
    pub struct DIR {
        _data: [u8; 0],
        _marker: core::marker::PhantomData<(*mut u8, core::marker::PhantomPinned)>,
    }

    // readdir(3) の Linux マニュアル ページに沿ったレイアウト。ino_t と
    // off_t は
    // /usr/include/x86_64-linux-gnu/{sys/types.h, bits/typesizes.h} の定義に従って解決されます。
    #[cfg(not(target_os = "macos"))]
    #[repr(C)]
    pub struct dirent {
        pub d_ino: c_ulong,
        pub d_off: c_long,
        pub d_reclen: c_ushort,
        pub d_type: c_uchar,
        pub d_name: [c_char; 256],
    }

    // macOSマニュアル ページのdir(5)に沿ったレイアウト。
    #[cfg(all(target_os = "macos"))]
    #[repr(C)]
    pub struct dirent {
        pub d_fileno: u64,
        pub d_seekoff: u64,
        pub d_reclen: u16,
        pub d_namlen: u16,
        pub d_type: u8,
        pub d_name: [c_char; 1024],
    }

    unsafe extern "C" {
        pub unsafe fn opendir(s: *const c_char) -> *mut DIR;

        #[cfg(not(all(target_os = "macos", target_arch = "x86_64")))]
        pub unsafe fn readdir(s: *mut DIR) -> *const dirent;

        // https://github.com/rust-lang/libc/issues/414、および  macOS 版マニュアル ページのstat(2)における
        // _DARWIN_FEATURE_64_BIT_INODE に関するセクションをご覧ください。
        //
        // 「これらのアップデートが利用可能になる前に存在していたプラットフォーム("Platforms that existed before these updates were available")」とは、
        // Intel および PowerPC 上の macOS(iOS / wearOS などではない)を指します。
        #[cfg(all(target_os = "macos", target_arch = "x86_64"))]
        #[link_name = "readdir$INODE64"]
        pub unsafe fn readdir(s: *mut DIR) -> *const dirent;

        pub unsafe fn closedir(s: *mut DIR) -> c_int;
    }
}

use std::ffi::{CStr, CString, OsStr, OsString};
use std::os::unix::ffi::OsStrExt;

#[derive(Debug)]
struct DirectoryIterator {
    path: CString,
    dir: *mut ffi::DIR,
}

impl DirectoryIterator {
    fn new(path: &str) -> Result<DirectoryIterator, String> {
        // opendir を呼び出し、成功した場合は Ok 値を返し、
        // それ以外の場合はメッセージとともに Err を返します。
        unimplemented!()
    }
}

impl Iterator for DirectoryIterator {
    type Item = OsString;
    fn next(&mut self) -> Option<OsString> {
        // NULL ポインタが返されるまで readdir を呼び出し続けます。
        unimplemented!()
    }
}

impl Drop for DirectoryIterator {
    fn drop(&mut self) {
        // 必要に応じて closedir を呼び出します。
        unimplemented!()
    }
}

fn main() -> Result<(), String> {
    let iter = DirectoryIterator::new(".")?;
    println!("files: {:#?}", iter.collect::<Vec<_>>());
    Ok(())
}
解答
mod ffi {
    use std::os::raw::{c_char, c_int};
    #[cfg(not(target_os = "macos"))]
    use std::os::raw::{c_long, c_uchar, c_ulong, c_ushort};

    // オペーク型。https://doc.rust-lang.org/nomicon/ffi.html をご覧ください。
    #[repr(C)]
    pub struct DIR {
        _data: [u8; 0],
        _marker: core::marker::PhantomData<(*mut u8, core::marker::PhantomPinned)>,
    }

    // readdir(3) の Linux マニュアル ページに沿ったレイアウト。ino_t と
    // off_t は
    // /usr/include/x86_64-linux-gnu/{sys/types.h, bits/typesizes.h} の定義に従って解決されます。
    #[cfg(not(target_os = "macos"))]
    #[repr(C)]
    pub struct dirent {
        pub d_ino: c_ulong,
        pub d_off: c_long,
        pub d_reclen: c_ushort,
        pub d_type: c_uchar,
        pub d_name: [c_char; 256],
    }

    // macOSマニュアル ページのdir(5)に沿ったレイアウト。
    #[cfg(all(target_os = "macos"))]
    #[repr(C)]
    pub struct dirent {
        pub d_fileno: u64,
        pub d_seekoff: u64,
        pub d_reclen: u16,
        pub d_namlen: u16,
        pub d_type: u8,
        pub d_name: [c_char; 1024],
    }

    unsafe extern "C" {
        pub unsafe fn opendir(s: *const c_char) -> *mut DIR;

        #[cfg(not(all(target_os = "macos", target_arch = "x86_64")))]
        pub unsafe fn readdir(s: *mut DIR) -> *const dirent;

        // https://github.com/rust-lang/libc/issues/414、および  macOS 版マニュアル ページのstat(2)における
        // _DARWIN_FEATURE_64_BIT_INODE に関するセクションをご覧ください。
        //
        // 「これらのアップデートが利用可能になる前に存在していたプラットフォーム("Platforms that existed before these updates were available")」とは、
        // Intel および PowerPC 上の macOS(iOS / wearOS などではない)を指します。
        #[cfg(all(target_os = "macos", target_arch = "x86_64"))]
        #[link_name = "readdir$INODE64"]
        pub unsafe fn readdir(s: *mut DIR) -> *const dirent;

        pub unsafe fn closedir(s: *mut DIR) -> c_int;
    }
}

use std::ffi::{CStr, CString, OsStr, OsString};
use std::os::unix::ffi::OsStrExt;

#[derive(Debug)]
struct DirectoryIterator {
    path: CString,
    dir: *mut ffi::DIR,
}

impl DirectoryIterator {
    fn new(path: &str) -> Result<DirectoryIterator, String> {
        // opendir を呼び出し、成功した場合は Ok 値を返し、
        // それ以外の場合はメッセージとともに Err を返します。
        let path =
            CString::new(path).map_err(|err| format!("Invalid path: {err}"))?;
        // SAFETY: path.as_ptr()がNULLであることはありません。
        let dir = unsafe { ffi::opendir(path.as_ptr()) };
        if dir.is_null() {
            Err(format!("Could not open {path:?}"))
        } else {
            Ok(DirectoryIterator { path, dir })
        }
    }
}

impl Iterator for DirectoryIterator {
    type Item = OsString;
    fn next(&mut self) -> Option<OsString> {
        // NULL ポインタが返されるまで readdir を呼び出し続けます。
        // SAFETY: self.dir は決して NULL になりません。
        let dirent = unsafe { ffi::readdir(self.dir) };
        if dirent.is_null() {
            // ディレクトリの最後に到達しました。
            return None;
        }
        // 安全: dirent は NULL ではなく、dirent.d_name は NUL
        // 文字終端されています。
        let d_name = unsafe { CStr::from_ptr((*dirent).d_name.as_ptr()) };
        let os_str = OsStr::from_bytes(d_name.to_bytes());
        Some(os_str.to_owned())
    }
}

impl Drop for DirectoryIterator {
    fn drop(&mut self) {
        // Call closedir as needed.
        // SAFETY: self.dir is never NULL.
        if unsafe { ffi::closedir(self.dir) } != 0 {
            panic!("Could not close {:?}", self.path);
        }
    }
}

fn main() -> Result<(), String> {
    let iter = DirectoryIterator::new(".")?;
    println!("files: {:#?}", iter.collect::<Vec<_>>());
    Ok(())
}

#[cfg(test)]
mod tests {
    use super::*;
    use std::error::Error;

    #[test]
    fn test_nonexisting_directory() {
        let iter = DirectoryIterator::new("no-such-directory");
        assert!(iter.is_err());
    }

    #[test]
    fn test_empty_directory() -> Result<(), Box<dyn Error>> {
        let tmp = tempfile::TempDir::new()?;
        let iter = DirectoryIterator::new(
            tmp.path().to_str().ok_or("Non UTF-8 character in path")?,
        )?;
        let mut entries = iter.collect::<Vec<_>>();
        entries.sort();
        assert_eq!(entries, &[".", ".."]);
        Ok(())
    }

    #[test]
    fn test_nonempty_directory() -> Result<(), Box<dyn Error>> {
        let tmp = tempfile::TempDir::new()?;
        std::fs::write(tmp.path().join("foo.txt"), "The Foo Diaries\n")?;
        std::fs::write(tmp.path().join("bar.png"), "<PNG>\n")?;
        std::fs::write(tmp.path().join("crab.rs"), "//! Crab\n")?;
        let iter = DirectoryIterator::new(
            tmp.path().to_str().ok_or("Non UTF-8 character in path")?,
        )?;
        let mut entries = iter.collect::<Vec<_>>();
        entries.sort();
        assert_eq!(entries, &[".", "..", "bar.png", "crab.rs", "foo.txt"]);
        Ok(())
    }
}
Android での Rust へようこそ
Rust は Android のシステム ソフトウェアでサポートされています。つまり、新しいサービス、ライブラリ、ドライバ、さらにはファームウェアを Rust で作成できます(または、必要に応じて既存のコードを改善できます)。
Android で Rust が使用されることが増えているため、次のいずれかに言及することをおすすめします。
-
Service example: DNS over HTTP.
-
Libraries: Rutabaga Virtual Graphics Interface.
-
Kernel Drivers: Binder.
-
Firmware: pKVM firmware.
セットアップ
コードのテストのためにCuttlefish Android Virtual Device を使用します。既存のDeviceがあればそれにアクセスできることを確認し、そうでなければ以下のコマンドにより作成しておいてください。
source build/envsetup.sh
lunch aosp_cf_x86_64_phone-trunk_staging-userdebug
acloud create
詳しくは、Android デベロッパー Codelab をご覧ください。
The code on the following pages can be found in the src/android/ directory of the course material. Please git clone the repository to follow along.
要点:
-
Cuttlefish は、一般的な Linux デスクトップで動作するように設計されたリファレンス Android デバイスです。macOS のサポートも予定されています。
-
Cuttlefish システム イメージは、実際のデバイスに対する高い忠実度を維持しているため、多くの Rust ユースケースを実行するのに理想的なエミュレータです。
ビルドのルール
Android ビルドシステム(Soong)は、さまざまなモジュールを通じて Rust をサポートしています。
| モジュール タイプ | 説明 |
|---|---|
rust_binary | Rust バイナリを生成します。 |
rust_library | Rust ライブラリを生成し、rlib と dylib の両方のバリアントを提供します。 |
rust_ffi | cc モジュールで使用できる Rust C ライブラリを生成し、静的バリアントと共有バリアントの両方を提供します。 |
rust_proc_macro | proc-macro Rust ライブラリを生成します。これらはコンパイラ プラグインに似ています。 |
rust_test | 標準の Rust テストハーネスを使用する Rust テストバイナリを生成します。 |
rust_fuzz | libfuzzer を利用して、Rust ファズバイナリを生成します。 |
rust_protobuf | ソースを生成し、特定の protobuf 用のインターフェースを提供する Rust ライブラリを生成します。 |
rust_bindgen | ソースを生成し、C ライブラリへの Rust バインディングを含む Rust ライブラリを生成します。 |
次に rust_binary と rust_library を見ていきます。
追加で次の項目に言及することをおすすめします。
-
Cargo は多言語リポジトリ用に最適化されていません。また、インターネットからパッケージをダウンロードします。
-
コンプライアンスおよびパフォーマンス上の理由から、Android ではクレートをツリー内に配置する必要があります。また、C /C++ / Java コードとの相互運用性も必要です。Soong を使用することで、そのギャップを埋めることができます。
-
Soong has many similarities to Bazel, which is the open-source variant of Blaze (used in google3).
-
豆知識: スタートレックの「データ」は、スン(Soong)型アンドロイドです。
Rust バイナリ
簡単なアプリから始めましょう。AOSP チェックアウトのルートで、次のファイルを作成します。
hello_rust/Android.bp:
rust_binary {
    name: "hello_rust",
    crate_name: "hello_rust",
    srcs: ["src/main.rs"],
}
hello_rust/src/main.rs:
//! Rust のデモ。

/// 挨拶を標準出力に出力します。
fn main() {
    println!("Hello from Rust!");
}
これで、バイナリをビルド、push、実行できます。
m hello_rust
adb push "$ANDROID_PRODUCT_OUT/system/bin/hello_rust" /data/local/tmp
adb shell /data/local/tmp/hello_rust
Hello from Rust!
Rust ライブラリ
rust_library を使用して、Android 用の新しい Rust ライブラリを作成します。
ここでは、2 つのライブラリへの依存関係を宣言します。
libgreeting: 以下で定義します。libtextwrap: すでにexternal/rust/crates/に取り込まれているクレートです。
hello_rust/Android.bp:
rust_binary {
    name: "hello_rust_with_dep",
    crate_name: "hello_rust_with_dep",
    srcs: ["src/main.rs"],
    rustlibs: [
        "libgreetings",
        "libtextwrap",
    ],
    prefer_rlib: true, // ダイナミック リンク エラーを回避するために必要です。
}

rust_library {
    name: "libgreetings",
    crate_name: "greetings",
    srcs: ["src/lib.rs"],
}
hello_rust/src/main.rs:
//! Rust のデモ。

use greetings::greeting;
use textwrap::fill;

/// 挨拶を標準出力に出力します。
fn main() {
    println!("{}", fill(&greeting("Bob"), 24));
}hello_rust/src/lib.rs:
//! 挨拶ライブラリ。

/// `name` に挨拶します。
pub fn greeting(name: &str) -> String {
    format!("Hello {name}, it is very nice to meet you!")
}
前と同じようにバイナリをビルド、push、実行します。
m hello_rust_with_dep
adb push "$ANDROID_PRODUCT_OUT/system/bin/hello_rust_with_dep" /data/local/tmp
adb shell /data/local/tmp/hello_rust_with_dep
Hello Bob, it is very
nice to meet you!
AIDL(Androidインターフェイス定義言語)
Rust では Android インターフェース定義言語(AIDL) がサポートされています。
- Rust コードは既存の AIDL サーバーを呼び出すことができます。
- Rust では新しい AIDL サーバーを作成できます。
誕生日サービスのチュートリアル
To illustrate how to use Rust with Binder, we’re going to walk through the process of creating a Binder interface. We’re then going to both implement the described service and write client code that talks to that service.
AIDL インターフェース
サービスの API を宣言するには、AIDL インターフェースを使用します。
birthday_service/aidl/com/example/birthdayservice/IBirthdayService.aidl:
package com.example.birthdayservice;
/** 誕生日サービスのインターフェース。*/
interface IBirthdayService {
/** 「お誕生日おめでとう」というメッセージを生成します。*/
String wishHappyBirthday(String name, int years);
}
birthday_service/aidl/Android.bp:
aidl_interface {
name: "com.example.birthdayservice",
srcs: ["com/example/birthdayservice/*.aidl"],
unstable: true,
backend: {
rust: { // Rust はデフォルトでは無効です。
enabled: true,
},
},
}
- Note that the directory structure under the
aidl/directory needs to match the package name used in the AIDL file, i.e. the package iscom.example.birthdayserviceand the file is ataidl/com/example/IBirthdayService.aidl.
Generated Service API
Binder generates a trait corresponding to the interface definition. trait to talk to the service.
birthday_service/aidl/com/example/birthdayservice/IBirthdayService.aidl:
/** 誕生日サービスのインターフェース。*/
interface IBirthdayService {
/** 「お誕生日おめでとう」というメッセージを生成します。*/
String wishHappyBirthday(String name, int years);
}
Generated trait:
trait IBirthdayService {
fn wishHappyBirthday(&self, name: &str, years: i32) -> binder::Result<String>;
}Your service will need to implement this trait, and your client will use this trait to talk to the service.
- The generated bindings can be found at
out/soong/.intermediates/<path to module>/. - Point out how the generated function signature, specifically the argument and return types, correspond the interface definition.
Stringfor an argument results in a different Rust type thanStringas a return type.
サービスの実装
次に、AIDL サービスを実装します。
birthday_service/src/lib.rs:
use com_example_birthdayservice::aidl::com::example::birthdayservice::IBirthdayService::IBirthdayService;
use com_example_birthdayservice::binder;
/// `IBirthdayService` の実装。
pub struct BirthdayService;
impl binder::Interface for BirthdayService {}
impl IBirthdayService for BirthdayService {
fn wishHappyBirthday(&self, name: &str, years: i32) -> binder::Result<String> {
Ok(format!("Happy Birthday {name}, congratulations with the {years} years!"))
}
}birthday_service/Android.bp:
rust_library {
name: "libbirthdayservice",
srcs: ["src/lib.rs"],
crate_name: "birthdayservice",
rustlibs: [
"com.example.birthdayservice-rust",
"libbinder_rs",
],
}
- Point out the path to the generated
IBirthdayServicetrait, and explain why each of the segments is necessary. - TODO: What does the
binder::Interfacetrait do? Are there methods to override? Where source?
AIDL サーバー
次に、サービスを公開するサーバーを作成します。
birthday_service/src/server.rs:
//! 誕生日サービス。
use birthdayservice::BirthdayService;
use com_example_birthdayservice::aidl::com::example::birthdayservice::IBirthdayService::BnBirthdayService;
use com_example_birthdayservice::binder;
const SERVICE_IDENTIFIER: &str = "birthdayservice";
/// 誕生日サービスのエントリ ポイント。
fn main() {
let birthday_service = BirthdayService;
let birthday_service_binder = BnBirthdayService::new_binder(
birthday_service,
binder::BinderFeatures::default(),
);
binder::add_service(SERVICE_IDENTIFIER, birthday_service_binder.as_binder())
.expect("Failed to register service");
binder::ProcessState::join_thread_pool();
}birthday_service/Android.bp:
rust_binary {
name: "birthday_server",
crate_name: "birthday_server",
srcs: ["src/server.rs"],
rustlibs: [
"com.example.birthdayservice-rust",
"libbinder_rs",
"libbirthdayservice",
],
prefer_rlib: true, // ダイナミック リンク エラーを回避するためです。
}
The process for taking a user-defined service implementation (in this case the BirthdayService type, which implements the IBirthdayService) and starting it as a Binder service has multiple steps, and may appear more complicated than students are used to if they’ve used Binder from C++ or another language. Explain to students why each step is necessary.
- Create an instance of your service type (
BirthdayService). - Wrap the service object in corresponding
Bn*type (BnBirthdayServicein this case). This type is generated by Binder and provides the common Binder functionality that would be provided by theBnBinderbase class in C++. We don’t have inheritance in Rust, so instead we use composition, putting ourBirthdayServicewithin the generatedBnBinderService. - Call
add_service, giving it a service identifier and your service object (theBnBirthdayServiceobject in the example). - Call
join_thread_poolto add the current thread to Binder’s thread pool and start listening for connections.
デプロイ
次に、サービスをビルド、push、開始します。
m birthday_server
adb push "$ANDROID_PRODUCT_OUT/system/bin/birthday_server" /data/local/tmp
adb root
adb shell /data/local/tmp/birthday_server
別のターミナルで、サービスが実行されていることを確認します。
adb shell service check birthdayservice
Service birthdayservice: found
service call を使用してサービスを呼び出すこともできます。
adb shell service call birthdayservice 1 s16 Bob i32 24
Result: Parcel(
0x00000000: 00000000 00000036 00610048 00700070 '....6...H.a.p.p.'
0x00000010: 00200079 00690042 00740072 00640068 'y. .B.i.r.t.h.d.'
0x00000020: 00790061 00420020 0062006f 0020002c 'a.y. .B.o.b.,. .'
0x00000030: 006f0063 0067006e 00610072 00750074 'c.o.n.g.r.a.t.u.'
0x00000040: 0061006c 00690074 006e006f 00200073 'l.a.t.i.o.n.s. .'
0x00000050: 00690077 00680074 00740020 00650068 'w.i.t.h. .t.h.e.'
0x00000060: 00320020 00200034 00650079 00720061 ' .2.4. .y.e.a.r.'
0x00000070: 00210073 00000000 's.!..... ')
AIDL クライアント
ようやくここで、新しいサービス用の Rust クライアントを作成します。
birthday_service/src/client.rs:
use com_example_birthdayservice::aidl::com::example::birthdayservice::IBirthdayService::IBirthdayService;
use com_example_birthdayservice::binder;
const SERVICE_IDENTIFIER: &str = "birthdayservice";
/// 誕生日サービスを呼び出します。
fn main() -> Result<(), Box<dyn Error>> {
let name = std::env::args().nth(1).unwrap_or_else(|| String::from("Bob"));
let years = std::env::args()
.nth(2)
.and_then(|arg| arg.parse::<i32>().ok())
.unwrap_or(42);
binder::ProcessState::start_thread_pool();
let service = binder::get_interface::<dyn IBirthdayService>(SERVICE_IDENTIFIER)
.map_err(|_| "Failed to connect to BirthdayService")?;
// Call the service.
let msg = service.wishHappyBirthday(&name, years)?;
println!("{msg}");
}birthday_service/Android.bp:
rust_binary {
name: "birthday_client",
crate_name: "birthday_client",
srcs: ["src/client.rs"],
rustlibs: [
"com.example.birthdayservice-rust",
"libbinder_rs",
],
prefer_rlib: true, // ダイナミック リンク エラーを回避するためです。
}
クライアントが libbirthdayservice に依存していないことに注目してください。
デバイスでクライアントをビルド、push、実行します。
m birthday_client
adb push "$ANDROID_PRODUCT_OUT/system/bin/birthday_client" /data/local/tmp
adb shell /data/local/tmp/birthday_client Charlie 60
Happy Birthday Charlie, congratulations with the 60 years!
Strong<dyn IBirthdayService>is the trait object representing the service that the client has connected to.Strongis a custom smart pointer type for Binder. It handles both an in-process ref count for the service trait object, and the global Binder ref count that tracks how many processes have a reference to the object.- Note that the trait object that the client uses to talk to the service uses the exact same trait that the server implements. For a given Binder interface, there is a single Rust trait generated that both client and server use.
- Use the same service identifier used when registering the service. This should ideally be defined in a common crate that both the client and server can depend on.
APIの変更
APIを拡張して、クライアントが誕生日カードに追加する複数行のメッセージを指定できるようにします。
package com.example.birthdayservice;
/** 誕生日サービスのインターフェース。*/
interface IBirthdayService {
/** 「お誕生日おめでとう」というメッセージを生成します。*/
String wishHappyBirthday(String name, int years, in String[] text);
}
This results in an updated trait definition for IBirthdayService:
trait IBirthdayService {
fn wishHappyBirthday(
&self,
name: &str,
years: i32,
text: &[String],
) -> binder::Result<String>;
}- Note how the
String[]in the AIDL definition is translated as a&[String]in Rust, i.e. that idiomatic Rust types are used in the generated bindings wherever possible:inarray arguments are translated to slices.outandinoutargs are translated to&mut Vec<T>.- Return values are translated to returning a
Vec<T>.
Updating Client and Service
Update the client and server code to account for the new API.
birthday_service/src/lib.rs:
impl IBirthdayService for BirthdayService {
fn wishHappyBirthday(
&self,
name: &str,
years: i32,
text: &[String],
) -> binder::Result<String> {
let mut msg = format!(
"Happy Birthday {name}, congratulations with the {years} years!",
);
for line in text {
msg.push('\n');
msg.push_str(line);
}
Ok(msg)
}
}birthday_service/src/client.rs:
let msg = service.wishHappyBirthday(
&name,
years,
&[
String::from("Habby birfday to yuuuuu"),
String::from("And also: many more"),
],
)?;- TODO: Move code snippets into project files where they’ll actually be built?
Working With AIDL Types
AIDL types translate into the appropriate idiomatic Rust type:
- Primitive types map (mostly) to idiomatic Rust types.
- Collection types like slices,
Vecs and string types are supported. - References to AIDL objects and file handles can be sent between clients and services.
- File handles and parcelables are fully supported.
Primitive Types
Primitive types map (mostly) idiomatically:
| AIDL Type | Rust 型 | Note |
|---|---|---|
boolean | bool | |
byte | i8 | Note that bytes are signed. |
char | u16 | Note the usage of u16, NOT u32. |
int | i32 | |
long | i64 | |
float | f32 | |
double | f64 | |
String | String |
配列型
The array types (T[], byte[], and List<T>) get translated to the appropriate Rust array type depending on how they are used in the function signature:
| Position | Rust 型 |
|---|---|
in argument | &[T] |
out/inout argument | &mut Vec<T> |
| Return | Vec<T> |
- In Android 13 or higher, fixed-size arrays are supported, i.e.
T[N]becomes[T; N]. Fixed-size arrays can have multiple dimensions (e.g.int[3][4]). In the Java backend, fixed-size arrays are represented as array types. - Arrays in parcelable fields always get translated to
Vec<T>.
オブジェクトの送信
AIDL objects can be sent either as a concrete AIDL type or as the type-erased IBinder interface:
birthday_service/aidl/com/example/birthdayservice/IBirthdayInfoProvider.aidl:
package com.example.birthdayservice;
interface IBirthdayInfoProvider {
String name();
int years();
}
birthday_service/aidl/com/example/birthdayservice/IBirthdayService.aidl:
import com.example.birthdayservice.IBirthdayInfoProvider;
interface IBirthdayService {
/** The same thing, but using a binder object. */
String wishWithProvider(IBirthdayInfoProvider provider);
/** The same thing, but using `IBinder`. */
String wishWithErasedProvider(IBinder provider);
}
birthday_service/src/client.rs:
/// Rust struct implementing the `IBirthdayInfoProvider` interface.
struct InfoProvider {
name: String,
age: u8,
}
impl binder::Interface for InfoProvider {}
impl IBirthdayInfoProvider for InfoProvider {
fn name(&self) -> binder::Result<String> {
Ok(self.name.clone())
}
fn years(&self) -> binder::Result<i32> {
Ok(self.age as i32)
}
}
fn main() {
binder::ProcessState::start_thread_pool();
let service = connect().expect("Failed to connect to BirthdayService");
// Create a binder object for the `IBirthdayInfoProvider` interface.
let provider = BnBirthdayInfoProvider::new_binder(
InfoProvider { name: name.clone(), age: years as u8 },
BinderFeatures::default(),
);
// Send the binder object to the service.
service.wishWithProvider(&provider)?;
// Perform the same operation but passing the provider as an `SpIBinder`.
service.wishWithErasedProvider(&provider.as_binder())?;
}- Note the usage of
BnBirthdayInfoProvider. This serves the same purpose asBnBirthdayServicethat we saw previously.
Parcelables
Binder for Rust supports sending parcelables directly:
birthday_service/aidl/com/example/birthdayservice/BirthdayInfo.aidl:
package com.example.birthdayservice;
parcelable BirthdayInfo {
String name;
int years;
}
birthday_service/aidl/com/example/birthdayservice/IBirthdayService.aidl:
import com.example.birthdayservice.BirthdayInfo;
interface IBirthdayService {
/** The same thing, but with a parcelable. */
String wishWithInfo(in BirthdayInfo info);
}
birthday_service/src/client.rs:
fn main() {
binder::ProcessState::start_thread_pool();
let service = connect().expect("Failed to connect to BirthdayService");
let info = BirthdayInfo { name: "Alice".into(), years: 123 };
service.wishWithInfo(&info)?;
}Sending Files
Files can be sent between Binder clients/servers using the ParcelFileDescriptor type:
birthday_service/aidl/com/example/birthdayservice/IBirthdayService.aidl:
interface IBirthdayService {
/** The same thing, but loads info from a file. */
String wishFromFile(in ParcelFileDescriptor infoFile);
}
birthday_service/src/client.rs:
fn main() {
binder::ProcessState::start_thread_pool();
let service = connect().expect("Failed to connect to BirthdayService");
// Open a file and put the birthday info in it.
let mut file = File::create("/data/local/tmp/birthday.info").unwrap();
writeln!(file, "{name}")?;
writeln!(file, "{years}")?;
// Create a `ParcelFileDescriptor` from the file and send it.
let file = ParcelFileDescriptor::new(file);
service.wishFromFile(&file)?;
}birthday_service/src/lib.rs:
impl IBirthdayService for BirthdayService {
fn wishFromFile(
&self,
info_file: &ParcelFileDescriptor,
) -> binder::Result<String> {
// Convert the file descriptor to a `File`. `ParcelFileDescriptor` wraps
// an `OwnedFd`, which can be cloned and then used to create a `File`
// object.
let mut info_file = info_file
.as_ref()
.try_clone()
.map(File::from)
.expect("Invalid file handle");
let mut contents = String::new();
info_file.read_to_string(&mut contents).unwrap();
let mut lines = contents.lines();
let name = lines.next().unwrap();
let years: i32 = lines.next().unwrap().parse().unwrap();
Ok(format!("Happy Birthday {name}, congratulations with the {years} years!"))
}
}ParcelFileDescriptorwraps anOwnedFd, and so can be created from aFile(or any other type that wraps anOwnedFd), and can be used to create a newFilehandle on the other side.- Other types of file descriptors can be wrapped and sent, e.g. TCP, UDP, and UNIX sockets.
Testing in Android
Building on Testing, we will now look at how unit tests work in AOSP. Use the rust_test module for your unit tests:
testing/Android.bp:
rust_library {
name: "libleftpad",
crate_name: "leftpad",
srcs: ["src/lib.rs"],
}
rust_test {
name: "libleftpad_test",
crate_name: "leftpad_test",
srcs: ["src/lib.rs"],
host_supported: true,
test_suites: ["general-tests"],
}
testing/src/lib.rs:
#![allow(unused)] fn main() { //! Left-padding library. /// Left-pad `s` to `width`. pub fn leftpad(s: &str, width: usize) -> String { format!("{s:>width$}") } #[cfg(test)] mod tests { use super::*; #[test] fn short_string() { assert_eq!(leftpad("foo", 5), " foo"); } #[test] fn long_string() { assert_eq!(leftpad("foobar", 6), "foobar"); } } }
You can now run the test with
atest --host libleftpad_test
The output looks like this:
INFO: Elapsed time: 2.666s, Critical Path: 2.40s
INFO: 3 processes: 2 internal, 1 linux-sandbox.
INFO: Build completed successfully, 3 total actions
//comprehensive-rust-android/testing:libleftpad_test_host PASSED in 2.3s
PASSED libleftpad_test.tests::long_string (0.0s)
PASSED libleftpad_test.tests::short_string (0.0s)
Test cases: finished with 2 passing and 0 failing out of 2 test cases
Notice how you only mention the root of the library crate. Tests are found recursively in nested modules.
GoogleTest
GoogleTest クレートにより、マッチャーを使用した柔軟なテスト アサーションが可能になります。
use googletest::prelude::*;
#[googletest::test]
fn test_elements_are() {
let value = vec!["foo", "bar", "baz"];
expect_that!(value, elements_are!(eq(&"foo"), lt(&"xyz"), starts_with("b")));
}最後の要素を "!" に変更すると、テストは失敗し、エラー箇所を示す構造化されたエラー メッセージが表示されます。
---- test_elements_are stdout ----
Value of: value
Expected: has elements:
0. is equal to "foo"
1. is less than "xyz"
2. starts with prefix "!"
Actual: ["foo", "bar", "baz"],
where element #2 is "baz", which does not start with "!"
at src/testing/googletest.rs:6:5
Error: See failure output above
-
GoogleTest は Rust プレイグラウンドの一部ではないため、この例はローカル環境で実行する必要があります。
cargo add googletestを使用して、既存の Cargo プロジェクトにすばやく追加します。 -
use googletest::prelude::*;行は、一般的に使用されるマクロと型をインポートします。 -
This just scratches the surface, there are many builtin matchers. Consider going through the first chapter of “Advanced testing for Rust applications”, a self-guided Rust course: it provides a guided introduction to the library, with exercises to help you get comfortable with
googletestmacros, its matchers and its overall philosophy. -
A particularly nice feature is that mismatches in multi-line strings are shown as a diff:
#[test]
fn test_multiline_string_diff() {
let haiku = "Memory safety found,\n\
Rust's strong typing guides the way,\n\
Secure code you'll write.";
assert_that!(
haiku,
eq("Memory safety found,\n\
Rust's silly humor guides the way,\n\
Secure code you'll write.")
);
}これにより、差分が色分けされます(ここでは色分けされていません)。
Value of: haiku
Expected: is equal to "Memory safety found,\nRust's silly humor guides the way,\nSecure code you'll write."
Actual: "Memory safety found,\nRust's strong typing guides the way,\nSecure code you'll write.",
which isn't equal to "Memory safety found,\nRust's silly humor guides the way,\nSecure code you'll write."
Difference(-actual / +expected):
Memory safety found,
-Rust's strong typing guides the way,
+Rust's silly humor guides the way,
Secure code you'll write.
at src/testing/googletest.rs:17:5
- このクレートは GoogleTest for C++ をRustに移植したものです。
モック
モックには、Mockall というライブラリが広く使用されています。トレイトを使用するようにコードをリファクタリングする必要があります。これにより、すぐにモックできるようになります。
use std::time::Duration;
#[mockall::automock]
pub trait Pet {
fn is_hungry(&self, since_last_meal: Duration) -> bool;
}
#[test]
fn test_robot_dog() {
let mut mock_dog = MockPet::new();
mock_dog.expect_is_hungry().return_const(true);
assert_eq!(mock_dog.is_hungry(Duration::from_secs(10)), true);
}-
Mockall is the recommended mocking library in Android (AOSP). There are other mocking libraries available on crates.io, in particular in the area of mocking HTTP services. The other mocking libraries work in a similar fashion as Mockall, meaning that they make it easy to get a mock implementation of a given trait.
-
モックを使用する際は少し注意が必要です。モックを使用すると、テストを依存関係から完全に分離できます。その結果、より高速で安定したテスト実行が可能になります。一方、モックが誤って構成され、実際の依存関係の動作とは異なる出力が返される可能性があります。
可能な限り、実際の依存関係を使用することをおすすめします。たとえば、多くのデータベースではインメモリ バックエンドを構成できます。つまり、テストで正しい動作が得られ、しかも高速で、テスト後は自動的にクリーンアップされます。
同様に、多くのウェブ フレームワークでは、
localhost上のランダムなポートにバインドするプロセス内サーバーを起動できます。このような構成は実際の環境でコードをテストすることを可能にするので、フレームワークをモックすることよりも常に優先して利用しましょう。 -
Mockall は Rust プレイグラウンドの一部ではないため、この例はローカル環境で実行する必要があります。
cargo add mockallを使用して、Mockall を既存の Cargo プロジェクトにすばやく追加します。 -
Mockall にはさらに多くの機能があります。特に、渡される引数に応じて期待値を設定できます。ここでは、最後に餌を与えてらえてから 3 時間後に空腹になる猫をモックするためにこれを使用します。
#[test]
fn test_robot_cat() {
let mut mock_cat = MockPet::new();
mock_cat
.expect_is_hungry()
.with(mockall::predicate::gt(Duration::from_secs(3 * 3600)))
.return_const(true);
mock_cat.expect_is_hungry().return_const(false);
assert_eq!(mock_cat.is_hungry(Duration::from_secs(1 * 3600)), false);
assert_eq!(mock_cat.is_hungry(Duration::from_secs(5 * 3600)), true);
}.times(n)を使用すると、モックメソッドが呼び出される回数をnに制限できます。これが満たされない場合、モックはドロップ時に自動的にパニックになります。
ログ出力
log クレートを使用して、自動的に (デバイス上では)logcat または (ホスト上では)stdoutにログを記録するようにします。
hello_rust_logs/Android.bp:
rust_binary {
name: "hello_rust_logs",
crate_name: "hello_rust_logs",
srcs: ["src/main.rs"],
rustlibs: [
"liblog_rust",
"liblogger",
],
host_supported: true,
}
hello_rust_logs/src/main.rs:
//! Rust ロギングのデモ。
use log::{debug, error, info};
/// 挨拶をログに記録します。
fn main() {
logger::init(
logger::Config::default()
.with_tag_on_device("rust")
.with_max_level(log::LevelFilter::Trace),
);
debug!("Starting program.");
info!("Things are going fine.");
error!("Something went wrong!");
}デバイスでバイナリをビルド、push、実行します。
m hello_rust_logs
adb push "$ANDROID_PRODUCT_OUT/system/bin/hello_rust_logs" /data/local/tmp
adb shell /data/local/tmp/hello_rust_logs
adb logcat でログを表示できます。
adb logcat -s rust
09-08 08:38:32.454 2420 2420 D rust: hello_rust_logs: Starting program.
09-08 08:38:32.454 2420 2420 I rust: hello_rust_logs: Things are going fine.
09-08 08:38:32.454 2420 2420 E rust: hello_rust_logs: Something went wrong!
- The logger implementation in
libloggeris only needed in the final binary, if you’re logging from a library you only need thelogfacade crate.
相互運用性
Rust は他の言語との相互運用性に優れているため、次のことが可能です。
- 他の言語から Rust 関数を呼び出す。
- Rust から他の言語で記述された関数を呼び出す。
他の言語の関数を呼び出す場合は、外部関数インターフェース(FFI: foreign function interface)を使用します。
C との相互運用性
Rust は、C の呼び出し規則によるオブジェクト ファイルのリンクを完全にサポートしています。同様に、Rust 関数をエクスポートして C から呼び出すことができます。
これは手動で行うこともできます。
unsafe extern "C" { safe fn abs(x: i32) -> i32; } fn main() { let x = -42; let abs_x = abs(x); println!("{x}, {abs_x}"); }
We already saw this in the Safe FFI Wrapper exercise.
これは、ターゲット プラットフォームを完全に理解していることを前提としています。本番環境での使用推奨されません。
次に、より良い選択肢を見ていきます。
Bindgen の使用
bindgen ツールを使用すると、C ヘッダー ファイルからバインディングを自動生成できます。
まず、小さな C ライブラリを作成します。
interoperability/bindgen/libbirthday.h:
typedef struct card {
const char* name;
int years;
} card;
void print_card(const card* card);
interoperability/bindgen/libbirthday.c:
#include <stdio.h>
#include "libbirthday.h"
void print_card(const card* card) {
printf("+--------------\n");
printf("| Happy Birthday %s!\n", card->name);
printf("| Congratulations with the %i years!\n", card->years);
printf("+--------------\n");
}
これを Android.bp ファイルに追加します。
interoperability/bindgen/Android.bp:
cc_library {
name: "libbirthday",
srcs: ["libbirthday.c"],
}
ライブラリのラッパー ヘッダー ファイルを作成します(この例では必須ではありません)。
interoperability/bindgen/libbirthday_wrapper.h:
#include "libbirthday.h"
これで、バインディングを自動生成できます。
interoperability/bindgen/Android.bp:
rust_bindgen {
name: "libbirthday_bindgen",
crate_name: "birthday_bindgen",
wrapper_src: "libbirthday_wrapper.h",
source_stem: "bindings",
static_libs: ["libbirthday"],
}
これで、Rust プログラムでバインディングを使用できます。
interoperability/bindgen/Android.bp:
rust_binary {
name: "print_birthday_card",
srcs: ["main.rs"],
rustlibs: ["libbirthday_bindgen"],
}
interoperability/bindgen/main.rs:
//! Bindgen のデモ。 use birthday_bindgen::{card, print_card}; fn main() { let name = std::ffi::CString::new("Peter").unwrap(); let card = card { name: name.as_ptr(), years: 42 }; // SAFETY: The pointer we pass is valid because it came from a Rust // reference, and the `name` it contains refers to `name` above which also // remains valid. `print_card` doesn't store either pointer to use later // after it returns. unsafe { print_card(&card as *const card); } }
デバイスでバイナリをビルド、push、実行します。
m print_birthday_card
adb push "$ANDROID_PRODUCT_OUT/system/bin/print_birthday_card" /data/local/tmp
adb shell /data/local/tmp/print_birthday_card
これで、自動生成されたテストを実行して、バインディングが機能していることを確認できます。
interoperability/bindgen/Android.bp:
rust_test {
name: "libbirthday_bindgen_test",
srcs: [":libbirthday_bindgen"],
crate_name: "libbirthday_bindgen_test",
test_suites: ["general-tests"],
auto_gen_config: true,
clippy_lints: "none", // 生成されたファイル、lint チェックをスキップ
lints: "none",
}
atest libbirthday_bindgen_test
Rust の呼び出し
Rust の関数と型は、C に簡単にエクスポートできます。
interoperability/rust/libanalyze/analyze.rs
//! Rust FFI のデモ。 #![deny(improper_ctypes_definitions)] use std::os::raw::c_int; /// Analyze the numbers. // SAFETY: There is no other global function of this name. #[unsafe(no_mangle)] pub extern "C" fn analyze_numbers(x: c_int, y: c_int) { if x < y { println!("x ({x}) is smallest!"); } else { println!("y ({y}) is probably larger than x ({x})"); } }
interoperability/rust/libanalyze/analyze.h
#ifndef ANALYSE_H
#define ANALYSE_H
void analyze_numbers(int x, int y);
#endif
interoperability/rust/libanalyze/Android.bp
rust_ffi {
name: "libanalyze_ffi",
crate_name: "analyze_ffi",
srcs: ["analyze.rs"],
include_dirs: ["."],
}
これで、これを C バイナリから呼び出せるようになりました。
interoperability/rust/analyze/main.c
#include "analyze.h"
int main() {
analyze_numbers(10, 20);
analyze_numbers(123, 123);
return 0;
}
interoperability/rust/analyze/Android.bp
cc_binary {
name: "analyze_numbers",
srcs: ["main.c"],
static_libs: ["libanalyze_ffi"],
}
デバイスでバイナリをビルド、push、実行します。
m analyze_numbers
adb push "$ANDROID_PRODUCT_OUT/system/bin/analyze_numbers" /data/local/tmp
adb shell /data/local/tmp/analyze_numbers
#[unsafe(no_mangle)] disables Rust’s usual name mangling, so the exported symbol will just be the name of the function. You can also use #[unsafe(export_name = "some_name")] to specify whatever name you want.
C++
CXX クレートを使用すると、Rust と C++ の間で安全な相互運用性を確保できます。
全体的なアプローチは次のようになります。

ブリッジモジュール
CXX は、各言語から他の言語に公開される関数シグネチャの記述に依存します。この記述は、#[cxx::bridge] 属性マクロでアノテーションされた Rust モジュール内の extern ブロックを使用して指定します。
#[allow(unsafe_op_in_unsafe_fn)]
#[cxx::bridge(namespace = "org::blobstore")]
mod ffi {
// 両方の言語からアクセスできるフィールドを持つ共有構造体。
struct BlobMetadata {
size: usize,
tags: Vec<String>,
}
// C++ に公開される Rust の型とシグネチャ。
extern "Rust" {
type MultiBuf;
fn next_chunk(buf: &mut MultiBuf) -> &[u8];
}
// Rust に公開される C++ の型とシグネチャ。
unsafe extern "C++" {
include!("include/blobstore.h");
type BlobstoreClient;
fn new_blobstore_client() -> UniquePtr<BlobstoreClient>;
fn put(self: Pin<&mut BlobstoreClient>, parts: &mut MultiBuf) -> u64;
fn tag(self: Pin<&mut BlobstoreClient>, blobid: u64, tag: &str);
fn metadata(&self, blobid: u64) -> BlobMetadata;
}
}- ブリッジは通常、クレート内の
ffiモジュールで宣言します。 - ブリッジ モジュールで行われた宣言から、CXX はマッチする Rust と C++ の型 / 関数の定義を生成し、これらのアイテムを両方の言語に公開します。
- 生成された Rust コードを表示するには、cargo-expand を使用して、展開された proc マクロを表示します。ほとんどの例では、
cargo expand ::ffiを使用してffiモジュールのみを展開します(ただし、これは Android プロジェクトには当てはまりません)。 - 生成された C++ コードを表示するには、
target/cxxbridgeを確認します。
Rust のブリッジ宣言
#[cxx::bridge]
mod ffi {
extern "Rust" {
type MyType; // オペーク型
fn foo(&self); // `MyType` のメソッド
fn bar() -> Box<MyType>; // Free function
}
}
struct MyType(i32);
impl MyType {
fn foo(&self) {
println!("{}", self.0);
}
}
fn bar() -> Box<MyType> {
Box::new(MyType(123))
}- 親モジュールのスコープ内にある
extern "Rust"参照アイテムで宣言されたアイテム。 - CXX コード ジェネレータは、
extern "Rust"セクションを使用して、対応する C++ 宣言を含む C++ ヘッダー ファイルを生成します。生成されるヘッダーのパスは、rs.hというファイル拡張子部分を除き、ブリッジを含む Rust ソースファイルと同じになります。
生成された C++
#[cxx::bridge]
mod ffi {
// C++ に公開される Rust の型とシグネチャ。
extern "Rust" {
type MultiBuf;
fn next_chunk(buf: &mut MultiBuf) -> &[u8];
}
}おおよそ次のような C++ が生成されます。
struct MultiBuf final : public ::rust::Opaque {
~MultiBuf() = delete;
private:
friend ::rust::layout;
struct layout {
static ::std::size_t size() noexcept;
static ::std::size_t align() noexcept;
};
};
::rust::Slice<::std::uint8_t const> next_chunk(::org::blobstore::MultiBuf &buf) noexcept;
C++ のブリッジ宣言
#[cxx::bridge]
mod ffi {
// Rust に公開される C++ の型とシグネチャ。
unsafe extern "C++" {
include!("include/blobstore.h");
type BlobstoreClient;
fn new_blobstore_client() -> UniquePtr<BlobstoreClient>;
fn put(self: Pin<&mut BlobstoreClient>, parts: &mut MultiBuf) -> u64;
fn tag(self: Pin<&mut BlobstoreClient>, blobid: u64, tag: &str);
fn metadata(&self, blobid: u64) -> BlobMetadata;
}
}おおよそ次のような Rust が生成されます。
#[repr(C)]
pub struct BlobstoreClient {
_private: ::cxx::private::Opaque,
}
pub fn new_blobstore_client() -> ::cxx::UniquePtr<BlobstoreClient> {
extern "C" {
#[link_name = "org$blobstore$cxxbridge1$new_blobstore_client"]
fn __new_blobstore_client() -> *mut BlobstoreClient;
}
unsafe { ::cxx::UniquePtr::from_raw(__new_blobstore_client()) }
}
impl BlobstoreClient {
pub fn put(&self, parts: &mut MultiBuf) -> u64 {
extern "C" {
#[link_name = "org$blobstore$cxxbridge1$BlobstoreClient$put"]
fn __put(
_: &BlobstoreClient,
parts: *mut ::cxx::core::ffi::c_void,
) -> u64;
}
unsafe {
__put(self, parts as *mut MultiBuf as *mut ::cxx::core::ffi::c_void)
}
}
}
// ...- プログラマーは、入力したシグネチャが正確であることを保証する必要はありません。CXX は、シグネチャが C++ で宣言されたものと完全に対応するということを静的に保証します。
unsafe externブロックを使用すると、Rust から安全に呼び出せる C++ 関数を宣言できます。
共有の型
#[cxx::bridge]
mod ffi {
#[derive(Clone, Debug, Hash)]
struct PlayingCard {
suit: Suit,
value: u8, // A=1、J=11、Q=12、K=13
}
enum Suit {
Clubs,
Diamonds,
Hearts,
Spades,
}
}- C のような(単位)列挙型のみがサポートされています。
- 共有型の
#[derive()]では、サポートされるトレイトの数が限られています。対応する機能は C++ コードでも生成されます。たとえば、Hashを導出すると、対応する C++ 型のstd::hashの実装も生成されます。
共有の列挙型
#[cxx::bridge]
mod ffi {
enum Suit {
Clubs,
Diamonds,
Hearts,
Spades,
}
}生成された Rust:
#![allow(unused)] fn main() { #[derive(Copy, Clone, PartialEq, Eq)] #[repr(transparent)] pub struct Suit { pub repr: u8, } #[allow(non_upper_case_globals)] impl Suit { pub const Clubs: Self = Suit { repr: 0 }; pub const Diamonds: Self = Suit { repr: 1 }; pub const Hearts: Self = Suit { repr: 2 }; pub const Spades: Self = Suit { repr: 3 }; } }
生成された C++:
enum class Suit : uint8_t {
Clubs = 0,
Diamonds = 1,
Hearts = 2,
Spades = 3,
};
- Rust 側では、共有列挙型に対して生成されるコードは、実際には数値をラップした構造体です。これは、列挙型クラスがリストされたすべてのバリアントとは異なる値を保持することは C++ では UB ではなく、Rust 表現は同じ動作をする必要があるためです。
Rustのエラー処理
#[cxx::bridge]
mod ffi {
extern "Rust" {
fn fallible(depth: usize) -> Result<String>;
}
}
fn fallible(depth: usize) -> anyhow::Result<String> {
if depth == 0 {
return Err(anyhow::Error::msg("fallible1 requires depth > 0"));
}
Ok("Success!".into())
}Resultを返す Rust 関数は、C++ 側で例外に変換されます。- スローされる例外は常に
rust::Error型で、主にエラー メッセージの文字列を取得する手段を提供します。エラー メッセージは、エラー型のDisplayの実装から取得されます。 - Rust から C++ にパニック アンワインドを行うと、プロセスは必ず直ちに終了します。
C++のエラー処理
#[cxx::bridge]
mod ffi {
unsafe extern "C++" {
include!("example/include/example.h");
fn fallible(depth: usize) -> Result<String>;
}
}
fn main() {
if let Err(err) = ffi::fallible(99) {
eprintln!("Error: {}", err);
process::exit(1);
}
}Resultを返すように宣言された C++ 関数は、C++ 側でスローされたあらゆる例外をキャッチし、呼び出し元の Rust 関数にErr値として返します。- CXX ブリッジでResultを返すように宣言されていないextern “C++“関数から例外がスローされると、
Resultが返されると、プログラムは C++ のstd::terminateを呼び出します。この動作は、同じ例外がnoexceptC++ 関数でスローされた場合と同等です。
その他の型
| Rust 型 | C++ 型 |
|---|---|
String | rust::String |
&str | rust::Str |
CxxString | std::string |
&[T]/&mut [T] | rust::Slice |
Box<T> | rust::Box<T> |
UniquePtr<T> | std::unique_ptr<T> |
Vec<T> | rust::Vec<T> |
CxxVector<T> | std::vector<T> |
- これらの型は、共有構造体のフィールドと、extern 関数の引数と戻り値で使用できます。
- Rust の
Stringはstd::stringに直接マッピングされません。これには次のような理由があります。std::stringは、Stringが必要とする UTF-8 不変条件を満たしません。- この 2 つの型はメモリ内のレイアウトが異なるため、言語間で直接渡すことはできません。
std::stringは、Rust のムーブ セマンティクスと一致しないムーブコンストラクタを必要とするため、std::stringを Rust に値で渡すことはできません。
Building in Android
cc_library_static を作成して、CXX で生成されたヘッダーとソースファイルを含む C++ ライブラリをビルドします。
cc_library_static {
name: "libcxx_test_cpp",
srcs: ["cxx_test.cpp"],
generated_headers: [
"cxx-bridge-header",
"libcxx_test_bridge_header"
],
generated_sources: ["libcxx_test_bridge_code"],
}
libcxx_test_bridge_headerとlibcxx_test_bridge_codeが、CXX CXXにより生成される C++ バインディングに対する依存関係であることを説明します。次のスライドで、これらがどのような記述になっているかを説明します。- また、一般的な CXX 定義を取得するためには、
cxx-bridge-headerライブラリに依存する必要があることにも注意してください。 - Android で CXX を使用するための詳細なドキュメントについては、Android のドキュメントをご覧ください。そのリンクをクラスと共有して、受講者が後で手順を確認できるようにすることをおすすめします。
Building in Android
genrule を 2 つ作成します。1 つは CXX ヘッダーの生成用、もう 1 つは CXX ソースファイルの生成用です。これらは cc_library_static への入力として使用されます。
// lib.rs にある Rustからエクスポートされた関数に対する
// C++ バインディングを含む C++ ヘッダーを生成します。
genrule {
name: "libcxx_test_bridge_header",
tools: ["cxxbridge"],
cmd: "$(location cxxbridge) $(in) --header > $(out)",
srcs: ["lib.rs"],
out: ["lib.rs.h"],
}
// Rust が呼び出す C++ コードを生成します。
genrule {
name: "libcxx_test_bridge_code",
tools: ["cxxbridge"],
cmd: "$(location cxxbridge) $(in) > $(out)",
srcs: ["lib.rs"],
out: ["lib.rs.cc"],
}
cxxbridgeツールは、ブリッジ モジュールの C++ 側を生成するスタンドアロン ツールです。Android に組み込まれており、Soong ツールとして利用できます。- 慣例として、Rust ソースファイルが
lib.rsの場合、ヘッダー ファイルの名前はlib.rs.h、ソースファイルの名前はlib.rs.ccとなります。ただし、この命名規則は強制ではありません。
Building in Android
libcxx と cc_library_staticに依存する rust_binary を作成します。
rust_binary {
name: "cxx_test",
srcs: ["lib.rs"],
rustlibs: ["libcxx"],
static_libs: ["libcxx_test_cpp"],
}
Java との相互運用性
Java では、Java Native Interface(JNI) を介して共有オブジェクトを読み込むことができます。jni クレート を使用すると、互換性のあるライブラリを作成できます。
まず、Java にエクスポートする Rust 関数を作成します。
interoperability/java/src/lib.rs:
#![allow(unused)] fn main() { //! Rust <-> Java FFI のデモ。 use jni::objects::{JClass, JString}; use jni::sys::jstring; use jni::JNIEnv; /// HelloWorld::hello method implementation. // SAFETY: There is no other global function of this name. #[unsafe(no_mangle)] pub extern "system" fn Java_HelloWorld_hello( mut env: JNIEnv, _class: JClass, name: JString, ) -> jstring { let input: String = env.get_string(&name).unwrap().into(); let greeting = format!("Hello, {input}!"); let output = env.new_string(greeting).unwrap(); output.into_raw() } }
interoperability/java/Android.bp:
rust_ffi_shared {
name: "libhello_jni",
crate_name: "hello_jni",
srcs: ["src/lib.rs"],
rustlibs: ["libjni"],
}
次に、Java からこの関数を呼び出します。
interoperability/java/HelloWorld.java:
class HelloWorld {
private static native String hello(String name);
static {
System.loadLibrary("hello_jni");
}
public static void main(String[] args) {
String output = HelloWorld.hello("Alice");
System.out.println(output);
}
}
interoperability/java/Android.bp:
java_binary {
name: "helloworld_jni",
srcs: ["HelloWorld.java"],
main_class: "HelloWorld",
required: ["libhello_jni"],
}
最後に、バイナリをビルド、同期、実行します。
m helloworld_jni
adb sync # requires adb root && adb remount
adb shell /system/bin/helloworld_jni
Chromium の Rust へようこそ
Rust は Chromium のサードパーティ ライブラリでサポートされています。Rust と既存の Chromium C++ コードを接続するには、ファースト パーティのグルーコードを使用します。
本日は、Rust で文字列を使って面白いことをしたいと思います。もし自分の担当部分にUTF8 文字列を表示するコードがある場合は、ここで述べた部分ではなく、自分のコードに対してこの手順を実行して構いません。
セットアップ
Chromium をビルドして実行できることを確認します。コードが比較的最近のもの(2023 年 11 月に対応するコミット位置 1223636 以降)であれば、任意のプラットフォームとビルドフラグのセットで問題ありません。
gn gen out/Debug
autoninja -C out/Debug chrome
out/Debug/chrome # or on Mac, out/Debug/Chromium.app/Contents/MacOS/Chromium
(反復処理の時間を最短にするには、コンポーネントのデバッグビルドをおすすめします。これがデフォルトです)
まだ確認していない場合は、Chromium のビルド方法 を確認してください。なお、Chromium をビルドするためのセットアップには時間がかかります。
また、Visual Studio Code をインストールしておくことをおすすめします。
演習について
コースのこのパートには、相互に関連した一連の演習があります。コースの最後だけでなく、全体を通して演習を行います。特定のパートを完了する時間がない場合も、後で追いつけばよいため心配はいりません。
Chromium と Cargo のエコシステムの比較
The Rust community typically uses cargo and libraries from crates.io. Chromium is built using gn and ninja and a curated set of dependencies.
Rust でコードを記述する際は、次の選択肢があります。
//build/rust/*.gniのテンプレート(例: 後で説明するrust_static_library)を参考にして、gnとninjaを使用します。これには、Chromium の監査済みのツールチェーンとクレートが使用されます。cargoを使用しますが、実際の利用をChromium の監査済みのツールチェーンとクレートに制限します。cargoを使用し、ツールチェーン や インターネットからダウンロードしたクレート を信頼します。
ここからは、gn と ninja に焦点を当てます。これらを使用することで、Chromium ブラウザに Rust コードを組み込むことができます。それとは別に、Cargo は Rust エコシステムの重要な部分であり、使いこなせるようになっているべきです。
Mini exercise
少人数のグループに分け、以下を行います。
cargoがメリットをもたらす可能性のあるシナリオをブレインストーミングし、それらのシナリオのリスク プロファイルを評価します。gnやninja、オフラインのcargoなどを使用する際に、どのツール、ライブラリ、人々を信頼しなければならないかについて話し合います。
受講者に、演習を完了する前にスピーカー ノートをのぞかないようお願いしてください。コースの受講者同士が地理的に集まっていると仮定して、3~4 人の少人数のグループで話し合ってもらうようにお願いしてください。
演習の前半に関するメモとヒント(「Cargo がメリットをもたらすシナリオ」):
-
ツールの作成時や Chromium の一部のプロトタイピング時に、crates.io ライブラリの充実したエコシステムにアクセスできるのは素晴らしいことです。ほぼすべての事柄についてクレートが用意されており、大概の場合はとても快適に使用できます(コマンドラインを解析するための
clap、さまざまな形式との間でシリアル化または逆シリアル化を行うためのserde、イテレータを操作するためのitertoolsなど)。cargoを使用すると、ライブラリを簡単に試すことができます(Cargo.tomlに 1 行追加してコードの記述を開始するだけです)。perlの普及に役立った CPAN や、pythonにおけるpipと比較してみると良いかもしれません。
-
主要な Rust ツール(ナイトリー、現在の安定版、古い安定版で動作する必要があるクレートをテストするときに、別の
rustcバージョンに切り替えるのに使用するrustupなど)だけでなく、サードパーティ ツールのエコシステム(Mozilla が提供するセキュリティ監査の容易化と共有のためcargo vet、ベンチマークを容易に実行する方法を提供するcriterionクレートなど)により、開発エクスペリエンスは非常に快適となっています。cargoを使用すると、cargo install --locked cargo-vetを介してツールを簡単に追加できます。- Chrome 拡張機能や VScode 拡張機能と比較してみるのも良いかもしれません。
-
cargoが適切な選択となるような、幅広い汎用的なプロジェクトの例を以下に示します。- 意外かもしれませんが、業界ではコマンドライン ツールの作成に使用する言語として、Rust の人気が高まっています。ライブラリの幅とエルゴノミクスの点で Python に匹敵しつつも、豊富な型システムのおかげで堅牢で、(インタプリタ言語ではなくコンパイル言語なので)実行速度が高速です。
- Rust エコシステムに参加するには、Cargo などの標準の Rust ツールを使用する必要があります。外部からコントリビューションを受け、Chromium 以外(Bazel や Android / Soong のビルド環境など)での使用が推奨されるライブラリでは、Cargo を使用することをおすすめします。
-
cargoベースの Chromium 関連プロジェクトの例:serde_json_lenient(Google の他の部門でテストした結果、PR のパフォーマンスが向上)font-typesなどのフォント化ライブラリgnrtツール(このコースの後半で取り上げます)は、コマンドラインの解析にはclapを使用し、構成ファイルにはtomlを使用します。- Disclaimer: a unique reason for using
cargowas unavailability ofgnwhen building and bootstrapping Rust standard library when building Rust toolchain. run_gnrt.pyuses Chromium’s copy ofcargoandrustc.gnrtdepends on third-party libraries downloaded from the internet, butrun_gnrt.pyaskscargothat only--lockedcontent is allowed viaCargo.lock.)
- Disclaimer: a unique reason for using
以下のアイテムは、暗黙的または明示的に信頼されているとみなして構いません。
- LLVM ライブラリ、Clang コンパイラ、
rustcソース(GitHub から取得され、Rust コンパイラ チームによるレビューを受けたもの)、ブートストラップ用にダウンロードされたバイナリ Rust コンパイラに依存するrustc(Rust コンパイラ) rustup(rustupはrustcと同じく https://github.com/rust-lang/ 組織の傘下で開発されていることを説明すると良いかもしれません)cargo、rustfmtなど- さまざまな内部インフラストラクチャ(
rustcをビルドする bot、事前構築済みのツールチェーンを Chromium エンジニアに配布するためのシステムなど) cargo auditやcargo vetなどの Cargo ツール//third_party/rustに取り込まれたRust ライブラリ(security@chromium.org が監査)- その他の Rust ライブラリ(ニッチなものもあれば、非常に人気がありよく使用されるものもあります)
Chromium の Rust ポリシー
Chromium では、Chromium の エリア テクニカル リード によって承認されているまれなケースを除き、ファースト パーティでのRust使用はまだ許可されていません。
サードパーティ ライブラリに関する Chromium のポリシーについては、こちら をご覧ください。Rust は、パフォーマンスやセキュリティを高めるうえで最適な選択肢である場合を含め、さまざまな状況でサードパーティ ライブラリに使用することが許可されています。
C / C++ API を直接公開する Rust ライブラリはほとんどないため、こうしたライブラリのほぼすべてで、少量のファースト パーティ グルーコードが必要になります。
特定のサードパーティ クレート用のファースト パーティ Rust グルーコードは通常、
third_party/rust/<crate>/<version>/wrapperに置かれるべきです。
以上の理由から、本日のコースでは以下に焦点を当てます。
- サードパーティの Rust ライブラリ(「クレート」)を導入する。
- Chromium C++ からクレートを使用できるようにグルーコードを記述する。
このポリシーが変更された場合は、それに合わせてコースも変更されます。
Build rules
Rust コードは通常、cargo を使用してビルドされます。Chromium は効率を高めるために gn と ninjaを使用してビルドされますが、その静的ルールによって最大限の並列処理が可能になります。Rust も例外ではありません。
Chromium に Rust コードを追加する
Chromium の既存の BUILD.gn ファイルで、rust_static_library を宣言します。
import("//build/rust/rust_static_library.gni")
rust_static_library("my_rust_lib") {
crate_root = "lib.rs"
sources = [ "lib.rs" ]
}
他の Rust ターゲットに deps を追加することもできます。後でこれを使用して、サードパーティのコードへの依存を設定します。
クレートルートとソースの完全なリストの両方を指定する必要があります。crate_root は Rust コンパイラに渡されるファイルで、コンパイル単位のルートファイル(通常は lib.rs)を表します。sources はすべてのソースファイルの完全なリストで、再ビルドが必要なタイミングを ninja が判断するために必要です。
(Rust ではクレート全体がコンパイル単位であるため、source_setと呼べるようなものは存在しません。static_library が最小単位です)。
受講者は、なぜ Rust の静的ライブラリに対する gn の組み込みサポート ではなく、gn テンプレートを使用する必要があるのか疑問に思うかもしれません。その答えは、このテンプレートが CXX 相互運用、Rustのfeatures、単体テストをサポートしているためです。その一部は後で使用します。
unsafe Rust コードの追加
安全でない Rust コードはデフォルトでは rust_static_library で禁止されており、コンパイルできません。安全でない Rust コードが必要な場合は、gn ターゲットに allow_unsafe = true を追加します(これが必要になる状況については、このコースの後半で説明します)。
import("//build/rust/rust_static_library.gni")
rust_static_library("my_rust_lib") {
crate_root = "lib.rs"
sources = [
"lib.rs",
"hippopotamus.rs"
]
allow_unsafe = true
}
Chromium C++からRustのコードに依存させる
上記のターゲットをいくつかの Chromium C++ ターゲットの deps に追加するだけです。
import("//build/rust/rust_static_library.gni")
rust_static_library("my_rust_lib") {
crate_root = "lib.rs"
sources = [ "lib.rs" ]
}
# または source_set、static_library など
component("preexisting_cpp") {
deps = [ ":my_rust_lib" ]
}
Visual Studio Code
Rust コードでは型が省略されているため、優れた IDE は C++ の場合よりもさらに有用です。Visual Studio Code は Chromium の Rust で適切に機能します。Visual Studio Code を使用するにあたり、以下の点を確認してください。
- VSCode に、以前の形式の Rust サポートではなく、
rust-analyzer拡張機能があることを確認 gn gen out/Debug --export-rust-project(またはあなたのプロジェクトにおける同様の出力ディレクトリ)ln -s out/Debug/rust-project.json rust-project.json
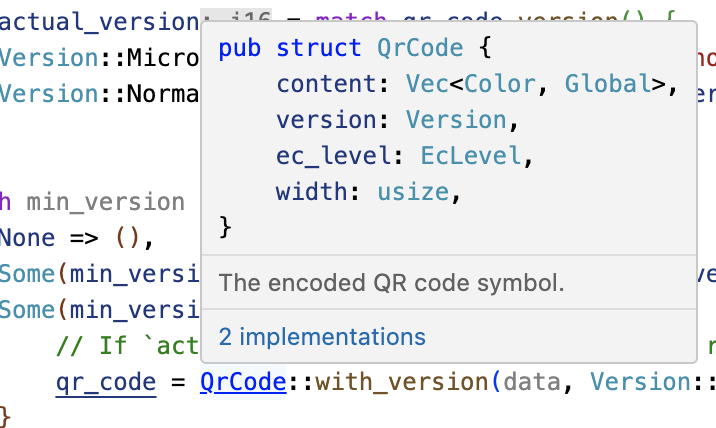
IDE に懐疑的な受講者に対しては、rust-analyzer のコード アノテーションと探索機能のデモを行うと良いかもしれません。
以下の手順に沿ってデモを行うことをおすすめします(代わりに自分が最も精通している Chromium 関連の Rustコードを使用しても構いません)。
components/qr_code_generator/qr_code_generator_ffi_glue.rsを開きます。- `qr_code_generator_ffi_glue.rs の
QrCode::new呼び出し(26 行目付近)にカーソルを合わせます。 - show documentation のデモを行います(一般的なバインディング: vscode = ctrl ki、vim/CoC = K)。
- go to definition のデモを行います(一般的なバインディング: vscode = F12、vim/CoC = g d)(これにより、
//third_party/rust/.../qr_code-.../src/lib.rsに移動します)。 - outline のデモを行い、
QrCode::with_bitsメソッドに移動します(164 行目付近。アウトラインは VSCode のファイル エクスプローラ ペインにあります。一般的な vim/CoC バインディング = space o)。 - Demo type annotations (there are quite a few nice examples in the
QrCode::with_bitsmethod)
BUILD.gn ファイルの編集後は gn gen ... --export-rust-project を再実行する必要があることを説明してください(このセッションの演習全体で数回行います)。
Build rules exercise
Chromium のビルドで、以下を含む新しい Rust ターゲットを //ui/base/BUILD.gn に追加します。
#![allow(unused)] fn main() { // SAFETY: There is no other global function of this name. #[unsafe(no_mangle)] pub extern "C" fn hello_from_rust() { println!("Hello from Rust!") } }
Important: note that no_mangle here is considered a type of unsafety by the Rust compiler, so you’ll need to allow unsafe code in your gn target.
この新しい Rust ターゲットを //ui/base:base の依存関係として追加します。この関数を ui/base/resource/resource_bundle.cc の先頭で宣言します(後ほど、バインディング生成ツールでこれを自動化する方法を説明します)。
extern "C" void hello_from_rust();
この関数を ui/base/resource/resource_bundle.cc 内のどこかから呼び出します。おすすめはResourceBundle::MaybeMangleLocalizedString の先頭から呼び出すことです。Chromium をビルドして実行し、“Hello from Rust!” が何度も出力されていることを確認します。
VSCode を使用している場合は、VSCode で適切に動作するように Rust を設定します。これは、後続の演習で役立ちます。設定が完了したら、println! で “Go to definition” を右クリックで利用できるようになります。
参考情報
rust_static_librarygn テンプレート で使用できるオプション- Information about
#[unsafe(no_mangle)] extern "C"に関する情報- gn の
--export-rust-projectスイッチに関する情報 - VSCode に rust-analyzer をインストールする方法
この例は、共通の相互運用言語である C に集約されているため、一般的ではありません。C++ と Rust はどちらも、C ABI 関数をネイティブに宣言して呼び出すことができます。コースの後半で、C++ を Rust に直接接続します。
allow_unsafe = true is required here because #[unsafe(no_mangle)] might allow Rust to generate two functions with the same name, and Rust can no longer guarantee that the right one is called.
純粋な Rust 実行可能ファイルが必要な場合は、rust_executable gn テンプレートを使用して行うこともできます。
テスト
Rust コミュニティは通常、テスト対象のコードと同じソースファイルに配置されたモジュールで単体テストを作成します。これは本コースの 前の部分 で説明しており、以下のようになります。
#![allow(unused)] fn main() { #[cfg(test)] mod tests { #[test] fn my_test() { todo!() } } }
Chromium では単体テストを別のソースファイルに配置しており、Rust でもこの方針を継続します。これにより、テストが常に検出可能になり、2 度目に(test 構成で).rs ファイルを再ビルドする必要がなくなります。
その結果、Chromium で Rust コードをテストするための次の選択肢が提供されます。
- ネイティブ Rust テスト(例:
#[test])。//third_party/rust以外では推奨されません。 - C++ で作成され、FFI 呼び出しを介して Rust を実行する
gtestテスト。Rust コードが単なる薄いFFI レイヤであり、既存の単体テストで今後この機能が漏れなくカバーされる場合には十分です。 - Rust で作成され、公開 API を介してテスト対象のクレートを使用する
gtestテスト(必要に応じてpub mod for_testing { ... }を使用)。これについては、次の数枚のスライドで説明します。
サードパーティ クレートのネイティブ Rust テストが最終的に Chromium bot によって実行される必要があることを説明します(このようなテストが必要になることはめったになく、サードパーティのクレートを追加または更新した後にのみ必要となります)。
C++ のgtest と Rust のgtest をどのような場合に使うべきか、いくつかの例を使って説明するとよいでしょう。
-
QR には、ファースト パーティの Rust レイヤの機能はほとんどありません(単なるシン FFI グルーです)。そのため、C++ と Rust の実装の両方をテストするには、既存の C++ 単体テストを使用します(テストをパラメータ化し、
ScopedFeatureListを使用して Rust を有効化または無効化できるようになっています)。 -
仮定の、または開発中の PNG 統合では、
libpngでは提供されているのに、pngクレートでは欠落しているピクセル変換(RGBA => BGRA、ガンマ補正など)のメモリセーフな実装が必要となる場合があります。このような機能の開発においては、別途Rustでテストを作成することが役立つ場合があります。
rust_gtest_interop ライブラリ
rust_gtest_interop ライブラリを使用すると、次のことができます。
- Rust 関数を
gtestテストケースとして使用する(#[gtest(...)]属性を使用)。 expect_eq!などのマクロを使用する(assert_eq!と似ていますが、アサーションが失敗してもパニックせず、テストを終了しません)。
Example:
use rust_gtest_interop::prelude::*;
#[gtest(MyRustTestSuite, MyAdditionTest)]
fn test_addition() {
expect_eq!(2 + 2, 4);
}Rust テスト用の GN ルール
Rust の gtest テストをビルドする最も簡単な方法は、C++ で作成されたテストがすでに含まれている既存のテストバイナリに追加することです。次に例を示します。
test("ui_base_unittests") {
...
sources += [ "my_rust_lib_unittest.rs" ]
deps += [ ":my_rust_lib" ]
}
別途、static_library で Rust テストを作成することも可能ですが、サポート ライブラリへの依存関係を手動で宣言する必要があります。
rust_static_library("my_rust_lib_unittests") {
testonly = true
is_gtest_unittests = true
crate_root = "my_rust_lib_unittest.rs"
sources = [ "my_rust_lib_unittest.rs" ]
deps = [
":my_rust_lib",
"//testing/rust_gtest_interop",
]
}
test("ui_base_unittests") {
...
deps += [ ":my_rust_lib_unittests" ]
}
chromium::import! マクロ
GN の deps に :my_rust_lib を追加した後も、my_rust_lib_unittest.rs から my_rust_lib をインポートして使用する方法について学ぶ必要があります。my_rust_lib には明示的な crate_name が指定されていないため、クレート名はターゲットのフルパスと名前に基づいて生成されます。幸い、自動的にインポートされる chromium クレートから chromium::import! マクロを使用すれば、このような扱いにくい名前の使用を回避できます。
chromium::import! {
"//ui/base:my_rust_lib";
}
use my_rust_lib::my_function_under_test;内部で、マクロは次のように展開されます。
extern crate ui_sbase_cmy_urust_ulib as my_rust_lib;
use my_rust_lib::my_function_under_test;詳しくは、chromium::import マクロの ドキュメント コメント をご覧ください。
rust_static_library は、crate_name プロパティによる明示的な名前の指定をサポートしていますが、クレート名はグローバルに一意である必要があるため、これは推奨されません。crates.io はクレート名の一意性を保証しているため、cargo_crate GN ターゲット(後述の gnrt ツールで生成)は短いクレート名を使用します。
Testing exercise
新たな演習の時間です!
Chromium ビルドで以下を行ってください。
hello_from_rustの横にテスト可能な関数を追加します。たとえば、引数として受け取った 2 つの整数を追加する、n 番目のフィボナッチ数を計算する、スライス内の整数を合計する、などが考えられます。- 新しい関数のテストを含む別個の
..._unittest.rsファイルを追加します。 - 新しいテストを
BUILD.gnに追加します。 - テストをビルドして実行し、新しいテストが機能することを確認します。
C++との相互運用性
Rust コミュニティには C++ と Rust の相互運用のためのオプションが複数用意されており、絶えず新しいツールが開発されています。現在のところ、Chromium では CXX というツールを使用しています。
言語境界全体をインターフェース定義言語(Rust によく似ています)で記述すると、CXX ツールが Rust と C++ の両方で関数と型の宣言を生成します。

CXX の詳細な使用例については、CXX チュートリアル をご覧ください。
図を見ながら話しましょう。裏で行われる処理は以前とまったく同じであり、このプロセスを自動化すると次のようなメリットがあることを説明します。
- このツールは、C++ 側と Rust 側が一致することを保証します(たとえば、
#[cxx::bridge]が実際の C++ または Rust の定義と一致しない場合、コンパイル エラーが発生しますが、同期されていない手動バインディングを使用すると、未定義の動作が発生します)。 - このツールは、C 以外の機能に対する FFI サンク(小さな C-ABI 互換のフリー関数)の生成を自動化します(Rust または C++ メソッドへの FFI 呼び出しの有効化など。手動バインディングでは、このようなトップレベルのフリー関数を手動で作成する必要があります)。
- ツールとライブラリは、次のような一連の主要な型を処理できます。
&[T]は、特定の ABI やメモリ レイアウトを保証するものではありませんが、FFI の境界を超えて渡すことができます。手動バインディングでは、std::span<T>/&[T]を手動で分離し、ポインタと長さから再構築する必要があります。言語ごとに空のスライスの表現方法が若干異なるため、エラーが発生しやすくなります。std::unique_ptr<T>、std::shared_ptr<T>、Boxなどのスマート ポインタは、ネイティブにサポートされています。手動バインディングでは、C-ABI 互換の未加工ポインタを渡す必要があるため、ライフタイムとメモリ安全性に関するリスクが高まります。rust::String型とCxxString型は、言語間の文字列表現の違いを理解し、維持します(たとえば、rust::String::lossyは、非 UTF8 の入力から Rust 文字列を作成できます。また、rust::String::c_strは文字列を NUL 終端できます)。
バインディングの例
CXX では、C++ と Rust の境界全体を .rs ソースコード内の cxx::bridge モジュールで宣言する必要があります。
#[cxx::bridge]
mod ffi {
extern "Rust" {
type MultiBuf;
fn next_chunk(buf: &mut MultiBuf) -> &[u8];
}
unsafe extern "C++" {
include!("example/include/blobstore.h");
type BlobstoreClient;
fn new_blobstore_client() -> UniquePtr<BlobstoreClient>;
fn put(self: &BlobstoreClient, buf: &mut MultiBuf) -> Result<u64>;
}
}
// Rust の型と関数の定義をここに記述します。以下を説明します。
- これは通常の Rust
modのように見えますが、#[cxx::bridge]プロシージャル マクロはこれに対して複雑な処理を行います。生成されるコードはもっと洗練されていますが、それでもコードにはffiというmodが作成されます。 - Rust での C++ の
std::unique_ptrのネイティブ サポート - Native support for Rust slices in C++
- C++ から Rust および Rust の型への呼び出し(上部)
- Rust から C++ および C++ の型への呼び出し(下部)
よくある誤解: Rust で C++ ヘッダーが解析されているように見えますが、これは誤解です。このヘッダーは Rust では解釈されず、C++ コンパイラのために生成された C++ コードに #include されているだけです。
CXXの限界
CXX を使用するときに最も役立つページは、型リファレンス です。
CXX は基本的に、次のようなケースに適しています。
- Rust-C++ インターフェースが十分にシンプルで、すべてを宣言できる場合。
- すでに CXX でネイティブにサポートされている型のみを使用している場合(例:
std::unique_ptr、std::string、&[u8])。
Rust の Option 型がサポートされていないなど、CXX には多くの制限があります。
こうした制限により、Chromium では 任意の Rust と C++ の相互運用は行われず、Rustの使用は十分に独立したコードに限定されています。Chromium での Rust のユースケースを検討する際は、まず、言語境界の CXX バインディングの下書きを作成して、シンプルに見えるかどうかを確認することをおすすめします。
また、CXX のその他の厄介な点を説明する必要があります。次に例を示します。
- エラー処理が C++ 例外に基づいて行われる(次のスライドを参照)。
- 関数ポインタが使いにくい。
CXXにおけるエラー処理
CXX の Result<T,E> のサポート は、C++ 例外に依存しているため、Chromium では使用できません。以下の代替手段があります。
-
Result<T, E>のTの部分:- out パラメータを介して返すことができます(例:
&mut T)。そのためには、Tを FFI の境界を越えて渡せる必要があります。たとえば、Tには以下を指定する必要があります。- プリミティブ型(
u32、usizeなど) - (
Box<T>とは異なり)適切なデフォルト値を持つcxxでネイティブにサポートされている型(UniquePtr<T>など)。
- プリミティブ型(
- Rust 側で保持し、参照を介して公開できます。これは、
Tが Rust 型の場合に必要になることがあります。Rust 型は FFI の境界を超えて渡すことができず、UniquePtr<T>に格納することもできません。
- out パラメータを介して返すことができます(例:
-
Result<T, E>のEの部分:- ブール値として返すことができます(たとえば、
trueは成功、falseは失敗を表します)。 - 理論上はエラーの詳細を保持できますが、これまでは実際に必要になることはありませんでした。
- ブール値として返すことができます(たとえば、
CXX Error Handling: QR Example
QR コード生成ツールは、ブール値が成功または失敗を伝達し、成功の結果を FFI の境界を超えて受け渡すことができる 一例 です。
#[cxx::bridge(namespace = "qr_code_generator")]
mod ffi {
extern "Rust" {
fn generate_qr_code_using_rust(
data: &[u8],
min_version: i16,
out_pixels: Pin<&mut CxxVector<u8>>,
out_qr_size: &mut usize,
) -> bool;
}
}受講者は out_qr_size 出力のセマンティクスに関心を持っている可能性があります。これはベクターのサイズではなく、QR コードのサイズです(つまり、この情報は冗長であり、ベクターのサイズの平方根に相当します)。
Rust 関数を呼び出す前に out_qr_size を初期化することの重要性を説明しましょう。初期化されていないメモリを指す Rust 参照を作成すると、未定義の動作となります(そのようなメモリを逆参照する操作のみが UB になるC++ とは異なります)。
Pin について受講者から尋ねられた場合は、CXX が C++ データへの可変参照のために Pin を必要とする理由を説明します。つまり、C++ のデータには自己参照ポインタが含まれている可能性があるため、Rust のデータのように移動することができません。
CXX Error Handling: PNG Example
PNG デコーダのプロトタイプは、成功した結果を FFI の境界を越えて渡せない場合に何ができるかを示しています。
#[cxx::bridge(namespace = "gfx::rust_bindings")]
mod ffi {
extern "Rust" {
/// これは `Result<PngReader<'a>,()>` と同等の FFI 対応の結果を
/// 返します。
fn new_png_reader<'a>(input: &'a [u8]) -> Box<ResultOfPngReader<'a>>;
/// `crate::png::ResultOfPngReader` 型の C++ バインディング
type ResultOfPngReader<'a>;
fn is_err(self: &ResultOfPngReader) -> bool;
fn unwrap_as_mut<'a, 'b>(
self: &'b mut ResultOfPngReader<'a>,
) -> &'b mut PngReader<'a>;
/// `crate::png::PngReader` 型の C++ バインディング
type PngReader<'a>;
fn height(self: &PngReader) -> u32;
fn width(self: &PngReader) -> u32;
fn read_rgba8(self: &mut PngReader, output: &mut [u8]) -> bool;
}
}PngReader と ResultOfPngReaderは Rust 型です。これらの型のオブジェクトは、Box<T> を介さずに FFI 境界を越えることはできません。CXX では Rust オブジェクトを値で格納できないため、out_parameter: &mut PngReader と書くことはできません。
この例は、CXX が任意のジェネリクスやテンプレートをサポートしていなくても、手動で非ジェネリック型に特化 / 単相化することで、FFI 境界を越えて渡せることを示しています。この例では、ResultOfPngReader はResult<T, E> の適切なメソッド(is_err、unwrap、as_mut など)に渡される非ジェネリック型です。
Chromium で cxx を使用する
Chromium では、Rust を使用するリーフノードごとに独立した #[cxx::bridge] mod を定義します。通常は、rust_static_library ごとに 1 つずつになります。
cxx_bindings = [ "my_rust_file.rs" ]
# すべてのソースファイルではなく、#[cxx::bridge] を含むファイルのリスト
allow_unsafe = true
上記のコードを、crate_root や sourcesと並んで、既存の rust_static_library ターゲットに追加するだけです。
C++ ヘッダーは適切な場所で生成されるため、次のようにインクルードできます。
#include "ui/base/my_rust_file.rs.h"
//base には、Chromium C++ 型から CXX Rust 型(およびその逆方向)への変換を行うためのユーティリティ関数がいくつかあります(例: SpanToRustSlice)。
受講者から、allow_unsafe = true がなぜここでも必要なのかを尋ねられる可能性があります。
大まかに答えると、C/C++ コードは通常の Rust 標準では「安全」ではありません。Rust から C/C++ に行ったり来たりすると、メモリに対して任意の処理が行われ、Rust 独自のデータ レイアウトの安全性が損なわれる可能性があります。C/C++ の相互運用で unsafe キーワードが多すぎると、unsafeに対する注目度が薄れるので、これには 賛否両論があります。ただし厳密には、外部コードを Rust バイナリに取り込むと、Rust の観点からは想定していない動作が発生する可能性があります。
具体的な答えは、このページ の上部の図にあります。裏では、CXX は Rust の unsafe 関数と extern "C" 関数を生成します。これは前のセクションで手動で行ったのとまったく同じです。
Exercise: Interoperability with C++
パート 1
- 先ほど作成した Rust ファイルに、C++ から呼び出す単一の関数を示す
#[cxx::bridge]を追加します。これはhello_from_rustという関数で、パラメータを受け取らず、値も返しません。 - Modify your previous
hello_from_rustfunction to removeextern "C"and#[unsafe(no_mangle)]. This is now just a standard Rust function. gnターゲットを変更して、これらのバインディングをビルドします。- C++ コードで、
hello_from_rustの前方宣言を削除し、代わりに生成されたヘッダー ファイルをインクルードします。 - ビルドして実行します。
パート 2
CXX を少し使ってみて、Chromium における Rust の柔軟性について理解を深めましょう。
以下を試してください。
- Rust から C++ を呼び出します。これには以下が必要です。
cxx::bridgeからinclude!できる追加のヘッダー ファイル。その新しいヘッダー ファイルで C++ 関数を宣言する必要があります。- このような関数を呼び出す
unsafeブロック。または こちら に記載されているとおり、#[cxx::bridge]内でunsafeキーワードを指定する必要があります。 #include "third_party/rust/cxx/v1/crate/include/cxx.h"も必要になるかもしれません。
- C++ から Rust に C++ 文字列を渡します。
- C++ オブジェクトへの参照を Rust に渡します。
- 意図的に
#[cxx::bridge]と一致しないようにRust 関数のシグネチャを変更し、表示されるエラーに慣れるようにします。 - 意図的に
#[cxx::bridge]と一致しないようにC++ 関数のシグネチャを変更し、表示されるエラーに慣れるようにします。 - なんらかの型の
std::unique_ptrを C++ から Rust に渡して、Rust がいくつかの C++ オブジェクトを所有できるようにします。 - Rust オブジェクトを作成して C++ に渡して、C++ がそれを所有できるようにします(ヒント:
Boxが必要です)。 - C++ 型でいくつかのメソッドを宣言し、Rust から呼び出します。
- Rust 型に対していくつかのメソッドを宣言し、C++ から呼び出します。
パート 3
CXX の相互運用性の長所と制限事項について理解したところで、インターフェースが非常にシンプルな、Chromium での Rust のユースケースをいくつか考えてみましょう。このインターフェースをどのように定義すればよいか考えてみましょう。
参考情報
次のような質問が寄せられる可能性があります。
- X と Y の両方が関数型である場合に、型 X の変数を型 Y で初期化すると問題が発生します。これは、C++ 関数が
cxx::bridge内の宣言と完全に一致しないためです。 - C++ 参照を Rust 参照に自由に変換できるようですが、UB のリスクはないでしょうか?CXX の不透明型の場合、サイズがゼロであるため、そのリスクはありません。CXX のトリビアル型では UB が発生する可能性がありますが、CXX の設計上、そのような例を作成するのは非常に困難です。
サードパーティのクレートを追加する
Rust ライブラリは「クレート」と呼ばれ、crates.io にあります。Rust クレートを互いに依存させるのは非常に簡単であり、実際にそのようになっています
| プロパティ | C++ library | Rust crate |
|---|---|---|
| Build system | 多数 | 一貫して Cargo.toml |
| 一般的なライブラリ サイズ | やや大 | 小 |
| 推移的依存関係 | 少 | 多数 |
Chromium のエンジニアにとって、クレートには長所と短所があります。
- すべてのクレートが共通のビルドシステムを使用しているため、Chromium への取り込みを自動化できます。
- しかし、クレートには通常、推移的依存関係があるため、複数のライブラリを取り込むことが必要になる可能性があります。
議論する内容は次のとおりです。
- Chromium ソースコード ツリーにクレートを配置する方法
- クレート用の
gnビルドルールを作成する方法 - クレートのソースコードの十分な安全性を監査する方法。
Cargo.toml ファイルによりクレートを追加する方法
Chromium には、一元管理される直接的なクレート依存関係が 1 セットあります。これらは単一の Cargo.toml で管理されます。
[dependencies]
bitflags = "1"
cfg-if = "1"
cxx = "1"
# lots more...
他の Cargo.toml と同様に、依存関係の詳細 を指定できます。通常は、クレートで有効にする features を指定します。
Chromium にクレートを追加する際は、多くの場合、 gnrt_config.tomlという追加ファイルに情報を指定する必要があります。これについては後で説明します。
gnrt_config.toml を構成する
Cargo.toml のほかに、gnrt_config.toml があります。これには、クレートを扱うための Chromium 固有の拡張機能が含まれています。
新しいクレートを追加する場合は、少なくとも次のいずれかの group を指定する必要があります。
# 'safe': The library satisfies the rule-of-2 and can be used in any process.
# 'sandbox': The library does not satisfy the rule-of-2 and must be used in
# a sandboxed process such as the renderer or a utility process.
# 'test': The library is only used in tests.
次に例を示します。
[crate.my-new-crate]
group = 'test' # only used in test code
クレートのソースコードのレイアウトによっては、このファイルを使用して LICENSE ファイルを見つける場所も指定する必要があります。
後ほど、いくつかの問題を解決するためにこのファイルに指定する必要がある設定について取り扱います。
クレートをダウンロードする
gnrt というツールは、クレートのダウンロード方法と BUILD.gn ルールの生成方法を把握しています。
まず、必要なクレートを次のようにダウンロードします。
cd chromium/src
vpython3 tools/crates/run_gnrt.py -- vendor
gnrtツールは Chromium のソースコードの一部ですが、このコマンドを実行すると、crates.ioから依存関係をダウンロードして実行します。これに関するセキュリティ上の決定については、前のセクション をご覧ください。
この vendor コマンドにより、以下がダウンロードされる場合があります。
- Your crate
- 直接的および推移的依存関係
cargoによって指示される、Chromium で必要となるクレートの完全セットを得るための他のクレートの新しいバージョン。
Chromium では、一部のクレートに対するパッチが //third_party/rust/chromium_crates_io/patches に保存されています。これらは自動的に再適用されますが、パッチ適用が失敗した場合は、手動による解決が必要になる場合があります。
gn ビルドルールを生成する
クレートをダウンロードしたら、以下のように BUILD.gn ファイルを作成します。
vpython3 tools/crates/run_gnrt.py -- gen
git status を実行し、以下を確認します。
third_party/rust/chromium_crates_io/vendorに 1 つ以上の新しいクレート ソースコードがあることthird_party/rust/<crate name>/v<major semver version>に 1 つ以上の新しいBUILD.gnがあること- 適切な
README.chromiumがあること
The “major semver version” is a Rust “semver” version number.
特に third_party/rust 以下に生成されるものをよく確認してください。
semver について、特に Chromium では互換性のないクレートのバージョンが複数許可されることを説明しておきましょう。これは推奨されませんが、Cargo エコシステムで必要になることがあります。
問題を解決する
ビルドが失敗した場合、build.rs(ビルド時に任意の処理を行うプログラム)が原因である可能性があります。これは、ビルドの並列性と再現性を最大化するために静的で決定的なビルドルールを目指す gn と ninja の設計とは、基本的に矛盾しています。
一部の build.rs アクションは自動的にサポートされますが、他のアクションには対応が必要です。
| ビルド スクリプトの効果 | gn テンプレートによるサポート | 必要な作業 |
|---|---|---|
| rustc のバージョンを確認して機能を有効または無効にする | はい | なし |
| プラットフォームまたは CPU を確認して機能を有効または無効にする | はい | なし |
| Generating code | はい | あり - gnrt_config.toml で指定する |
| C/C++ のビルド | いいえ | パッチを適用する |
| その他の任意のアクション | いいえ | パッチを適用する |
幸い、ほとんどのクレートにはビルド スクリプトが含まれておらず、ほとんどのビルド スクリプトは上位 2 つのアクションのみを実行します。
コードを生成するビルドスクリプト
ninjaがファイルを見つけられないというメッセージを表示する場合は、build.rs がソースコード ファイルを作成しているかどうかを確認します。
もしファイルが作成されるようになっていたら、gnrt_config.toml を変更して、クレートに build-script-outputs を追加します。これが推移的依存関係(Chromium コードが直接依存すべきでない依存関係)の場合は、allow-first-party-usage=false も追加します。このファイルには、すでにいくつかの例が含まれています。
[crate.unicode-linebreak]
allow-first-party-usage = false
build-script-outputs = ["tables.rs"]
次に、gnrt.py -- gen を再実行して BUILD.gn ファイルを再生成し、この特定の出力ファイルが後続のビルドステップで入力されることを ninja に教えます。
C++をビルドする、もしくは、任意のアクションを実行するビルドスクリプト
一部のクレートは、cc クレートを使用して、C / C++ ライブラリのビルドとリンクを行います。他のクレートは、ビルド スクリプト内で bindgen を使用して C / C++ を解析します。これらのアクションは、Chromium のコンテキストではサポートできません。Chromiumの gn、ninja、LLVM ビルドシステムは、ビルド アクション間の関係を非常に具体的に表現するためです。
したがって、次のようなオプションがあります。
- これらのクレートを使用しない
- クレートにパッチを適用する
パッチは third_party/rust/chromium_crates_io/patches/<crate> に保存する必要があります。たとえば、cxx クレートに対するパッチ をご覧ください。また、パッチはクレートがアップグレードされるたびに gnrt によって自動的に適用されます。
クレートへの依存を設定する
サードパーティ クレートを追加してビルドルールを生成したら、クレートへの依存を簡単に設定できます。rust_static_library ターゲットを見つけて、クレート内の :lib ターゲットに dep を追加します。
具体的には次のようにします。
次に例を示します。
rust_static_library("my_rust_lib") {
crate_root = "lib.rs"
sources = [ "lib.rs" ]
deps = [ "//third_party/rust/example_rust_crate/v1:lib" ]
}
サードパーティ クレートの監査
新しいライブラリを追加する場合、Chromium の標準の ポリシー が適用されますが、当然ながらセキュリティ審査の対象にもなります。1 つのクレートだけでなく推移的依存関係も取り込む場合、審査すべきコードが多数存在することがあります。その一方で、安全な Rust コードの取り込みに関しては、悪い副作用は限定的となります。クレートの審査はどのように行われるべきでしょうか。
Chromium は今後 cargo vet を中心としたプロセスに移行されていく予定ですが、
それまでの間、新しいクレートが追加されるたびに、以下のチェックを行います。
- 各クレートが使用されている理由と、クレート同士の関係を理解します。各クレートのビルドシステムに
build.rsまたは手続き型マクロが含まれている場合は、その目的を調べます。また、Chromium の通常のビルド方法と互換性があるかどうかも確認します。 - 各クレートが十分にメンテナンスされているか確認します。
cd third-party/rust/chromium_crates_io; cargo auditを使用して既知の脆弱性をチェックします(最初にcargo install cargo-auditを実行する必要がありますが、皮肉なことに、これによってインターネットから多くの依存関係をダウンロードすることになります 2)。unsafeなコードが Rule of Two を満たしていることを確認します。fsおよびnetのAPI が使用されているかどうかを確認します。- 悪意を持って不正に挿入された可能性のある部分がないか探すのに十分なレベルでコードを読みます(多くの場合、コードが多すぎて完璧にチェックすることはできません)。
これらはガイドラインにすぎません。security@chromium.org の審査担当者と協力して、自信を持ってクレートを使用するための適切な方法を見つけてください。
クレートを Chromium ソースコードにチェックインする
git status を実行すると、以下を確認できます。
//third_party/rust/chromium_crates_ioにあるクレートコード//third_party/rust/<crate>/<version>にあるメタデータ(BUILD.gnとREADME.chromium)
後者の場所に OWNERS ファイルも追加してください。
これらすべてを、Cargo.toml および gnrt_config.toml の変更とともに Chromium リポジトリに追加する必要があります。
重要: git add -f を使用する必要があります。そうしないと、.gitignore ファイルによって一部のファイルがスキップされる可能性があるためです。
その際、インクルーシブでない表現が原因で presubmit チェックが失敗することがあります。これは、Rust のクレートデータには Git ブランチの名前が含まれている傾向があり、多くのプロジェクトで依然としてインクルーシブでない表現が使用されているためです。そのため、以下を実行する必要があります。
infra/update_inclusive_language_presubmit_exempt_dirs.sh > infra/inclusive_language_presubmit_exempt_dirs.txt
git add -p infra/inclusive_language_presubmit_exempt_dirs.txt # add whatever changes are yours
クレートを最新の状態に保つ
サードパーティの Chromium 依存関係の所有者は、セキュリティに関する修正を行って依存関係を最新の状態に保つことが求められます。これはまもなく自動化されることが期待されていますが、現状は他のサードパーティの依存関係の場合と同様に、デベロッパーがその責任を負います。
演習
Chromium に uwuify を追加し、クレートの デフォルトの機能 を無効にします。クレートは Chromium の公開板で使用されますが、信頼できない入力の処理には使用されないと仮定してください。
(次の演習で Chromium の uwuify を使用しますが、ここで行っても構いません。または、uwuify を使用する新しい rust_executable ターゲット を作成することもできます)。
受講者は多数の推移的依存関係をダウンロードする必要があります。
必要なクレートは次のとおりです。
instantlock_apiparking_lotparking_lot_coreredox_syscallscopeguardsmallvecuwuify
受講者が上記以外のクレートをダウンロードしている場合は、デフォルトの機能を無効にするのを忘れている可能性があります。
このクレートに協力してくれた Daniel Liu に感謝します。
まとめ — 演習
この演習では、Chromium の新しい機能を追加しながら、これまで学んだことをまとめます。
プロダクト マネジメント部門からのブリーフィング
人里離れた熱帯雨林に生息するピクシー(妖精の一種)の村が発見されました。ピクシー向けの Chromium をできるだけ早く提供することが重要です。
要件は、Chromium のすべての UI 文字列をピクシーの言語に翻訳することです。
正式な翻訳を行っている時間はありませんが、幸いにもピクシーの言語は英語に非常に近く、その翻訳を行う Rust クレートがあることがわかりました。
(言うまでもなく、Chrome を実際に翻訳するには細心の注意と努力が必要ですので、これは公開しないでください)。
手順
表示前にすべての文字列を翻訳するように ResourceBundle::MaybeMangleLocalizedString を変更します。Chromium のこの特別なビルドでは、mangle_localized_strings_ の設定に関係なく、常にこのようにします。
ここまでの演習をすべて正しく終わらせれていれば、これでピクシー向けの Chrome が完成しているはずです。

- UTF16 と UTF8 について、受講者は Rust 文字列が常に UTF8 であることに注意する必要があります。おそらく、C++ 側で
base::UTF16ToUTF8を使用して変換、逆変換する方がよいと判断するでしょう。 - Rust 側で変換を行う場合は、
String::from_utf16の利用、エラー処理、多くの u16s を転送可能な CXX でサポートされている型 はどれかを検討する必要があります。 - 受講者はいくつかの異なる方法で C++ と Rust の境界を設計できます。たとえば、文字列を値で取得して返す、または文字列への可変参照を取得するなどです。可変参照が使用されている場合は、おそらく CXX は
Pinを使用する必要がある旨のメッセージを表示します。Pinの機能を説明し、C++ データへの可変参照のために CXX でPinが必要になる理由を説明する必要があるかもしれません。答えは、C++ データには自己参照ポインタが含まれている可能性があるため、Rust データのように移動できないためです。 ResourceBundle::MaybeMangleLocalizedStringを含む C++ ターゲットは、rust_static_libraryターゲットに依存する必要があります。受講者はすでにこれを行っているはずです。rust_static_libraryターゲットは//third_party/rust/uwuify/v0_2:libに依存する必要があります。
演習の解答
Chromium の演習の解答については、こちらの CL シリーズ をご覧ください。
ベアメタルRustへようこそ
こちらはベアメタルRustに関する独立した1日コースです。対象としているのは、Rustの基本的な部分に関しては習得済みな人で(例えば、本講座で)、Cなどの他の言語でベアメタル開発の経験があると理想的です。
今日、取り扱うのは、ベアメタルRustです。すなわち、OSなしでRustのコードを実行します。この章は以下のような構成になります:
no_stdRustとは?- マイクロコントローラ向けのファームウェア開発。
- アプリケーションプロセッサ向けのブートローダ/カーネル開発。
- ベアメタルRust開発に役立つクレートの紹介。
For the microcontroller part of the course we will use the BBC micro:bit v2 as an example. It’s a development board based on the Nordic nRF52833 microcontroller with some LEDs and buttons, an I2C-connected accelerometer and compass, and an on-board SWD debugger.
まずはじめに、後ほど必要となるいくつかのツールをインストールします。gLinuxまたはDebianの場合は以下のようになります:
sudo apt install gdb-multiarch libudev-dev picocom pkg-config qemu-system-arm
rustup update
rustup target add aarch64-unknown-none thumbv7em-none-eabihf
rustup component add llvm-tools-preview
cargo install cargo-binutils
curl --proto '=https' --tlsv1.2 -LsSf https://github.com/probe-rs/probe-rs/releases/latest/download/probe-rs-tools-installer.sh | sh
さらに、plugdevグループにmicro:bitプログラム用デバイスへのアクセスを付与します:
echo 'SUBSYSTEM=="hidraw", ATTRS{idVendor}=="0d28", MODE="0660", GROUP="logindev", TAG+="uaccess"' |\
sudo tee /etc/udev/rules.d/50-microbit.rules
sudo udevadm control --reload-rules
MacOSの場合は以下のようになります:
xcode-select --install
brew install gdb picocom qemu
rustup update
rustup target add aarch64-unknown-none thumbv7em-none-eabihf
rustup component add llvm-tools-preview
cargo install cargo-binutils
curl --proto '=https' --tlsv1.2 -LsSf https://github.com/probe-rs/probe-rs/releases/latest/download/probe-rs-tools-installer.sh | sh
no_std
|
|
|
|
|---|---|---|
|
|
|
HashMapはRNGに依存します。stdはcoreとallocの両方を再エクスポートします。
最小限のno_stdプログラム
#![no_main] #![no_std] use core::panic::PanicInfo; #[panic_handler] fn panic(_panic: &PanicInfo) -> ! { loop {} }
- このコードは空のバイナリにコンパイルされます。
- パニックハンドラは
stdが提供するので、それを使わない場合は自分で提供する必要があります。 - あるいは、
panic-haltのような別のクレートが提供するパニックハンドラを利用することもできます。 - ターゲットによっては、
eh_personalityに関するエラーを回避するためにpanic = "abort"を指定してコンパイルする必要があります。 - なお、
mainのようなプログラムの規定エントリポイントはないので、自分でエントリポイントを定義する必要があります。通常、Rustコードを実行できるようにするためには、リンカスクリプトとある程度のアセンブリコードを必要とします。
alloc
allocを使うためには、グローバル(ヒープ)アロケータを実装しなければなりません。
#![no_main] #![no_std] extern crate alloc; extern crate panic_halt as _; use alloc::string::ToString; use alloc::vec::Vec; use buddy_system_allocator::LockedHeap; #[global_allocator] static HEAP_ALLOCATOR: LockedHeap<32> = LockedHeap::<32>::new(); static mut HEAP: [u8; 65536] = [0; 65536]; pub fn entry() { // SAFETY: `HEAP` is only used here and `entry` is only called once. unsafe { // アロケーターにメモリを割り当てます。 HEAP_ALLOCATOR.lock().init(HEAP.as_mut_ptr() as usize, HEAP.len()); } // これで、ヒープ割り当てを必要とする処理を実行できるようになりました。 let mut v = Vec::new(); v.push("A string".to_string()); }
buddy_system_allocatorはサードパーティのクレートで、単純なバディシステムアロケータです。その他にも利用できるクレートはありますし、自前で実装したり、別のアロケータに自分のコードをフックすることも可能です。- パラメータ定数
LockedHeapはアロケータの最大オーダを示します。この場合、2**32バイトの領域を確保することが可能です。 - もし依存関係にあるクレートが
allocに依存する場合、必ずバイナリファイルあたり一つだけのグローバルなアロケータが存在するようにしなければなりません。通常、これはトップレベルのバイナリを生成するクレートにより制御されます。 extern crate panic_halt as _という部分は、panic_haltクレートを確実にリンクし、パニックハンドラを利用可能にするために必要です。- この例で示したコードはビルドできますが、エントリポイントがないので実行することはできません。
マイクロコントローラ
cortex_m_rtクレートはCortex Mマイクロコントローラ向けのリセットハンドラ(とその他もろもろ)を提供します。
#![no_main] #![no_std] extern crate panic_halt as _; mod interrupts; use cortex_m_rt::entry; #[entry] fn main() -> ! { loop {} }
次は、抽象度の低いレベルから順に周辺I/Oにアクセスする方法について見ていきます。
- リセットハンドラはリターンしないので、
cortex_m_rt::entryマクロは対象関数がfn() -> !という型であることを要求します。 - この例は
cargo embed --bin minimalにより実行します
生MMIO(メモリマップドI/O)
大半のマイクロコントローラはメモリマップドRIO空間を通して周辺I/Oにアクセスします。micro:bitのLEDを光らせてみましょう:
#![no_main] #![no_std] extern crate panic_halt as _; mod interrupts; use core::mem::size_of; use cortex_m_rt::entry; /// GPIO 0 番ポートの周辺アドレス const GPIO_P0: usize = 0x5000_0000; // GPIO 周辺機器オフセット const PIN_CNF: usize = 0x700; const OUTSET: usize = 0x508; const OUTCLR: usize = 0x50c; // PIN_CNF フィールド const DIR_OUTPUT: u32 = 0x1; const INPUT_DISCONNECT: u32 = 0x1 << 1; const PULL_DISABLED: u32 = 0x0 << 2; const DRIVE_S0S1: u32 = 0x0 << 8; const SENSE_DISABLED: u32 = 0x0 << 16; #[entry] fn main() -> ! { // GPIO 0 の 21 番ピンと 28 番ピンをプッシュプル出力として設定します。 let pin_cnf_21 = (GPIO_P0 + PIN_CNF + 21 * size_of::<u32>()) as *mut u32; let pin_cnf_28 = (GPIO_P0 + PIN_CNF + 28 * size_of::<u32>()) as *mut u32; // SAFETY: The pointers are to valid peripheral control registers, and no // aliases exist. unsafe { pin_cnf_21.write_volatile( DIR_OUTPUT | INPUT_DISCONNECT | PULL_DISABLED | DRIVE_S0S1 | SENSE_DISABLED, ); pin_cnf_28.write_volatile( DIR_OUTPUT | INPUT_DISCONNECT | PULL_DISABLED | DRIVE_S0S1 | SENSE_DISABLED, ); } // 28 番ピンをロー、21 番ピンをハイに設定して LED をオンにします。 let gpio0_outset = (GPIO_P0 + OUTSET) as *mut u32; let gpio0_outclr = (GPIO_P0 + OUTCLR) as *mut u32; // SAFETY: The pointers are to valid peripheral control registers, and no // aliases exist. unsafe { gpio0_outclr.write_volatile(1 << 28); gpio0_outset.write_volatile(1 << 21); } loop {} }
- GPIO 0のピン21はマトリクスLEDの一番目の列に、ピン28は最初の行に接続されています。
例の実行方法:
cargo embed --bin mmio
周辺I/Oへアクセスするためのクレート(PACs)
svd2rust はCMSIS-SVD ファイルから、メモリマップされた周辺I/Oに対するほぼ安全(mostly-safe)なRustラッパーを生成します。
#![no_main] #![no_std] extern crate panic_halt as _; use cortex_m_rt::entry; use nrf52833_pac::Peripherals; #[entry] fn main() -> ! { let p = Peripherals::take().unwrap(); let gpio0 = p.P0; // GPIO 0 の 21 番ピンと 28 番ピンをプッシュプル出力として設定します。 gpio0.pin_cnf[21].write(|w| { w.dir().output(); w.input().disconnect(); w.pull().disabled(); w.drive().s0s1(); w.sense().disabled(); w }); gpio0.pin_cnf[28].write(|w| { w.dir().output(); w.input().disconnect(); w.pull().disabled(); w.drive().s0s1(); w.sense().disabled(); w }); // 28 番ピンをロー、21 番ピンをハイに設定して LED をオンにします。 gpio0.outclr.write(|w| w.pin28().clear()); gpio0.outset.write(|w| w.pin21().set()); loop {} }
- SVD (System View Description)ファイルはXMLファイルでデバイスのメモリマップを記述したものであり、通常シリコンベンダにより提供されます。
- 周辺I/Oごとに、レジスタ、フィールドと値、名前、説明、アドレスなどにより構成されています。
- SVDファイルにはよく誤りがあり、また情報が不足していることも多いので、様々なプロジェクトがそれを修正・追加し、クレートとして公開しています。
cortex-m-rtはベクタテーブルも提供します。- もし
cargo install cargo-binutilsを実行していれば、cargo objdump --bin pac -- -d --no-show-raw-insnを実行することにより生成されたバイナリの中身を見ることができます。
例の実行方法:
cargo embed --bin pac
HALクレート
多くのマイクロコントローラに対するHALクレートが様々な周辺I/Oに対するラッパーを提供しています。これらのクレートの多くはembedded-halが定義するトレイトを実装しています。
#![no_main] #![no_std] extern crate panic_halt as _; use cortex_m_rt::entry; use embedded_hal::digital::OutputPin; use nrf52833_hal::gpio::{p0, Level}; use nrf52833_hal::pac::Peripherals; #[entry] fn main() -> ! { let p = Peripherals::take().unwrap(); // GPIO 0 番ポートの HAL ラッパーを作成します。 let gpio0 = p0::Parts::new(p.P0); // GPIO 0 の 21 番ピンと 28 番ピンをプッシュプル出力として設定します。 let mut col1 = gpio0.p0_28.into_push_pull_output(Level::High); let mut row1 = gpio0.p0_21.into_push_pull_output(Level::Low); // 28 番ピンをロー、21 番ピンをハイに設定して LED をオンにします。 col1.set_low().unwrap(); row1.set_high().unwrap(); loop {} }
set_lowとset_highはembedded_halのOutputPinトレイトの定義するメソッドです。- Cortex-MやRISC-Vの多くのデバイスに対してHALクレートが存在し、これらにはSTM32、GD32、nRF、NXP、MSP430、AVR、PICマイクロコントローラなどが含まれます。
例の実行方法:
cargo embed --bin hal
ボードサポートクレート
ボードサポートクレードは特定のボードに対して更に利便性を向上させるラッパーを提供します。
#![no_main] #![no_std] extern crate panic_halt as _; use cortex_m_rt::entry; use embedded_hal::digital::OutputPin; use microbit::Board; #[entry] fn main() -> ! { let mut board = Board::take().unwrap(); board.display_pins.col1.set_low().unwrap(); board.display_pins.row1.set_high().unwrap(); loop {} }
- この例では、ボードサポートクレートは単に分かりやすい名前を提供し、少しの初期化を実施しているだけです。
- マイクロコントローラの外に実装されたオンボードデバイスに対するドライバも提供されていることがあります。
microbit-v2はマトリクスLEDに対する簡単なドライバを含んでいます。
例の実行方法:
cargo embed --bin board_support
タイプステートパターン
#[entry] fn main() -> ! { let p = Peripherals::take().unwrap(); let gpio0 = p0::Parts::new(p.P0); let pin: P0_01<Disconnected> = gpio0.p0_01; // let gpio0_01_again = gpio0.p0_01; // エラー、移動済み。 let mut pin_input: P0_01<Input<Floating>> = pin.into_floating_input(); if pin_input.is_high().unwrap() { // ... } let mut pin_output: P0_01<Output<OpenDrain>> = pin_input .into_open_drain_output(OpenDrainConfig::Disconnect0Standard1, Level::Low); pin_output.set_high().unwrap(); // pin_input.is_high(); // エラー、移動済み。 let _pin2: P0_02<Output<OpenDrain>> = gpio0 .p0_02 .into_open_drain_output(OpenDrainConfig::Disconnect0Standard1, Level::Low); let _pin3: P0_03<Output<PushPull>> = gpio0.p0_03.into_push_pull_output(Level::Low); loop {} }
- この例では、ピンを表すタイプは
CopyもCloneも実装していません。そのため、ただ一つのインスタンスだけが存在可能です。ピンがポート構造体からムーブされると、他の誰もそのピンにアクセスすることはできなくなります。 - ピンの設定を変更することは古いピンのインスタンスを消費することになります。そのため、それ以降は古いインスタンスを使い続けることはできなくなります。
- 変数の型はその状態を表すようになっています。例えば、この例では型がGPIOピンの状態を表しています。このようにステートマシンをタイプシステムに織り込むことで、正しい設定をせずにピンを使ってしまうことがなくなります。不正な状態遷移に関してはコンパイル時に発見されるようになります。
- インプットピンに対して
is_highを呼び出すことは可能で、アウトプットピンに対してset_highを呼び出すことも可能です。しかし、その逆の組み合わせは不可能です。 - 多くのHALクレートがこのパターンを用いています。
embedded-hal
The embedded-hal crate provides a number of traits covering common microcontroller peripherals:
- GPIO
- PWM
- Delay timers
- I2C and SPI buses and devices
Similar traits for byte streams (e.g. UARTs), CAN buses and RNGs and broken out into embedded-io, embedded-can and rand_core respectively.
Other crates then implement drivers in terms of these traits, e.g. an accelerometer driver might need an I2C or SPI device instance.
- The traits cover using the peripherals but not initialising or configuring them, as initialisation and configuration is usually highly platform-specific.
- 多くのマイクロコントローラに対する実装に加えて、Raspberry Pi上のLinux向けの実装も存在します。
embedded-hal-asyncprovides async versions of the traits.embedded-hal-nbprovides another approach to non-blocking I/O, based on thenbcrate.
probe-rsとcargo-embed
probe-rsは組み込み向けデバッグに有用なツールセットです。これはOpenOCDのようなものですが、より高度に統合されています。
- SWD (Serial Wire Debug) やCMSIS-DAP経由のJTAG、 ST-LinkやJ-Linkプローブ
- GDBスタブやMicrosoft DAP (Debug Adapter Protocol)サーバ
- Cargoとのインテグレーション
cargo-embedはcargoのサブコマンドであり、バイナリをビルドしたり、フラッシュしたり、RTT(Real Time Transfers)の出力ログを取得したり、GDBに接続するためのものです。設定は対象とするプロジェクトディレクトリにおけるEmbed.tomlファイルにより行います。
- CMSIS-DAP はUSB上のARM標準プロトコルで、インサーキット・デバッガが様々なArm Cortexプロセッサのコアサイト・デバッグ・アクセスポートにアクセスするためのものです。BBC micro:bit のオンボード・デバッガもこれを利用しています。
- ST-Link はST Microelectronicsによるインサーキット・デバッガの総称で、 J-LinkはSEGGERによるインサーキット・デバッガの総称です。
- デバッグ・アクセスポートは通常5ピンのJTAGインタフェースか、2ピンのシリアルワイヤデバッグです。
- probe-rsは自分で独自のツールを統合したい場合に利用できるライブラリです。
- Microsoft Debug Adapter Protocol はVSCodeや他のIDEから、サポートされたマイクロコントローラ上で実行されているコードをデバッグすることを可能にします。
- cargo-embedはprobe-rsライブラリを利用して生成されたバイナリです。
- RTT (Real Time Transfers)はデバッグホストとターゲット間のデータを多くのリングバッファを介してやりとりするためのメカニズムです。
デバッグ
Embed.toml:
[default.general]
chip = "nrf52833_xxAA"
[debug.gdb]
enabled = true
ひとつのターミナルで、src/bare-metal/microcontrollers/examples/において下記を実行:
cargo embed --bin board_support debug
別のターミナルで、同じディレクトリで下記を実行:
gLinuxまたはDebianの場合:
gdb-multiarch target/thumbv7em-none-eabihf/debug/board_support --eval-command="target remote :1337"
MacOSの場合は以下のようになります:
arm-none-eabi-gdb target/thumbv7em-none-eabihf/debug/board_support --eval-command="target remote :1337"
GDBで下記を実行してみてください:
b src/bin/board_support.rs:29
b src/bin/board_support.rs:30
b src/bin/board_support.rs:32
c
c
c
他のプロジェクト
- RTIC
- “Real-Time Interrupt-driven Concurrency”.
- Shared resource management, message passing, task scheduling, timer queue.
- Embassy
asyncexecutors with priorities, timers, networking, USB.
- TockOS
- Security-focused RTOS with preemptive scheduling and Memory Protection Unit support.
- Hubris
- Microkernel RTOS from Oxide Computer Company with memory protection, unprivileged drivers, IPC.
- Bindings for FreeRTOS.
いくつかのプラットフォームでは stdの実装あり、例えば esp-idf。
- RTICはRTOSとして捉えることもできますし、並行実行のフレームワークとして捉えることもできます。
- 他のHALを全く含んでいません。
- スケジューリングはカーネルではなく、Cortex-M NVIC (Nested Virtual Interrupt Controller)を利用して行います。
- Cortex-Mのみの対応です。
- GoogleはTockOSをTitanセキュリティキーのHavenマイクロコントローラで利用しています。
- FreeRTOS はほとんどCで書かれていますが、アプリケーションを開発するためのRustバインディングが存在します。
練習問題
I2C接続のコンパスから方位を読み取り、その結果をシリアルポートに出力します。
練習問題に取り組んだあとは、 解答をみても構いません。
コンパス
I2C接続のコンパスから方位を読み取り、その結果をシリアルポートに出力します。もし時間があれば、LEDやボタンをなんとか利用して方位を出力してみてください。
ヒント:
lsm303agrクレートとmicrobit-v2クレートのドキュメント、ならびにmicro:bitハードウェア仕様を確認してみてください。- LSM303AGR慣性計測器は内部のI2Cバスに接続されています。
- TWIはI2Cの別名なので、I2CマスタはTWIMという名前になっています。
- The LSM303AGR driver needs something implementing the
embedded_hal::i2c::I2ctrait. Themicrobit::hal::Twimstruct implements this. - 様々なピンや周辺I/Oのための
microbit::Boardという構造体があります。 - nRF52833データシートを見ることもできますが、この練習問題のためには必要ないはずです。
練習問題のテンプレート をダウンロードして、compassというディレクトリの中にある下記のファイルを見てください。
src/main.rs:
#![no_main] #![no_std] extern crate panic_halt as _; use core::fmt::Write; use cortex_m_rt::entry; use microbit::{hal::{Delay, uarte::{Baudrate, Parity, Uarte}}, Board}; #[entry] fn main() -> ! { let mut board = Board::take().unwrap(); // Configure serial port. let mut serial = Uarte::new( board.UARTE0, board.uart.into(), Parity::EXCLUDED, Baudrate::BAUD115200, ); // Use the system timer as a delay provider. let mut delay = Delay::new(board.SYST); // Set up the I2C controller and Inertial Measurement Unit. // TODO writeln!(serial, "Ready.").unwrap(); loop { // Read compass data and log it to the serial port. // TODO } }
Cargo.toml (変更は不要なはずです):
[workspace]
[package]
name = "compass"
version = "0.1.0"
edition = "2021"
publish = false
[dependencies]
cortex-m-rt = "0.7.3"
embedded-hal = "1.0.0"
lsm303agr = "1.1.0"
microbit-v2 = "0.15.1"
panic-halt = "1.0.0"
Embed.toml (変更は不要なはずです):
[default.general]
chip = "nrf52833_xxAA"
[debug.gdb]
enabled = true
[debug.reset]
halt_afterwards = true
.cargo/config.toml (変更は不要なはずです):
[build]
target = "thumbv7em-none-eabihf" # Cortex-M4F
[target.'cfg(all(target_arch = "arm", target_os = "none"))']
rustflags = ["-C", "link-arg=-Tlink.x"]
Linuxではシリアルポート出力を下記のコマンドで確認します:
picocom --baud 115200 --imap lfcrlf /dev/ttyACM0
Mac OSではこんな感じになります(デバイス名が少し違うかもしれません):
picocom --baud 115200 --imap lfcrlf /dev/tty.usbmodem14502
Ctrl+A Ctrl+Q でpicocomを終了します。
ベアメタル Rust の午前の演習
コンパス
(演習に戻る)
#![no_main] #![no_std] extern crate panic_halt as _; use core::fmt::Write; use cortex_m_rt::entry; use core::cmp::{max, min}; use embedded_hal::digital::InputPin; use lsm303agr::{ AccelMode, AccelOutputDataRate, Lsm303agr, MagMode, MagOutputDataRate, }; use microbit::display::blocking::Display; use microbit::hal::twim::Twim; use microbit::hal::uarte::{Baudrate, Parity, Uarte}; use microbit::hal::{Delay, Timer}; use microbit::pac::twim0::frequency::FREQUENCY_A; use microbit::Board; const COMPASS_SCALE: i32 = 30000; const ACCELEROMETER_SCALE: i32 = 700; #[entry] fn main() -> ! { let mut board = Board::take().unwrap(); // シリアルポートを設定します。 let mut serial = Uarte::new( board.UARTE0, board.uart.into(), Parity::EXCLUDED, Baudrate::BAUD115200, ); // システム タイマーを遅延目的で使用します。 let mut delay = Delay::new(board.SYST); // I2C コントローラと慣性測定ユニットをセットアップします。 writeln!(serial, "Setting up IMU...").unwrap(); let i2c = Twim::new(board.TWIM0, board.i2c_internal.into(), FREQUENCY_A::K100); let mut imu = Lsm303agr::new_with_i2c(i2c); imu.init().unwrap(); imu.set_mag_mode_and_odr( &mut delay, MagMode::HighResolution, MagOutputDataRate::Hz50, ) .unwrap(); imu.set_accel_mode_and_odr( &mut delay, AccelMode::Normal, AccelOutputDataRate::Hz50, ) .unwrap(); let mut imu = imu.into_mag_continuous().ok().unwrap(); // ディスプレイとタイマーをセットアップします。 let mut timer = Timer::new(board.TIMER0); let mut display = Display::new(board.display_pins); let mut mode = Mode::Compass; let mut button_pressed = false; writeln!(serial, "Ready.").unwrap(); loop { // コンパスデータを読み取り、シリアルポートに記録します。 while !(imu.mag_status().unwrap().xyz_new_data() && imu.accel_status().unwrap().xyz_new_data()) {} let compass_reading = imu.magnetic_field().unwrap(); let accelerometer_reading = imu.acceleration().unwrap(); writeln!( serial, "{},{},{}\t{},{},{}", compass_reading.x_nt(), compass_reading.y_nt(), compass_reading.z_nt(), accelerometer_reading.x_mg(), accelerometer_reading.y_mg(), accelerometer_reading.z_mg(), ) .unwrap(); let mut image = [[0; 5]; 5]; let (x, y) = match mode { Mode::Compass => ( scale(-compass_reading.x_nt(), -COMPASS_SCALE, COMPASS_SCALE, 0, 4) as usize, scale(compass_reading.y_nt(), -COMPASS_SCALE, COMPASS_SCALE, 0, 4) as usize, ), Mode::Accelerometer => ( scale( accelerometer_reading.x_mg(), -ACCELEROMETER_SCALE, ACCELEROMETER_SCALE, 0, 4, ) as usize, scale( -accelerometer_reading.y_mg(), -ACCELEROMETER_SCALE, ACCELEROMETER_SCALE, 0, 4, ) as usize, ), }; image[y][x] = 255; display.show(&mut timer, image, 100); // ボタン A が押された場合、次のモードに切り替えてすべての LED を短時間点滅 // させます。 if board.buttons.button_a.is_low().unwrap() { if !button_pressed { mode = mode.next(); display.show(&mut timer, [[255; 5]; 5], 200); } button_pressed = true; } else { button_pressed = false; } } } #[derive(Copy, Clone, Debug, Eq, PartialEq)] enum Mode { Compass, Accelerometer, } impl Mode { fn next(self) -> Self { match self { Self::Compass => Self::Accelerometer, Self::Accelerometer => Self::Compass, } } } fn scale(value: i32, min_in: i32, max_in: i32, min_out: i32, max_out: i32) -> i32 { let range_in = max_in - min_in; let range_out = max_out - min_out; cap(min_out + range_out * (value - min_in) / range_in, min_out, max_out) } fn cap(value: i32, min_value: i32, max_value: i32) -> i32 { max(min_value, min(value, max_value)) }
アプリケーションプロセッサ
ここまではArm Cortex-Mシリーズのようなマイクロコントローラについて見てきました。今度はCortex-Aを対象として何かを書いてみましょう。簡単化のために、ここでは(本物のハードウェアではなく)QEMUのaarch64 ‘virt’ボードを利用します。
- 大まかに言って、マイクロコントローラがMMUや複数の特権レベル(Arm CPUにおける例外レベル、x86におけるリング)を持たないのに対し、アプリケーションプロセッサはこれらを持っています。
- QEMU は個々のアーキテクチャに対して様々な異なるマシンやボードモデルをサポートしています。今回使う ‘virt’ ボードは特定の本物のハードウェアに対応したものではなく、純粋に仮想マシンとして設計されたものです。
Rust の準備
Rustのコードを実行できるようになる前にいくつかの初期化が必要です。
.section .init.entry, "ax"
.global entry
entry:
/*
* Load and apply the memory management configuration, ready to
* enable MMU and caches.
*/
adrp x30, idmap
msr ttbr0_el1, x30
mov_i x30, .Lmairval
msr mair_el1, x30
mov_i x30, .Ltcrval
/* Copy the supported PA range into TCR_EL1.IPS. */
mrs x29, id_aa64mmfr0_el1
bfi x30, x29, #32, #4
msr tcr_el1, x30
mov_i x30, .Lsctlrval
/*
* Ensure everything before this point has completed, then
* invalidate any potentially stale local TLB entries before they
* start being used.
*/
isb
tlbi vmalle1
ic iallu
dsb nsh
isb
/*
* Configure sctlr_el1 to enable MMU and cache and don't proceed
* until this has completed.
*/
msr sctlr_el1, x30
isb
/* Disable trapping floating point access in EL1. */
mrs x30, cpacr_el1
orr x30, x30, #(0x3 << 20)
msr cpacr_el1, x30
isb
/* Zero out the bss section. */
adr_l x29, bss_begin
adr_l x30, bss_end
0: cmp x29, x30
b.hs 1f
stp xzr, xzr, [x29], #16
b 0b
1: /* Prepare the stack. */
adr_l x30, boot_stack_end
mov sp, x30
/* Set up exception vector. */
adr x30, vector_table_el1
msr vbar_el1, x30
/* Call into Rust code. */
bl main
/* Loop forever waiting for interrupts. */
2: wfi
b 2b
- この初期化内容はCの場合と同じになります。プロセッサ状態を初期化して、BSSをゼロ埋めして、スタックポインタを設定します。
- BSS(歴史的な理由によりblock starting symbolと呼ばれているもの)はオブジェクトファイルにおいてゼロ初期化される静的な変数を含む部分です。この部分はゼロによる領域の浪費を避けるためにイメージからは除外されています。コンパイラはローダがこの領域をゼロ初期化することを想定しているのです。
- メモリの初期化方法やイメージのロード方法によってはBSSはすでにゼロ埋めされていることがありますが、ここでは念の為にゼロ埋めしています。
- いかなるメモリのreadやwriteよりも前にMMUとキャッシュを有効化する必要があります。それをしないと:
- アラインされていないアクセスがフォールトになります。我々はコンパイラがアラインされていないアクセスを生成しないように
+strict-alignオプション を設定するaarch64-unknown-noneターゲット向けにRustコードをビルドします。そのためここでは問題にはなりませんが、一般的にはそうとは言えません。 - もしVM上で実行していたとすると、キャッシュコヒーレンシーの問題を起こすことがあります。問題なのはVMがキャッシュを無効化したまま直接メモリにアクセスしているのに対し、ホストは同じメモリに対してキャッシュ可能なエイリアスを持ってしまうということです。ホストが仮に明示的にメモリにアクセスしないとしても、投機的なアクセスによりキャッシュフィルが起きることがあります。そうなると、ホストがキャッシュをフラッシュするかVMがキャッシュを有効化したときに、VMかホストのどちらかによる変更が失われてしまいます。(キャッシュは仮想アドレスやIPAではなく物理アドレスをキーとしてアクセスされます)
- アラインされていないアクセスがフォールトになります。我々はコンパイラがアラインされていないアクセスを生成しないように
- 単純化のために、ハードコードしたページテーブル(
idmap.S参照)を利用します。このページテーブルは最初の1GiBをデバイス用に、次の1GiBをDRAM用に、次の1GiBをさらなるデバイス用に透過的にマップします。これはQEMUのメモリレイアウトに合致します。 - 例外ベクタ(
vbar_el1)も設定します。これに関しては後ほど詳しく見ます。 - 今日の午後に扱うすべての例は例外レベル1(EL1)で実行されることを想定しています。もし、別の例外レベルで実行する必要がある場合には、
entry.Sをそれに合わせて変更する必要があります。
インラインアセンブリ
時折Rustコードでは書けないことを行うためにアセンブリ言語を使う必要があります。例えば、電源を落とすためにファームウェアに対してHVC(ハイパーバイザコール)を発行する場合です:
#![no_main] #![no_std] use core::arch::asm; use core::panic::PanicInfo; mod exceptions; const PSCI_SYSTEM_OFF: u32 = 0x84000008; // SAFETY: There is no other global function of this name. #[unsafe(no_mangle)] extern "C" fn main(_x0: u64, _x1: u64, _x2: u64, _x3: u64) { // SAFETY: this only uses the declared registers and doesn't do anything // with memory. unsafe { asm!("hvc #0", inout("w0") PSCI_SYSTEM_OFF => _, inout("w1") 0 => _, inout("w2") 0 => _, inout("w3") 0 => _, inout("w4") 0 => _, inout("w5") 0 => _, inout("w6") 0 => _, inout("w7") 0 => _, options(nomem, nostack) ); } loop {} }
(もし実際に電源を落とすプログラムを書きたい場合は、これらのすべての機能に対するラッパーを提供しているsmcccを使うと良いでしょう。)
- PSCI はArmのPower State Coordination Interfaceのことであり、これはシステムやCPU電力状態管理の機能を含む標準的なセットです。これは多くのシステムでEL3ファームウェアとハイパーバイザにより実装されています。
0 => _というシンタックスは、インラインアセンブリを実行する前にレジスタをゼロで初期化し、実行後はその値は気にしないということを示しています。inではなくinoutを使う必要があるのは、この実行でレジスタの値を上書きしてしまう可能性があるからです。- This
mainfunction needs to be#[unsafe(no_mangle)]andextern "C"because it is called from our entry point inentry.S. _x0–_x3はレジスタx0–x3の値であり、慣習的にブートロードがデバイスツリーなどへのポインタを渡すのに利用されています。(extern "C"により指定された)aarch64 の関数コール規約ではレジスタx0–x7は最初の8個の引数を関数に渡すのに利用されることになっているため、entry.Sはこれらの値を変更しないようにする以外の特別なことをする必要はありません。- この例を
src/bare-metal/aps/examplesにおいてmake qemu_psciとすることでQEMUにより実行してみましょう。
MMIOに対するvolatileアクセス
- Use
pointer::read_volatileandpointer::write_volatile. - 絶対に参照を保持してはいけません。
- Use
&rawto get fields of structs without creating an intermediate reference.
- Volatileアクセス:MMIO領域に対するreadやwriteは副作用があることがあるので、コンパイラやハードウェアが実行順序を変更したり、複製したり、省略したりできないようにするためのものです。
- 通常は、例えばある可変参照に対してライトしリードすると、コンパイラはライトしたのと同じ値がリードで読み出されると想定し、実際にメモリをリードする必要はないと判断します。
- ハードウェアへのvolatileアクセスを行うための既存のクレートには参照を保持するものがありますが、これは健全ではありません。参照が存在する間はいつでもコンパイラがその参照を外して(MMIO領域にアクセスして)しまう可能性があります。
- Use
&rawto get struct field pointers from a pointer to the struct. - For compatibility with old versions of Rust you can use the
addr_of!macro instead.
UARTドライバを書いてみましょう
QEMUの’virt’ マシンにはPL011というUARTがあるので、それに対するドライバを書いてみましょう。
const FLAG_REGISTER_OFFSET: usize = 0x18; const FR_BUSY: u8 = 1 << 3; const FR_TXFF: u8 = 1 << 5; /// PL011 UARTの最小ドライバ。 #[derive(Debug)] pub struct Uart { base_address: *mut u8, } impl Uart { /// 指定されたベースアドレスに存在する /// PL011 デバイス用の UART ドライバの新しいインスタンスを作成します。 /// /// # 安全性 /// /// 指定されたベースアドレスは PL011 デバイスの 8 つの MMIO 制御レジスタを指していなければなりません。 /// これらはデバイスメモリとしてプロセスのアドレス空間に /// マッピングされ、他のエイリアスはありません。 pub unsafe fn new(base_address: *mut u8) -> Self { Self { base_address } } /// UART に 1 バイトを書き込みます。 pub fn write_byte(&self, byte: u8) { // TX バッファに空きができるまで待機します。 while self.read_flag_register() & FR_TXFF != 0 {} // SAFETY: We know that the base address points to the control // registers of a PL011 device which is appropriately mapped. unsafe { // TX バッファに書き込みます。 self.base_address.write_volatile(byte); } // UART がビジーでなくなるまで待機します。 while self.read_flag_register() & FR_BUSY != 0 {} } fn read_flag_register(&self) -> u8 { // SAFETY: We know that the base address points to the control // registers of a PL011 device which is appropriately mapped. unsafe { self.base_address.add(FLAG_REGISTER_OFFSET).read_volatile() } } }
Uart::newがアンセーフでその他のメソッドがセーフであるということに注目してください。これは、Uart::newの安全性要求が満たされている(すなわち特定のUARTに対して一つしかドライバのインスタンスが存在せず、そのアドレス空間に対してエイリアスが全く存在しない)ことをその呼び出し元が保証する限り、それ以降は必要な事前条件が満たされていると想定することができwrite_byteを常に安全に呼び出すことができるようになることが理由です。- 逆に(
newをセーフにして、write_byteをアンセーフに)することもできましたが、そうするとwrite_byteの全呼び出し箇所において安全性を考慮しなければならなくなり、利便性が低下します - これはアンセーフなコードに対してセーフなラッパーを構築する場合の共通パターンです:健全性に関する証明に関する労力を多数の場所から少数の場所に集約します。
他のトレイト
ここではDebugトレイトを導出しました。この他にもいくつかのトレイトを実装すると良いでしょう。
use core::fmt::{self, Write}; impl Write for Uart { fn write_str(&mut self, s: &str) -> fmt::Result { for c in s.as_bytes() { self.write_byte(*c); } Ok(()) } } // SAFETY: `Uart` just contains a pointer to device memory, which can be // accessed from any context. unsafe impl Send for Uart {}
Writeを実装すると、Uartタイプに対してwrite!とwriteln!マクロが利用できるようになります。- この例を
src/bare-metal/aps/examplesにおいてmake qemu_minimalとすることで、QEMUにより実行してみましょう。
UARTドライバの改善
実際のところPL011にはもっと多くのレジスタがあり、それらにアクセスするためにオフセットを足してポインタを得ることは間違えになりやすく、可読性を低下させます。さらに、いくつかはビットフィールドなので、構造化された方法でアクセスできたほうが良いでしょう。
| オフセット | レジスタ名 | 幅 |
|---|---|---|
| 0x00 | DR | 12 |
| 0x04 | RSR | 4 |
| 0x18 | FR | 9 |
| 0x20 | ILPR | 8 |
| 0x24 | IBRD | 16 |
| 0x28 | FBRD | 6 |
| 0x2c | LCR_H | 8 |
| 0x30 | CR | 16 |
| 0x34 | IFLS | 6 |
| 0x38 | IMSC | 11 |
| 0x3c | RIS | 11 |
| 0x40 | MIS | 11 |
| 0x44 | ICR | 11 |
| 0x48 | DMACR | 3 |
- いくつかのIDレジスタは簡単化のための省略しています。
ビットフラッグ
bitflags クレートはビットフラグを扱うのに便利です。
use bitflags::bitflags; bitflags! { /// UART フラグレジスタからのフラグ。 #[repr(transparent)] #[derive(Copy, Clone, Debug, Eq, PartialEq)] struct Flags: u16 { /// 送信可。 const CTS = 1 << 0; /// データセット レディ。 const DSR = 1 << 1; /// データキャリア検出。 const DCD = 1 << 2; /// UART はデータ送信のためビジー状態。 const BUSY = 1 << 3; /// 受信 FIFO が空。 const RXFE = 1 << 4; /// 送信 FIFO が満杯。 const TXFF = 1 << 5; /// 受信 FIFO が満杯。 const RXFF = 1 << 6; /// 送信 FIFO が空。 const TXFE = 1 << 7; /// 着呼表示。 const RI = 1 << 8; } }
bitflags!マクロはFlags(u16)のような新しいタイプを生成し、フラグを読み書きするための多くのメソッド実装を一緒に提供します。
複数のレジスタ
構造体を使ってUARTのレジスタのメモリレイアウトを表現することができます。
#[repr(C, align(4))] struct Registers { dr: u16, _reserved0: [u8; 2], rsr: ReceiveStatus, _reserved1: [u8; 19], fr: Flags, _reserved2: [u8; 6], ilpr: u8, _reserved3: [u8; 3], ibrd: u16, _reserved4: [u8; 2], fbrd: u8, _reserved5: [u8; 3], lcr_h: u8, _reserved6: [u8; 3], cr: u16, _reserved7: [u8; 3], ifls: u8, _reserved8: [u8; 3], imsc: u16, _reserved9: [u8; 2], ris: u16, _reserved10: [u8; 2], mis: u16, _reserved11: [u8; 2], icr: u16, _reserved12: [u8; 2], dmacr: u8, _reserved13: [u8; 3], }
#[repr(C)]はコンパイラに対して、Cと同じ規則に従って構造体のフィールドを定義されている順番で配置することを指示します。これは構造体のレイアウトを予測可能にするために必要です。なぜならば、Rust標準の表現はコンパイラがフィールドを好きなように並び替えること(他にも色々とありますが)を許しているからです。
ドライバ
新しく定義したRegisters 構造体を我々のドライバで使ってみましょう。
/// PL011 UART のドライバ。 #[derive(Debug)] pub struct Uart { registers: *mut Registers, } impl Uart { /// 指定されたベースアドレスに存在する /// PL011 デバイス用の UART ドライバの新しいインスタンスを作成します。 /// /// # 安全性 /// /// 指定されたベースアドレスは PL011 デバイスの 8 つの MMIO 制御レジスタを指していなければなりません。 /// これらはデバイスメモリとしてプロセスのアドレス空間に /// マッピングされ、他のエイリアスはありません。 pub unsafe fn new(base_address: *mut u32) -> Self { Self { registers: base_address as *mut Registers } } /// UART に 1 バイトを書き込みます。 pub fn write_byte(&self, byte: u8) { // TX バッファに空きができるまで待機します。 while self.read_flag_register().contains(Flags::TXFF) {} // SAFETY: We know that self.registers points to the control registers // of a PL011 device which is appropriately mapped. unsafe { // TX バッファに書き込みます。 (&raw mut (*self.registers).dr).write_volatile(byte.into()); } // UART がビジーでなくなるまで待機します。 while self.read_flag_register().contains(Flags::BUSY) {} } /// 保留中のバイトを読み取り、何も受け取っていない場合は`None` を /// 返します。 pub fn read_byte(&self) -> Option<u8> { if self.read_flag_register().contains(Flags::RXFE) { None } else { // SAFETY: We know that self.registers points to the control // registers of a PL011 device which is appropriately mapped. let data = unsafe { (&raw const (*self.registers).dr).read_volatile() }; // TODO: ビット 8~11 でエラー状態をチェックします。 Some(data as u8) } } fn read_flag_register(&self) -> Flags { // SAFETY: We know that self.registers points to the control registers // of a PL011 device which is appropriately mapped. unsafe { (&raw const (*self.registers).fr).read_volatile() } } }
- Note the use of
&raw const/&raw mutto get pointers to individual fields without creating an intermediate reference, which would be unsound.
使用例
我々のドライバを使って、シリアルコンソールにライトし、そして入力されたバイトをエコーする小さなプログラムを書いてみましょう。
#![no_main] #![no_std] mod exceptions; mod pl011; use crate::pl011::Uart; use core::fmt::Write; use core::panic::PanicInfo; use log::error; use smccc::psci::system_off; use smccc::Hvc; /// プライマリ PL011 UART のベースアドレス。 const PL011_BASE_ADDRESS: *mut u32 = 0x900_0000 as _; // SAFETY: There is no other global function of this name. #[unsafe(no_mangle)] extern "C" fn main(x0: u64, x1: u64, x2: u64, x3: u64) { // SAFETY: `PL011_BASE_ADDRESS` is the base address of a PL011 device, and // nothing else accesses that address range. let mut uart = unsafe { Uart::new(PL011_BASE_ADDRESS) }; writeln!(uart, "main({x0:#x}, {x1:#x}, {x2:#x}, {x3:#x})").unwrap(); loop { if let Some(byte) = uart.read_byte() { uart.write_byte(byte); match byte { b'\r' => { uart.write_byte(b'\n'); } b'q' => break, _ => continue, } } } writeln!(uart, "\n\nBye!").unwrap(); system_off::<Hvc>().unwrap(); }
- インラインアセンブリ の例と同じように、この
main関数はentry.Sにおけるエントリポイントから呼び出されます。詳細はそちらのspeaker notesを参照してください。 - この例を
src/bare-metal/aps/examplesにおいてmake qemuとすることでQEMUにより実行してみましょう。
ログ出力
log クレートが提供するログ用マクロを使えると良いでしょう。これはLogトレイトを実装することで可能になります。
use crate::pl011::Uart; use core::fmt::Write; use log::{LevelFilter, Log, Metadata, Record, SetLoggerError}; use spin::mutex::SpinMutex; static LOGGER: Logger = Logger { uart: SpinMutex::new(None) }; struct Logger { uart: SpinMutex<Option<Uart>>, } impl Log for Logger { fn enabled(&self, _metadata: &Metadata) -> bool { true } fn log(&self, record: &Record) { writeln!( self.uart.lock().as_mut().unwrap(), "[{}] {}", record.level(), record.args() ) .unwrap(); } fn flush(&self) {} } /// UART ロガーを初期化します。 pub fn init(uart: Uart, max_level: LevelFilter) -> Result<(), SetLoggerError> { LOGGER.uart.lock().replace(uart); log::set_logger(&LOGGER)?; log::set_max_level(max_level); Ok(()) }
LOGGERをset_loggerを呼び出す前に初期化しているので、log` におけるunwrapはセーフです。
使用例
使用前にloggerを初期化する必要があります。
#![no_main] #![no_std] mod exceptions; mod logger; mod pl011; use crate::pl011::Uart; use core::panic::PanicInfo; use log::{error, info, LevelFilter}; use smccc::psci::system_off; use smccc::Hvc; /// プライマリ PL011 UART のベースアドレス。 const PL011_BASE_ADDRESS: *mut u32 = 0x900_0000 as _; // SAFETY: There is no other global function of this name. #[unsafe(no_mangle)] extern "C" fn main(x0: u64, x1: u64, x2: u64, x3: u64) { // SAFETY: `PL011_BASE_ADDRESS` is the base address of a PL011 device, and // nothing else accesses that address range. let uart = unsafe { Uart::new(PL011_BASE_ADDRESS) }; logger::init(uart, LevelFilter::Trace).unwrap(); info!("main({x0:#x}, {x1:#x}, {x2:#x}, {x3:#x})"); assert_eq!(x1, 42); system_off::<Hvc>().unwrap(); } #[panic_handler] fn panic(info: &PanicInfo) -> ! { error!("{info}"); system_off::<Hvc>().unwrap(); loop {} }
- 我々のパニックハンドラがパニックの詳細についてログ出力できるようになったことに注目してください。
- この例を
src/bare-metal/aps/examplesにおいてmake qemu_loggerとすることでQEMUにより実行してみましょう。
例外
AArch64は16エントリを持つ例外ベクターテーブルを定義しており、これらは4つのステート(現在のELでSP0利用、現在のELでSPx利用、低位のELでAArch64、低位のELでAArch32)における4つのタイプの例外(同期、IRQ、FIQ、SError)に対応します。ここではRustコードの呼び出し前に揮発レジスタの値をスタックに退避するためにベクターテーブルをアセンブリ言語で実装しています:
use log::error; use smccc::psci::system_off; use smccc::Hvc; // SAFETY: There is no other global function of this name. #[unsafe(no_mangle)] extern "C" fn sync_exception_current(_elr: u64, _spsr: u64) { error!("sync_exception_current"); system_off::<Hvc>().unwrap(); } // SAFETY: There is no other global function of this name. #[unsafe(no_mangle)] extern "C" fn irq_current(_elr: u64, _spsr: u64) { error!("irq_current"); system_off::<Hvc>().unwrap(); } // SAFETY: There is no other global function of this name. #[unsafe(no_mangle)] extern "C" fn fiq_current(_elr: u64, _spsr: u64) { error!("fiq_current"); system_off::<Hvc>().unwrap(); } // SAFETY: There is no other global function of this name. #[unsafe(no_mangle)] extern "C" fn serr_current(_elr: u64, _spsr: u64) { error!("serr_current"); system_off::<Hvc>().unwrap(); } // SAFETY: There is no other global function of this name. #[unsafe(no_mangle)] extern "C" fn sync_lower(_elr: u64, _spsr: u64) { error!("sync_lower"); system_off::<Hvc>().unwrap(); } // SAFETY: There is no other global function of this name. #[unsafe(no_mangle)] extern "C" fn irq_lower(_elr: u64, _spsr: u64) { error!("irq_lower"); system_off::<Hvc>().unwrap(); } // SAFETY: There is no other global function of this name. #[unsafe(no_mangle)] extern "C" fn fiq_lower(_elr: u64, _spsr: u64) { error!("fiq_lower"); system_off::<Hvc>().unwrap(); } // SAFETY: There is no other global function of this name. #[unsafe(no_mangle)] extern "C" fn serr_lower(_elr: u64, _spsr: u64) { error!("serr_lower"); system_off::<Hvc>().unwrap(); }
- ELは例外レベルです。本日の午後に扱ったすべての例はEL1で実行されています。
- 簡単化のために、ここでは現在のEL例外におけるSP0とSPxの違い、低位のELレベルにおけるAArch32とAArch64の違いを区別していません。
- ここではこれらの例外が発生しないはずなので、ただ例外に関するログを出力し、電源を落としています。
- 例外ハンドラとメインの実行コンテキストは異なるスレッドのようなものだと考えることができます。ちょうどスレッド間の共有と同じように、
SendとSyncにより何を共有するかを制御することができます。例えば、例外ハンドラとプログラムの他のコンテキストでとある値を共有したい場合に、もしそれがSendでありSyncでなければ、Mutexのようなものでラップして、staticに定義しなければなりません。
他のプロジェクト
- oreboot
- “coreboot without the C”.
- アーキテクチャはx86、aarch64ならびにRISC-Vをサポート。
- 自身で多くのドライバを抱えずにLinuxBootに依存。
- Rust RaspberryPi OS のチュートリアル
- Initialisation, UART driver, simple bootloader, JTAG, exception levels, exception handling, page tables.
- キャッシュメンテナンスとRustの初期化に関してちょっと疑わしいところがあるので、製品コードで真似するには必ずしも良い例ではありません。
cargo-call-stack- スタックの最大使用量に関する静的解析。
- RaspberryPi OS チュートリアルはMMUやキャッシュを有効化する前にRustコードを実行しています。これにより、例えばスタックメモリをreadしたりwriteしたりすることになります。しかし:
- MMUとキャッシュを有効化していないと、アラインされていないアクセスはフォールトを引き起こします。そのチュートリアルでは、コンパイラがアラインされていないアクセスを生成しない
+strict-alignオプションをセットするaarch64-unknown-noneをターゲットとしてビルドしているので大丈夫なはずですが、一般的には大丈夫とは限りません。 - もしVM上で実行していたとすると、キャッシュコヒーレンシーの問題を起こすことがあります。問題なのはVMがキャッシュを無効化したまま直接メモリにアクセスしているのに対し、ホストは同じメモリに対してキャッシュ可能なエイリアスを持ってしまうということです。ホストが仮に明示的にメモリにアクセスしないとしても、投機的なアクセスによりキャッシュフィルが起きることがあり、そうなるとVMかホストのどちらかによる変更が失われてしまいます。この(ハイパーバイザなしで直接ハードウェアで実行する)場合には問題にはなりませんが、一般的には良くないパターンです。
- MMUとキャッシュを有効化していないと、アラインされていないアクセスはフォールトを引き起こします。そのチュートリアルでは、コンパイラがアラインされていないアクセスを生成しない
便利クレート
ベアメタルプログラミングにおいて共通に発生する問題に対する解を与えるクレートについていくつか紹介します。
zerocopy
(Fuchsiaの)zerocopyクレートはバイトシーケンスとその他の型の変換を安全に行うためのトレイトやマクロを提供します。
use zerocopy::{Immutable, IntoBytes}; #[repr(u32)] #[derive(Debug, Default, Immutable, IntoBytes)] enum RequestType { #[default] In = 0, Out = 1, Flush = 4, } #[repr(C)] #[derive(Debug, Default, Immutable, IntoBytes)] struct VirtioBlockRequest { request_type: RequestType, reserved: u32, sector: u64, } fn main() { let request = VirtioBlockRequest { request_type: RequestType::Flush, sector: 42, ..Default::default() }; assert_eq!( request.as_bytes(), &[4, 0, 0, 0, 0, 0, 0, 0, 42, 0, 0, 0, 0, 0, 0, 0] ); }
これは(volatile read、writeを使用していないため)MMIOには適してませんが、例えばDMAのようなハードウェアと共有するデータ構造あるいは外部インタフェースを通して送信するデータ構造を扱うに場合には有用です。
FromBytesはいかなるバイトパターンも有効な値となる型に対して実装することができ、信用できないバイトシーケンスからの安全な変換を可能にします。RequestTypeはu32型のすべての値を有効なenum値として定義していないので、すべてのバイトパターンが有効とはならず、これらに対するFromBytesの導出はフェールするでしょう。zerocopy::byteorderはバイトオーダを気にする数値プリミティブに関する型を提供します。- この例を
src/bare-metal/useful-crates/zerocopy-example/においてcargo runととすることで実行してみましょう。(Playgroundではこの例が依存するクレートを利用できないため実行できません)
aarch64-paging
aarch64-pagingクレートはAArch64仮想メモリシステムアーキテクチャに則ったページテーブルの生成を可能にします。
use aarch64_paging::{ idmap::IdMap, paging::{Attributes, MemoryRegion}, }; const ASID: usize = 1; const ROOT_LEVEL: usize = 1; // 仮想物理同一となる新しいページテーブルを作成します。 let mut idmap = IdMap::new(ASID, ROOT_LEVEL); // 2 MiB のメモリ領域を読み取り専用としてマッピングします。 idmap.map_range( &MemoryRegion::new(0x80200000, 0x80400000), Attributes::NORMAL | Attributes::NON_GLOBAL | Attributes::READ_ONLY, ).unwrap(); // `TTBR0_EL1` を設定してページテーブルを有効にします。 idmap.activate();
- 現時点ではEL1しかサポートされていませんが、他の例外レベルのサポートも簡単に追加できるはずです。
- これはAndroidでProtected VM Firmwareのために利用されています。
- この例は本物のハードウェアかQEMUを必要とするので、簡単には実行できません。
buddy_system_allocator
buddy_system_allocator はサードパーティのクレートで、基本的なバディシステムアローケータを実装しています。このクレートはGlobalAlloc を実装する LockedHeap により( 以前見たように)標準のalloc クレートを利用可能にするために使えますし、別のアドレス空間をアロケートするためにも使えます。例えば、PCI BARに対するMMIO領域をアロケートしたい場合には以下のようにできます:
use buddy_system_allocator::FrameAllocator; use core::alloc::Layout; fn main() { let mut allocator = FrameAllocator::<32>::new(); allocator.add_frame(0x200_0000, 0x400_0000); let layout = Layout::from_size_align(0x100, 0x100).unwrap(); let bar = allocator .alloc_aligned(layout) .expect("Failed to allocate 0x100 byte MMIO region"); println!("Allocated 0x100 byte MMIO region at {:#x}", bar); }
- PCI BARは常にサイズと同じアラインになります。
- この例を
src/bare-metal/useful-crates/allocator-example/においてcargo runとすることで実行してみましょう。(Playgroundではこの例が依存するクレートを利用できないため実行できません)
tinyvec
時にはVecのようにリサイズできる領域をヒープを使わずに確保したいと思うことがあります。tinyvecは静的に確保、またはスタック上に確保した配列またはスライスを割当領域とするベクタを提供します。この実装では、いくつの要素が使われているかが管理され、確保された以上に使おうとするとパニックします。
use tinyvec::{array_vec, ArrayVec}; fn main() { let mut numbers: ArrayVec<[u32; 5]> = array_vec!(42, 66); println!("{numbers:?}"); numbers.push(7); println!("{numbers:?}"); numbers.remove(1); println!("{numbers:?}"); }
tinyvecは初期化のために要素となるタイプがDefaultを実装することを必要とします。- Rust Playgroundは
tinyvecを内包しているので、オンラインでこの例を実行することができます。
spin
std::syncが提供するstd::sync::Mutex とその他の同期プリミティブはcoreまたはallocでは利用できません。となると、例えば異なるCPU間での状態共有のための、同期や内部可変性はどのように実現したら良いのでしょうか?
spin クレートはこれらの多くのプリミティブと等価なスピンロックベースのものを提供します。
use spin::mutex::SpinMutex; static counter: SpinMutex<u32> = SpinMutex::new(0); fn main() { println!("count: {}", counter.lock()); *counter.lock() += 2; println!("count: {}", counter.lock()); }
- 割り込みハンドラでロックを取得する場合にはデッドロックを引き起こさないように気をつけてください。
spinalso has a ticket lock mutex implementation; equivalents ofRwLock,BarrierandOncefromstd::sync; andLazyfor lazy initialisation.once_cellクレートもspin::once::Onceとは少し異なるアプローチの遅延初期化のための有用な型をいくつか持っています。- Rust Playgroundは
spinを内包しているので、この例はオンラインで実行できます。
Android上のベアメタル
AOSPにおいてベアメタルRustバイナリをビルドするためには、Rustコードをビルドするためのrust_ffi_staticというSoongルール、リンカスクリプトとそれを使ってバイナリを生成するためのcc_binaryというルール、さらにELFを実行可能な形式の生バイナリに変換するraw_binaryというルールが必要です。
rust_ffi_static {
name: "libvmbase_example",
defaults: ["vmbase_ffi_defaults"],
crate_name: "vmbase_example",
srcs: ["src/main.rs"],
rustlibs: [
"libvmbase",
],
}
cc_binary {
name: "vmbase_example",
defaults: ["vmbase_elf_defaults"],
srcs: [
"idmap.S",
],
static_libs: [
"libvmbase_example",
],
linker_scripts: [
"image.ld",
":vmbase_sections",
],
}
raw_binary {
name: "vmbase_example_bin",
stem: "vmbase_example.bin",
src: ":vmbase_example",
enabled: false,
target: {
android_arm64: {
enabled: true,
},
},
}
vmbase
For VMs running under crosvm on aarch64, the vmbase library provides a linker script and useful defaults for the build rules, along with an entry point, UART console logging and more.
#![no_main] #![no_std] use vmbase::{main, println}; main!(main); pub fn main(arg0: u64, arg1: u64, arg2: u64, arg3: u64) { println!("Hello world"); }
main!というマクロはメイン関数を指定するもので、指定された関数はvmbaseのエントリポイントから呼び出されることになります。vmbaseのエントリポイントはコンソールの初期化を行い、メイン関数がリターンした場合にはPSCI_SYSTEM_OFF を発行しVMをシャットダウンします。
練習問題
PL031 リアルタイム クロック デバイス用のドライバを作成します。
演習の終了後は、提供されている ソリューション を確認してください。
RTC ドライバ
QEMU aarch64 virt マシンの 0x9010000 には、PL031 リアルタイム クロックが搭載されています。この演習では、そのドライバを作成する必要があります。
- これを使用して現在の時刻をシリアル コンソールに出力します。日時の形式には
chronoクレートを使用できます。 - 一致レジスタと未加工の割り込みステータスを使用して、指定時刻(たとえば 3 秒後)までビジーウェイトします(ループ内で
core::hint::spin_loopを呼び出します)。 - 時間がある場合は、RTC の一致によって生成された割り込みを有効にして処理します。
arm-gicクレートで提供されているドライバを使用して、Arm 汎用割り込みコントローラを設定して構いません。- RTC 割り込みを使用します。この割り込みは GIC に
IntId::spi(2)として接続されています。 - 割り込みを有効にすると、
arm_gic::wfi()を使用してコアをスリープさせることができます。これにより、コアは割り込みを受けるまでスリープ状態になります。
- RTC 割り込みを使用します。この割り込みは GIC に
演習テンプレート をダウンロードし、rtc ディレクトリで以下のファイルを探します。
src/main.rs:
#![no_main] #![no_std] mod exceptions; mod logger; mod pl011; use crate::pl011::Uart; use arm_gic::gicv3::GicV3; use core::panic::PanicInfo; use log::{error, info, trace, LevelFilter}; use smccc::psci::system_off; use smccc::Hvc; /// Base addresses of the GICv3. const GICD_BASE_ADDRESS: *mut u64 = 0x800_0000 as _; const GICR_BASE_ADDRESS: *mut u64 = 0x80A_0000 as _; /// Base address of the primary PL011 UART. const PL011_BASE_ADDRESS: *mut u32 = 0x900_0000 as _; // SAFETY: There is no other global function of this name. #[unsafe(no_mangle)] extern "C" fn main(x0: u64, x1: u64, x2: u64, x3: u64) { // SAFETY: `PL011_BASE_ADDRESS` is the base address of a PL011 device, and // nothing else accesses that address range. let uart = unsafe { Uart::new(PL011_BASE_ADDRESS) }; logger::init(uart, LevelFilter::Trace).unwrap(); info!("main({:#x}, {:#x}, {:#x}, {:#x})", x0, x1, x2, x3); // SAFETY: `GICD_BASE_ADDRESS` and `GICR_BASE_ADDRESS` are the base // addresses of a GICv3 distributor and redistributor respectively, and // nothing else accesses those address ranges. let mut gic = unsafe { GicV3::new(GICD_BASE_ADDRESS, GICR_BASE_ADDRESS) }; gic.setup(); // TODO: Create instance of RTC driver and print current time. // TODO: Wait for 3 seconds. system_off::<Hvc>().unwrap(); } #[panic_handler] fn panic(info: &PanicInfo) -> ! { error!("{info}"); system_off::<Hvc>().unwrap(); loop {} }
src/exceptions.rs(この演習の 3 番目のパートでのみ変更する必要があります):
#![allow(unused)] fn main() { // Copyright 2023 Google LLC // // Licensed under the Apache License, Version 2.0 (the "License"); // you may not use this file except in compliance with the License. // You may obtain a copy of the License at // // http://www.apache.org/licenses/LICENSE-2.0 // // Unless required by applicable law or agreed to in writing, software // distributed under the License is distributed on an "AS IS" BASIS, // WITHOUT WARRANTIES OR CONDITIONS OF ANY KIND, either express or implied. // See the License for the specific language governing permissions and // limitations under the License. use arm_gic::gicv3::GicV3; use log::{error, info, trace}; use smccc::psci::system_off; use smccc::Hvc; // SAFETY: There is no other global function of this name. #[unsafe(no_mangle)] extern "C" fn sync_exception_current(_elr: u64, _spsr: u64) { error!("sync_exception_current"); system_off::<Hvc>().unwrap(); } // SAFETY: There is no other global function of this name. #[unsafe(no_mangle)] extern "C" fn irq_current(_elr: u64, _spsr: u64) { trace!("irq_current"); let intid = GicV3::get_and_acknowledge_interrupt().expect("No pending interrupt"); info!("IRQ {intid:?}"); } // SAFETY: There is no other global function of this name. #[unsafe(no_mangle)] extern "C" fn fiq_current(_elr: u64, _spsr: u64) { error!("fiq_current"); system_off::<Hvc>().unwrap(); } // SAFETY: There is no other global function of this name. #[unsafe(no_mangle)] extern "C" fn serr_current(_elr: u64, _spsr: u64) { error!("serr_current"); system_off::<Hvc>().unwrap(); } // SAFETY: There is no other global function of this name. #[unsafe(no_mangle)] extern "C" fn sync_lower(_elr: u64, _spsr: u64) { error!("sync_lower"); system_off::<Hvc>().unwrap(); } // SAFETY: There is no other global function of this name. #[unsafe(no_mangle)] extern "C" fn irq_lower(_elr: u64, _spsr: u64) { error!("irq_lower"); system_off::<Hvc>().unwrap(); } // SAFETY: There is no other global function of this name. #[unsafe(no_mangle)] extern "C" fn fiq_lower(_elr: u64, _spsr: u64) { error!("fiq_lower"); system_off::<Hvc>().unwrap(); } // SAFETY: There is no other global function of this name. #[unsafe(no_mangle)] extern "C" fn serr_lower(_elr: u64, _spsr: u64) { error!("serr_lower"); system_off::<Hvc>().unwrap(); } }
src/logger.rs(変更する必要はありません):
#![allow(unused)] fn main() { // Copyright 2023 Google LLC // // Licensed under the Apache License, Version 2.0 (the "License"); // you may not use this file except in compliance with the License. // You may obtain a copy of the License at // // http://www.apache.org/licenses/LICENSE-2.0 // // Unless required by applicable law or agreed to in writing, software // distributed under the License is distributed on an "AS IS" BASIS, // WITHOUT WARRANTIES OR CONDITIONS OF ANY KIND, either express or implied. // See the License for the specific language governing permissions and // limitations under the License. // ANCHOR: main use crate::pl011::Uart; use core::fmt::Write; use log::{LevelFilter, Log, Metadata, Record, SetLoggerError}; use spin::mutex::SpinMutex; static LOGGER: Logger = Logger { uart: SpinMutex::new(None) }; struct Logger { uart: SpinMutex<Option<Uart>>, } impl Log for Logger { fn enabled(&self, _metadata: &Metadata) -> bool { true } fn log(&self, record: &Record) { writeln!( self.uart.lock().as_mut().unwrap(), "[{}] {}", record.level(), record.args() ) .unwrap(); } fn flush(&self) {} } /// Initialises UART logger. pub fn init(uart: Uart, max_level: LevelFilter) -> Result<(), SetLoggerError> { LOGGER.uart.lock().replace(uart); log::set_logger(&LOGGER)?; log::set_max_level(max_level); Ok(()) } }
src/pl011.rs(変更する必要はありません):
#![allow(unused)] fn main() { // Copyright 2023 Google LLC // // Licensed under the Apache License, Version 2.0 (the "License"); // you may not use this file except in compliance with the License. // You may obtain a copy of the License at // // http://www.apache.org/licenses/LICENSE-2.0 // // Unless required by applicable law or agreed to in writing, software // distributed under the License is distributed on an "AS IS" BASIS, // WITHOUT WARRANTIES OR CONDITIONS OF ANY KIND, either express or implied. // See the License for the specific language governing permissions and // limitations under the License. #![allow(unused)] use core::fmt::{self, Write}; // ANCHOR: Flags use bitflags::bitflags; bitflags! { /// Flags from the UART flag register. #[repr(transparent)] #[derive(Copy, Clone, Debug, Eq, PartialEq)] struct Flags: u16 { /// Clear to send. const CTS = 1 << 0; /// Data set ready. const DSR = 1 << 1; /// Data carrier detect. const DCD = 1 << 2; /// UART busy transmitting data. const BUSY = 1 << 3; /// Receive FIFO is empty. const RXFE = 1 << 4; /// Transmit FIFO is full. const TXFF = 1 << 5; /// Receive FIFO is full. const RXFF = 1 << 6; /// Transmit FIFO is empty. const TXFE = 1 << 7; /// Ring indicator. const RI = 1 << 8; } } // ANCHOR_END: Flags bitflags! { /// Flags from the UART Receive Status Register / Error Clear Register. #[repr(transparent)] #[derive(Copy, Clone, Debug, Eq, PartialEq)] struct ReceiveStatus: u16 { /// Framing error. const FE = 1 << 0; /// Parity error. const PE = 1 << 1; /// Break error. const BE = 1 << 2; /// Overrun error. const OE = 1 << 3; } } // ANCHOR: Registers #[repr(C, align(4))] struct Registers { dr: u16, _reserved0: [u8; 2], rsr: ReceiveStatus, _reserved1: [u8; 19], fr: Flags, _reserved2: [u8; 6], ilpr: u8, _reserved3: [u8; 3], ibrd: u16, _reserved4: [u8; 2], fbrd: u8, _reserved5: [u8; 3], lcr_h: u8, _reserved6: [u8; 3], cr: u16, _reserved7: [u8; 3], ifls: u8, _reserved8: [u8; 3], imsc: u16, _reserved9: [u8; 2], ris: u16, _reserved10: [u8; 2], mis: u16, _reserved11: [u8; 2], icr: u16, _reserved12: [u8; 2], dmacr: u8, _reserved13: [u8; 3], } // ANCHOR_END: Registers // ANCHOR: Uart /// Driver for a PL011 UART. #[derive(Debug)] pub struct Uart { registers: *mut Registers, } impl Uart { /// Constructs a new instance of the UART driver for a PL011 device at the /// given base address. /// /// # Safety /// /// The given base address must point to the MMIO control registers of a /// PL011 device, which must be mapped into the address space of the process /// as device memory and not have any other aliases. pub unsafe fn new(base_address: *mut u32) -> Self { Self { registers: base_address as *mut Registers } } /// Writes a single byte to the UART. pub fn write_byte(&self, byte: u8) { // Wait until there is room in the TX buffer. while self.read_flag_register().contains(Flags::TXFF) {} // SAFETY: We know that self.registers points to the control registers // of a PL011 device which is appropriately mapped. unsafe { // Write to the TX buffer. (&raw mut (*self.registers).dr).write_volatile(byte.into()); } // Wait until the UART is no longer busy. while self.read_flag_register().contains(Flags::BUSY) {} } /// Reads and returns a pending byte, or `None` if nothing has been /// received. pub fn read_byte(&self) -> Option<u8> { if self.read_flag_register().contains(Flags::RXFE) { None } else { // SAFETY: We know that self.registers points to the control // registers of a PL011 device which is appropriately mapped. let data = unsafe { (&raw const (*self.registers).dr).read_volatile() }; // TODO: Check for error conditions in bits 8-11. Some(data as u8) } } fn read_flag_register(&self) -> Flags { // SAFETY: We know that self.registers points to the control registers // of a PL011 device which is appropriately mapped. unsafe { (&raw const (*self.registers).fr).read_volatile() } } } // ANCHOR_END: Uart impl Write for Uart { fn write_str(&mut self, s: &str) -> fmt::Result { for c in s.as_bytes() { self.write_byte(*c); } Ok(()) } } // Safe because it just contains a pointer to device memory, which can be // accessed from any context. unsafe impl Send for Uart {} }
Cargo.toml (変更は不要なはずです):
[workspace]
[package]
name = "rtc"
version = "0.1.0"
edition = "2021"
publish = false
[dependencies]
arm-gic = "0.1.1"
bitflags = "2.6.0"
chrono = { version = "0.4.38", default-features = false }
log = "0.4.22"
smccc = "0.1.1"
spin = "0.9.8"
[build-dependencies]
cc = "1.1.31"
build.rs(変更する必要はありません):
// Copyright 2023 Google LLC // // Licensed under the Apache License, Version 2.0 (the "License"); // you may not use this file except in compliance with the License. // You may obtain a copy of the License at // // http://www.apache.org/licenses/LICENSE-2.0 // // Unless required by applicable law or agreed to in writing, software // distributed under the License is distributed on an "AS IS" BASIS, // WITHOUT WARRANTIES OR CONDITIONS OF ANY KIND, either express or implied. // See the License for the specific language governing permissions and // limitations under the License. use cc::Build; use std::env; fn main() { env::set_var("CROSS_COMPILE", "aarch64-none-elf"); env::set_var("CC", "clang"); Build::new() .file("entry.S") .file("exceptions.S") .file("idmap.S") .compile("empty") }
entry.S(変更する必要はありません):
/*
* Copyright 2023 Google LLC
*
* Licensed under the Apache License, Version 2.0 (the "License");
* you may not use this file except in compliance with the License.
* You may obtain a copy of the License at
*
* https://www.apache.org/licenses/LICENSE-2.0
*
* Unless required by applicable law or agreed to in writing, software
* distributed under the License is distributed on an "AS IS" BASIS,
* WITHOUT WARRANTIES OR CONDITIONS OF ANY KIND, either express or implied.
* See the License for the specific language governing permissions and
* limitations under the License.
*/
.macro adr_l, reg:req, sym:req
adrp \reg, \sym
add \reg, \reg, :lo12:\sym
.endm
.macro mov_i, reg:req, imm:req
movz \reg, :abs_g3:\imm
movk \reg, :abs_g2_nc:\imm
movk \reg, :abs_g1_nc:\imm
movk \reg, :abs_g0_nc:\imm
.endm
.set .L_MAIR_DEV_nGnRE, 0x04
.set .L_MAIR_MEM_WBWA, 0xff
.set .Lmairval, .L_MAIR_DEV_nGnRE | (.L_MAIR_MEM_WBWA << 8)
/* 4 KiB granule size for TTBR0_EL1. */
.set .L_TCR_TG0_4KB, 0x0 << 14
/* 4 KiB granule size for TTBR1_EL1. */
.set .L_TCR_TG1_4KB, 0x2 << 30
/* Disable translation table walk for TTBR1_EL1, generating a translation fault instead. */
.set .L_TCR_EPD1, 0x1 << 23
/* Translation table walks for TTBR0_EL1 are inner sharable. */
.set .L_TCR_SH_INNER, 0x3 << 12
/*
* Translation table walks for TTBR0_EL1 are outer write-back read-allocate write-allocate
* cacheable.
*/
.set .L_TCR_RGN_OWB, 0x1 << 10
/*
* Translation table walks for TTBR0_EL1 are inner write-back read-allocate write-allocate
* cacheable.
*/
.set .L_TCR_RGN_IWB, 0x1 << 8
/* Size offset for TTBR0_EL1 is 2**39 bytes (512 GiB). */
.set .L_TCR_T0SZ_512, 64 - 39
.set .Ltcrval, .L_TCR_TG0_4KB | .L_TCR_TG1_4KB | .L_TCR_EPD1 | .L_TCR_RGN_OWB
.set .Ltcrval, .Ltcrval | .L_TCR_RGN_IWB | .L_TCR_SH_INNER | .L_TCR_T0SZ_512
/* Stage 1 instruction access cacheability is unaffected. */
.set .L_SCTLR_ELx_I, 0x1 << 12
/* SP alignment fault if SP is not aligned to a 16 byte boundary. */
.set .L_SCTLR_ELx_SA, 0x1 << 3
/* Stage 1 data access cacheability is unaffected. */
.set .L_SCTLR_ELx_C, 0x1 << 2
/* EL0 and EL1 stage 1 MMU enabled. */
.set .L_SCTLR_ELx_M, 0x1 << 0
/* Privileged Access Never is unchanged on taking an exception to EL1. */
.set .L_SCTLR_EL1_SPAN, 0x1 << 23
/* SETEND instruction disabled at EL0 in aarch32 mode. */
.set .L_SCTLR_EL1_SED, 0x1 << 8
/* Various IT instructions are disabled at EL0 in aarch32 mode. */
.set .L_SCTLR_EL1_ITD, 0x1 << 7
.set .L_SCTLR_EL1_RES1, (0x1 << 11) | (0x1 << 20) | (0x1 << 22) | (0x1 << 28) | (0x1 << 29)
.set .Lsctlrval, .L_SCTLR_ELx_M | .L_SCTLR_ELx_C | .L_SCTLR_ELx_SA | .L_SCTLR_EL1_ITD | .L_SCTLR_EL1_SED
.set .Lsctlrval, .Lsctlrval | .L_SCTLR_ELx_I | .L_SCTLR_EL1_SPAN | .L_SCTLR_EL1_RES1
/**
* This is a generic entry point for an image. It carries out the operations required to prepare the
* loaded image to be run. Specifically, it zeroes the bss section using registers x25 and above,
* prepares the stack, enables floating point, and sets up the exception vector. It preserves x0-x3
* for the Rust entry point, as these may contain boot parameters.
*/
.section .init.entry, "ax"
.global entry
entry:
/* Load and apply the memory management configuration, ready to enable MMU and caches. */
adrp x30, idmap
msr ttbr0_el1, x30
mov_i x30, .Lmairval
msr mair_el1, x30
mov_i x30, .Ltcrval
/* Copy the supported PA range into TCR_EL1.IPS. */
mrs x29, id_aa64mmfr0_el1
bfi x30, x29, #32, #4
msr tcr_el1, x30
mov_i x30, .Lsctlrval
/*
* Ensure everything before this point has completed, then invalidate any potentially stale
* local TLB entries before they start being used.
*/
isb
tlbi vmalle1
ic iallu
dsb nsh
isb
/*
* Configure sctlr_el1 to enable MMU and cache and don't proceed until this has completed.
*/
msr sctlr_el1, x30
isb
/* Disable trapping floating point access in EL1. */
mrs x30, cpacr_el1
orr x30, x30, #(0x3 << 20)
msr cpacr_el1, x30
isb
/* Zero out the bss section. */
adr_l x29, bss_begin
adr_l x30, bss_end
0: cmp x29, x30
b.hs 1f
stp xzr, xzr, [x29], #16
b 0b
1: /* Prepare the stack. */
adr_l x30, boot_stack_end
mov sp, x30
/* Set up exception vector. */
adr x30, vector_table_el1
msr vbar_el1, x30
/* Call into Rust code. */
bl main
/* Loop forever waiting for interrupts. */
2: wfi
b 2b
exceptions.S(変更する必要はありません):
/*
* Copyright 2023 Google LLC
*
* Licensed under the Apache License, Version 2.0 (the "License");
* you may not use this file except in compliance with the License.
* You may obtain a copy of the License at
*
* https://www.apache.org/licenses/LICENSE-2.0
*
* Unless required by applicable law or agreed to in writing, software
* distributed under the License is distributed on an "AS IS" BASIS,
* WITHOUT WARRANTIES OR CONDITIONS OF ANY KIND, either express or implied.
* See the License for the specific language governing permissions and
* limitations under the License.
*/
/**
* Saves the volatile registers onto the stack. This currently takes 14
* instructions, so it can be used in exception handlers with 18 instructions
* left.
*
* On return, x0 and x1 are initialised to elr_el2 and spsr_el2 respectively,
* which can be used as the first and second arguments of a subsequent call.
*/
.macro save_volatile_to_stack
/* Reserve stack space and save registers x0-x18, x29 & x30. */
stp x0, x1, [sp, #-(8 * 24)]!
stp x2, x3, [sp, #8 * 2]
stp x4, x5, [sp, #8 * 4]
stp x6, x7, [sp, #8 * 6]
stp x8, x9, [sp, #8 * 8]
stp x10, x11, [sp, #8 * 10]
stp x12, x13, [sp, #8 * 12]
stp x14, x15, [sp, #8 * 14]
stp x16, x17, [sp, #8 * 16]
str x18, [sp, #8 * 18]
stp x29, x30, [sp, #8 * 20]
/*
* Save elr_el1 & spsr_el1. This such that we can take nested exception
* and still be able to unwind.
*/
mrs x0, elr_el1
mrs x1, spsr_el1
stp x0, x1, [sp, #8 * 22]
.endm
/**
* Restores the volatile registers from the stack. This currently takes 14
* instructions, so it can be used in exception handlers while still leaving 18
* instructions left; if paired with save_volatile_to_stack, there are 4
* instructions to spare.
*/
.macro restore_volatile_from_stack
/* Restore registers x2-x18, x29 & x30. */
ldp x2, x3, [sp, #8 * 2]
ldp x4, x5, [sp, #8 * 4]
ldp x6, x7, [sp, #8 * 6]
ldp x8, x9, [sp, #8 * 8]
ldp x10, x11, [sp, #8 * 10]
ldp x12, x13, [sp, #8 * 12]
ldp x14, x15, [sp, #8 * 14]
ldp x16, x17, [sp, #8 * 16]
ldr x18, [sp, #8 * 18]
ldp x29, x30, [sp, #8 * 20]
/* Restore registers elr_el1 & spsr_el1, using x0 & x1 as scratch. */
ldp x0, x1, [sp, #8 * 22]
msr elr_el1, x0
msr spsr_el1, x1
/* Restore x0 & x1, and release stack space. */
ldp x0, x1, [sp], #8 * 24
.endm
/**
* This is a generic handler for exceptions taken at the current EL while using
* SP0. It behaves similarly to the SPx case by first switching to SPx, doing
* the work, then switching back to SP0 before returning.
*
* Switching to SPx and calling the Rust handler takes 16 instructions. To
* restore and return we need an additional 16 instructions, so we can implement
* the whole handler within the allotted 32 instructions.
*/
.macro current_exception_sp0 handler:req
msr spsel, #1
save_volatile_to_stack
bl \handler
restore_volatile_from_stack
msr spsel, #0
eret
.endm
/**
* This is a generic handler for exceptions taken at the current EL while using
* SPx. It saves volatile registers, calls the Rust handler, restores volatile
* registers, then returns.
*
* This also works for exceptions taken from EL0, if we don't care about
* non-volatile registers.
*
* Saving state and jumping to the Rust handler takes 15 instructions, and
* restoring and returning also takes 15 instructions, so we can fit the whole
* handler in 30 instructions, under the limit of 32.
*/
.macro current_exception_spx handler:req
save_volatile_to_stack
bl \handler
restore_volatile_from_stack
eret
.endm
.section .text.vector_table_el1, "ax"
.global vector_table_el1
.balign 0x800
vector_table_el1:
sync_cur_sp0:
current_exception_sp0 sync_exception_current
.balign 0x80
irq_cur_sp0:
current_exception_sp0 irq_current
.balign 0x80
fiq_cur_sp0:
current_exception_sp0 fiq_current
.balign 0x80
serr_cur_sp0:
current_exception_sp0 serr_current
.balign 0x80
sync_cur_spx:
current_exception_spx sync_exception_current
.balign 0x80
irq_cur_spx:
current_exception_spx irq_current
.balign 0x80
fiq_cur_spx:
current_exception_spx fiq_current
.balign 0x80
serr_cur_spx:
current_exception_spx serr_current
.balign 0x80
sync_lower_64:
current_exception_spx sync_lower
.balign 0x80
irq_lower_64:
current_exception_spx irq_lower
.balign 0x80
fiq_lower_64:
current_exception_spx fiq_lower
.balign 0x80
serr_lower_64:
current_exception_spx serr_lower
.balign 0x80
sync_lower_32:
current_exception_spx sync_lower
.balign 0x80
irq_lower_32:
current_exception_spx irq_lower
.balign 0x80
fiq_lower_32:
current_exception_spx fiq_lower
.balign 0x80
serr_lower_32:
current_exception_spx serr_lower
idmap.S (you shouldn’t need to change this):
/*
* Copyright 2023 Google LLC
*
* Licensed under the Apache License, Version 2.0 (the "License");
* you may not use this file except in compliance with the License.
* You may obtain a copy of the License at
*
* https://www.apache.org/licenses/LICENSE-2.0
*
* Unless required by applicable law or agreed to in writing, software
* distributed under the License is distributed on an "AS IS" BASIS,
* WITHOUT WARRANTIES OR CONDITIONS OF ANY KIND, either express or implied.
* See the License for the specific language governing permissions and
* limitations under the License.
*/
.set .L_TT_TYPE_BLOCK, 0x1
.set .L_TT_TYPE_PAGE, 0x3
.set .L_TT_TYPE_TABLE, 0x3
/* Access flag. */
.set .L_TT_AF, 0x1 << 10
/* Not global. */
.set .L_TT_NG, 0x1 << 11
.set .L_TT_XN, 0x3 << 53
.set .L_TT_MT_DEV, 0x0 << 2 // MAIR #0 (DEV_nGnRE)
.set .L_TT_MT_MEM, (0x1 << 2) | (0x3 << 8) // MAIR #1 (MEM_WBWA), inner shareable
.set .L_BLOCK_DEV, .L_TT_TYPE_BLOCK | .L_TT_MT_DEV | .L_TT_AF | .L_TT_XN
.set .L_BLOCK_MEM, .L_TT_TYPE_BLOCK | .L_TT_MT_MEM | .L_TT_AF | .L_TT_NG
.section ".rodata.idmap", "a", %progbits
.global idmap
.align 12
idmap:
/* level 1 */
.quad .L_BLOCK_DEV | 0x0 // 1 GiB of device mappings
.quad .L_BLOCK_MEM | 0x40000000 // 1 GiB of DRAM
.fill 254, 8, 0x0 // 254 GiB of unmapped VA space
.quad .L_BLOCK_DEV | 0x4000000000 // 1 GiB of device mappings
.fill 255, 8, 0x0 // 255 GiB of remaining VA space
image.ld(変更する必要はありません):
/*
* Copyright 2023 Google LLC
*
* Licensed under the Apache License, Version 2.0 (the "License");
* you may not use this file except in compliance with the License.
* You may obtain a copy of the License at
*
* https://www.apache.org/licenses/LICENSE-2.0
*
* Unless required by applicable law or agreed to in writing, software
* distributed under the License is distributed on an "AS IS" BASIS,
* WITHOUT WARRANTIES OR CONDITIONS OF ANY KIND, either express or implied.
* See the License for the specific language governing permissions and
* limitations under the License.
*/
/*
* Code will start running at this symbol which is placed at the start of the
* image.
*/
ENTRY(entry)
MEMORY
{
image : ORIGIN = 0x40080000, LENGTH = 2M
}
SECTIONS
{
/*
* Collect together the code.
*/
.init : ALIGN(4096) {
text_begin = .;
*(.init.entry)
*(.init.*)
} >image
.text : {
*(.text.*)
} >image
text_end = .;
/*
* Collect together read-only data.
*/
.rodata : ALIGN(4096) {
rodata_begin = .;
*(.rodata.*)
} >image
.got : {
*(.got)
} >image
rodata_end = .;
/*
* Collect together the read-write data including .bss at the end which
* will be zero'd by the entry code.
*/
.data : ALIGN(4096) {
data_begin = .;
*(.data.*)
/*
* The entry point code assumes that .data is a multiple of 32
* bytes long.
*/
. = ALIGN(32);
data_end = .;
} >image
/* Everything beyond this point will not be included in the binary. */
bin_end = .;
/* The entry point code assumes that .bss is 16-byte aligned. */
.bss : ALIGN(16) {
bss_begin = .;
*(.bss.*)
*(COMMON)
. = ALIGN(16);
bss_end = .;
} >image
.stack (NOLOAD) : ALIGN(4096) {
boot_stack_begin = .;
. += 40 * 4096;
. = ALIGN(4096);
boot_stack_end = .;
} >image
. = ALIGN(4K);
PROVIDE(dma_region = .);
/*
* Remove unused sections from the image.
*/
/DISCARD/ : {
/* The image loads itself so doesn't need these sections. */
*(.gnu.hash)
*(.hash)
*(.interp)
*(.eh_frame_hdr)
*(.eh_frame)
*(.note.gnu.build-id)
}
}
Makefile(変更する必要はありません):
# Copyright 2023 Google LLC
#
# Licensed under the Apache License, Version 2.0 (the "License");
# you may not use this file except in compliance with the License.
# You may obtain a copy of the License at
#
# http://www.apache.org/licenses/LICENSE-2.0
#
# Unless required by applicable law or agreed to in writing, software
# distributed under the License is distributed on an "AS IS" BASIS,
# WITHOUT WARRANTIES OR CONDITIONS OF ANY KIND, either express or implied.
# See the License for the specific language governing permissions and
# limitations under the License.
.PHONY: build qemu_minimal qemu qemu_logger
all: rtc.bin
build:
cargo build
rtc.bin: build
cargo objcopy -- -O binary $@
qemu: rtc.bin
qemu-system-aarch64 -machine virt,gic-version=3 -cpu max -serial mon:stdio -display none -kernel $< -s
clean:
cargo clean
rm -f *.bin
.cargo/config.toml (変更は不要なはずです):
[build]
target = "aarch64-unknown-none"
rustflags = ["-C", "link-arg=-Timage.ld"]
make qemuによりQEMU でコードを実行します。
ベアメタルRust PM
RTC ドライバ
(演習に戻る)
main.rs:
#![no_main] #![no_std] mod exceptions; mod logger; mod pl011; mod pl031; use crate::pl031::Rtc; use arm_gic::gicv3::{IntId, Trigger}; use arm_gic::{irq_enable, wfi}; use chrono::{TimeZone, Utc}; use core::hint::spin_loop; use crate::pl011::Uart; use arm_gic::gicv3::GicV3; use core::panic::PanicInfo; use log::{error, info, trace, LevelFilter}; use smccc::psci::system_off; use smccc::Hvc; /// GICv3 のベースアドレス。 const GICD_BASE_ADDRESS: *mut u64 = 0x800_0000 as _; const GICR_BASE_ADDRESS: *mut u64 = 0x80A_0000 as _; /// プライマリ PL011 UART のベースアドレス。 const PL011_BASE_ADDRESS: *mut u32 = 0x900_0000 as _; /// PL031 RTC のベースアドレス。 const PL031_BASE_ADDRESS: *mut u32 = 0x901_0000 as _; /// PL031 RTC が使用する IRQ。 const PL031_IRQ: IntId = IntId::spi(2); // SAFETY: There is no other global function of this name. #[unsafe(no_mangle)] extern "C" fn main(x0: u64, x1: u64, x2: u64, x3: u64) { // SAFETY: `PL011_BASE_ADDRESS` is the base address of a PL011 device, and // nothing else accesses that address range. let uart = unsafe { Uart::new(PL011_BASE_ADDRESS) }; logger::init(uart, LevelFilter::Trace).unwrap(); info!("main({:#x}, {:#x}, {:#x}, {:#x})", x0, x1, x2, x3); // SAFETY: `GICD_BASE_ADDRESS` and `GICR_BASE_ADDRESS` are the base // addresses of a GICv3 distributor and redistributor respectively, and // nothing else accesses those address ranges. let mut gic = unsafe { GicV3::new(GICD_BASE_ADDRESS, GICR_BASE_ADDRESS) }; gic.setup(); // SAFETY: `PL031_BASE_ADDRESS` is the base address of a PL031 device, and // nothing else accesses that address range. let mut rtc = unsafe { Rtc::new(PL031_BASE_ADDRESS) }; let timestamp = rtc.read(); let time = Utc.timestamp_opt(timestamp.into(), 0).unwrap(); info!("RTC: {time}"); GicV3::set_priority_mask(0xff); gic.set_interrupt_priority(PL031_IRQ, 0x80); gic.set_trigger(PL031_IRQ, Trigger::Level); irq_enable(); gic.enable_interrupt(PL031_IRQ, true); // 割り込みなしで 3 秒間待機します。 let target = timestamp + 3; rtc.set_match(target); info!("Waiting for {}", Utc.timestamp_opt(target.into(), 0).unwrap()); trace!( "matched={}, interrupt_pending={}", rtc.matched(), rtc.interrupt_pending() ); while !rtc.matched() { spin_loop(); } trace!( "matched={}, interrupt_pending={}", rtc.matched(), rtc.interrupt_pending() ); info!("Finished waiting"); // 割り込みまでさらに 3 秒待ちます。 let target = timestamp + 6; info!("Waiting for {}", Utc.timestamp_opt(target.into(), 0).unwrap()); rtc.set_match(target); rtc.clear_interrupt(); rtc.enable_interrupt(true); trace!( "matched={}, interrupt_pending={}", rtc.matched(), rtc.interrupt_pending() ); while !rtc.interrupt_pending() { wfi(); } trace!( "matched={}, interrupt_pending={}", rtc.matched(), rtc.interrupt_pending() ); info!("Finished waiting"); system_off::<Hvc>().unwrap(); } #[panic_handler] fn panic(info: &PanicInfo) -> ! { error!("{info}"); system_off::<Hvc>().unwrap(); loop {} }
pl031.rs:
#![allow(unused)] fn main() { #[repr(C, align(4))] struct Registers { /// データレジスタ dr: u32, /// 一致レジスタ mr: u32, /// 読み込みレジスタ lr: u32, /// 制御レジスタ cr: u8, _reserved0: [u8; 3], /// 割り込みマスクセットまたはクリアレジスタ imsc: u8, _reserved1: [u8; 3], /// 未加工の割り込みステータス ris: u8, _reserved2: [u8; 3], /// マスクされた割り込みステータス mis: u8, _reserved3: [u8; 3], /// 割り込みクリアレジスタ icr: u8, _reserved4: [u8; 3], } /// PL031 リアルタイム クロック用のドライバ。 #[derive(Debug)] pub struct Rtc { registers: *mut Registers, } impl Rtc { /// 指定されたベースアドレスに /// PL031 デバイス用の RTC ドライバの新しいインスタンスを作成します。 /// /// # 安全性 /// /// 指定されたベースアドレスは PL031 デバイスの MMIO 制御レジスタを指している必要があります。 /// これらはデバイスメモリとしてプロセスのアドレス空間に /// マッピングされ、他のエイリアスはありません。 pub unsafe fn new(base_address: *mut u32) -> Self { Self { registers: base_address as *mut Registers } } /// 現在の RTC 値を読み取ります。 pub fn read(&self) -> u32 { // SAFETY: We know that self.registers points to the control registers // of a PL031 device which is appropriately mapped. unsafe { (&raw const (*self.registers).dr).read_volatile() } } /// 一致値を書き込みます。RTC 値がこれに一致すると、割り込みが生成されます /// (割り込みが有効になっている場合)。 pub fn set_match(&mut self, value: u32) { // SAFETY: We know that self.registers points to the control registers // of a PL031 device which is appropriately mapped. unsafe { (&raw mut (*self.registers).mr).write_volatile(value) } } /// 割り込みが有効になっているかどうかに関係なく、一致レジスタが RTC 値と /// 一致するかどうかを返します。 pub fn matched(&self) -> bool { // SAFETY: We know that self.registers points to the control registers // of a PL031 device which is appropriately mapped. let ris = unsafe { (&raw const (*self.registers).ris).read_volatile() }; (ris & 0x01) != 0 } /// 現在保留中の割り込みがあるかどうかを返します。 /// /// これは `matched` が true を返し、割り込みがマスクされている場合にのみ /// true になります。 pub fn interrupt_pending(&self) -> bool { // SAFETY: We know that self.registers points to the control registers // of a PL031 device which is appropriately mapped. let ris = unsafe { (&raw const (*self.registers).mis).read_volatile() }; (ris & 0x01) != 0 } /// 割り込みマスクを設定またはクリアします。 /// /// マスクが true の場合、割り込みは有効になります。false の場合、 /// 割り込みは無効になります。 pub fn enable_interrupt(&mut self, mask: bool) { let imsc = if mask { 0x01 } else { 0x00 }; // SAFETY: We know that self.registers points to the control registers // of a PL031 device which is appropriately mapped. unsafe { (&raw mut (*self.registers).imsc).write_volatile(imsc) } } /// 保留中の割り込みがあればクリアします。 pub fn clear_interrupt(&mut self) { // SAFETY: We know that self.registers points to the control registers // of a PL031 device which is appropriately mapped. unsafe { (&raw mut (*self.registers).icr).write_volatile(0x01) } } } // SAFETY: `Rtc` just contains a pointer to device memory, which can be // accessed from any context. unsafe impl Send for Rtc {} }
Rustでの並行性へようこそ
Rustはミューテックスとチャネルを用いてOSスレッドを扱う並行性を十分にサポートしています。
Rustの型システムは多くの並行性にまつわるバグをコンパイル時のバグにとどめるという点で、重要な役割を果たします。これは時に fearless concurrency (「怖くない並行性」) と呼ばれます。なぜなら、コンパイラに実行時での正しさを保証することをまかせてよいためです。
スケジュール
Including 10 minute breaks, this session should take about 3 hours and 20 minutes. It contains:
| Segment | Duration |
|---|---|
| スレッド | 30 minutes |
| チャネル | 20 minutes |
| SendとSync | 15 minutes |
| 状態共有 | 30 minutes |
| 練習問題 | 1 hour and 10 minutes |
- Rust lets us access OS concurrency toolkit: threads, sync. primitives, etc.
- The type system gives us safety for concurrency without any special features.
- The same tools that help with “concurrent” access in a single thread (e.g., a called function that might mutate an argument or save references to it to read later) save us from multi-threading issues.
スレッド
This segment should take about 30 minutes. It contains:
| Slide | Duration |
|---|---|
| プレーンなスレッド | 15 minutes |
| スコープ付きスレッド | 15 minutes |
プレーンなスレッド
Rustのスレッドは他の言語のスレッドと似た挙動をします:
use std::thread; use std::time::Duration; fn main() { thread::spawn(|| { for i in 0..10 { println!("Count in thread: {i}!"); thread::sleep(Duration::from_millis(5)); } }); for i in 0..5 { println!("Main thread: {i}"); thread::sleep(Duration::from_millis(5)); } }
- Spawning new threads does not automatically delay program termination at the end of
main. - スレッドパニックは互いに独立です。
- Panics can carry a payload, which can be unpacked with
Any::downcast_ref.
- Panics can carry a payload, which can be unpacked with
-
Run the example.
- 5ms timing is loose enough that main and spawned threads stay mostly in lockstep.
- Notice that the program ends before the spawned thread reaches 10!
- This is because
mainends the program and spawned threads do not make it persist.- Compare to
pthreads/C++std::thread/boost::threadif desired.
- Compare to
-
How do we wait around for the spawned thread to complete?
-
thread::spawnreturns aJoinHandle. Look at the docs.JoinHandlehas a.join()method that blocks.
-
Use
let handle = thread::spawn(...)and laterhandle.join()to wait for the thread to finish and have the program count all the way to 10. -
Now what if we want to return a value?
-
Look at docs again:
thread::spawn’s closure returnsTJoinHandle.join()returnsthread::Result<T>
-
Use the
Resultreturn value fromhandle.join()to get access to the returned value. -
Ok, what about the other case?
- Trigger a panic in the thread. Note that this doesn’t panic
main. - Access the panic payload. This is a good time to talk about
Any.
- Trigger a panic in the thread. Note that this doesn’t panic
-
Now we can return values from threads! What about taking inputs?
- Capture something by reference in the thread closure.
- An error message indicates we must move it.
- Move it in, see we can compute and then return a derived value.
-
If we want to borrow?
- Main kills child threads when it returns, but another function would just return and leave them running.
- That would be stack use-after-return, which violates memory safety!
- How do we avoid this? See next slide.
スコープ付きスレッド
通常のスレッドはそれらの環境から借用することはできません:
use std::thread; fn foo() { let s = String::from("Hello"); thread::spawn(|| { println!("Length: {}", s.len()); }); } fn main() { foo(); }
しかし、そのためにスコープ付きスレッドを使うことができます:
use std::thread; fn foo() { let s = String::from("Hello"); thread::scope(|scope| { scope.spawn(|| { println!("Length: {}", s.len()); }); }); } fn main() { foo(); }
- この理由は、関数
thread::scopeが完了するとき、全てのスレッドはjoinされることが保証されているので、スレッドが借用したデータを返すことができるためです。 - 通常のRustの借用のルールが適用されます: 一つのスレッドがミュータブルで借用すること、または任意の数のスレッドからイミュータブルで借用すること。
チャネル
This segment should take about 20 minutes. It contains:
| Slide | Duration |
|---|---|
| 送信側(Senders)と受信側(Receivers) | 10 minutes |
| Unboundedチャネル | 2 minutes |
| Boundedチャネル | 10 minutes |
送信側(Senders)と受信側(Receivers)
Rust channels have two parts: a Sender<T> and a Receiver<T>. The two parts are connected via the channel, but you only see the end-points.
use std::sync::mpsc; fn main() { let (tx, rx) = mpsc::channel(); tx.send(10).unwrap(); tx.send(20).unwrap(); println!("Received: {:?}", rx.recv()); println!("Received: {:?}", rx.recv()); let tx2 = tx.clone(); tx2.send(30).unwrap(); println!("Received: {:?}", rx.recv()); }
Unboundedチャネル
You get an unbounded and asynchronous channel with mpsc::channel():
use std::sync::mpsc; use std::thread; use std::time::Duration; fn main() { let (tx, rx) = mpsc::channel(); thread::spawn(move || { let thread_id = thread::current().id(); for i in 0..10 { tx.send(format!("Message {i}")).unwrap(); println!("{thread_id:?}: sent Message {i}"); } println!("{thread_id:?}: done"); }); thread::sleep(Duration::from_millis(100)); for msg in rx.iter() { println!("Main: got {msg}"); } }
Boundedチャネル
With bounded (synchronous) channels, send() can block the current thread:
use std::sync::mpsc; use std::thread; use std::time::Duration; fn main() { let (tx, rx) = mpsc::sync_channel(3); thread::spawn(move || { let thread_id = thread::current().id(); for i in 0..10 { tx.send(format!("Message {i}")).unwrap(); println!("{thread_id:?}: sent Message {i}"); } println!("{thread_id:?}: done"); }); thread::sleep(Duration::from_millis(100)); for msg in rx.iter() { println!("Main: got {msg}"); } }
- Calling
send()will block the current thread until there is space in the channel for the new message. The thread can be blocked indefinitely if there is nobody who reads from the channel. - A call to
send()will abort with an error (that is why it returnsResult) if the channel is closed. A channel is closed when the receiver is dropped. - A bounded channel with a size of zero is called a “rendezvous channel”. Every send will block the current thread until another thread calls
recv().
SendとSync
This segment should take about 15 minutes. It contains:
| Slide | Duration |
|---|---|
| マーカートレイト | 2 minutes |
| Send | 2 minutes |
| Sync | 2 minutes |
| 例 | 10 minutes |
マーカートレイト
How does Rust know to forbid shared access across threads? The answer is in two traits:
Send and Sync are unsafe traits. The compiler will automatically derive them for your types as long as they only contain Send and Sync types. You can also implement them manually when you know it is valid.
- これらのトレイトは、ある型が特定のスレッドセーフの特性を持っていることを示すマーカーと考えることもできます。
- これらは通常のトレイトと同じように、ジェネリック境界の中で利用することができます。
Send
型
Tの値を安全に別のスレッドにムーブできる場合、型TはSendである。
所有権を別のスレットにムーブするということは、デストラクタ がそのスレッドで実行されるということです。つまり、あるスレッドでアロケートされた値を別のスレッドで解放しても良いかというのが判断基準になります。
例を挙げると、SQLiteライブラリへのコネクションは、一つのスレッドからのみアクセスされる必要があります。
Sync
型
Tの値を複数のスレッドから同時にアクセスしても安全な場合、型TはSyncである。
より正確には、以下のような定義です:
&TがSendである場合、かつその場合に限り、TはSyncである
これはつまり、「ある型の共有がスレッドセーフであれば、その参照をスレッド間で受け渡すこともスレッドセーフである」ということを手短に表したものです。
なぜなら、ある型がSyncである場合、データ競合や他の同期の問題などのリスクなしにその型を複数のスレッド間で共有でき、その型を別のスレッドにムーブしても安全だからです。また、型への参照は別のスレッドにムーブしても安全です。それは、それが参照するデータは任意のスレッドから安全にアクセスすることができるからです。
例
Send + Sync
見かけるほとんどの型はSend + Syncです:
i8、f32、bool、char、&strなど(T1, T2)、[T; N]、&[T]、struct { x: T }などString、Option<T>、Vec<T>、Box<T>などArc<T>: アトミック参照カウントにより、明示的にスレッドセーフ。Mutex<T>: 内部ロックにより明示的にスレッドセーフ。mpsc::Sender<T>: As of 1.72.0.AtomicBool,AtomicU8, …: 特別なアトミック命令を利用。
ジェネリクスは、型パラメタがSend + Syncであるとき、通常はSend + Syncです。
Send + !Sync
これらの型は別のスレッドにムーブすることができますが、このようなムーブはスレッドセーフではありません。通常は内部可変性がその原因です:
mpsc::Receiver<T>Cell<T>RefCell<T>
!Send + Sync
These types are safe to access (via shared references) from multiple threads, but they cannot be moved to another thread:
MutexGuard<T: Sync>: Uses OS level primitives which must be deallocated on the thread which created them. However, an already-locked mutex can have its guarded variable read by any thread with which the guard is shared.
!Send + !Sync
このような型はスレッドセーフではないため、別のスレッドにムーブすることはできません:
Rc<T>: それぞれのRc<T>はRcBox<T>への参照を持っています。これは、アトミックでない参照カウントを持っています。*const T,*mut T: Rust は、生ポインターは同時実行性に関する特別な考慮事項がある可能性があることを仮定しています。
状態共有
This segment should take about 30 minutes. It contains:
| Slide | Duration |
|---|---|
| Arc | 5 minutes |
| Mutex | 15 minutes |
| 例 | 10 minutes |
Arc
Arc<T> は読み取り専用の共有アクセスをArc::cloneにより可能にします:
use std::sync::Arc; use std::thread; fn main() { let v = Arc::new(vec![10, 20, 30]); let mut handles = Vec::new(); for _ in 0..5 { let v = Arc::clone(&v); handles.push(thread::spawn(move || { let thread_id = thread::current().id(); println!("{thread_id:?}: {v:?}"); })); } handles.into_iter().for_each(|h| h.join().unwrap()); println!("v: {v:?}"); }
Arcは“Atomic Reference Counted“の略で、アトミック操作を利用するという点で、Rcがスレッド安全になったバージョンのようなものです。Arc<T>はCloneを実装します。このことはTがCloneを実装するしないに関係ありません。TがSendとSyncの両方を実装している場合で、かつその場合に限り、Arc<T>は両者を実装します。Arc::clone()にはアトミック操作のコストがかかります。ただ、その後は、Tの利用に関するコストはかかりません。- 参照サイクルに気をつけてください。
Arcには参照サイクルを検知するためのガベージコレクタはありません。std::sync::Weakが役立ちます。
Mutex
Mutex<T> ensures mutual exclusion and allows mutable access to T behind a read-only interface (another form of interior mutability):
use std::sync::Mutex; fn main() { let v = Mutex::new(vec![10, 20, 30]); println!("v: {:?}", v.lock().unwrap()); { let mut guard = v.lock().unwrap(); guard.push(40); } println!("v: {:?}", v.lock().unwrap()); }
impl<T: Send> Sync for Mutex<T> のブランケット実装があることに注目してください。
- Rustにおける
Mutexとは、保護されるデータである、たった一つの要素から構成されたコレクションのようなものです。- 保護されたデータにアクセスする前に、ミューテックスを確保し忘れることはありません。
&Mutex<T>からロックを取得することで、&mut Tを得ることができます。このMutexGuardは&mut Tが保持されているロックよりも長く存続しないことを保証します。Mutex<T>implements bothSendandSyncif and only ifTimplementsSend.- 読み書きのロックの場合に対応するものがあります:
RwLock。 - なぜ
lock()はResultを返すのでしょう?- Mutex
を保持したスレッドがパニックを起こした場合、保護すべきデータが整合性の欠けた状態にある可能性を伝えるため、Mutexは「ポイゾンされた」("poisoned")状態になります。ポイゾンされたMutexに対してlock()をコールすると、[PoisonError](https://doc.rust-lang.org/std/sync/struct.PoisonError.html)とともに失敗します。into_inner()` を用いることで、そのエラーにおいて、とりあえずデータを回復することはできます。
- Mutex
例
Arc と Mutex の動作を見てみましょう:
use std::thread; // use std::sync::{Arc, Mutex}; fn main() { let v = vec![10, 20, 30]; let handle = thread::spawn(|| { v.push(10); }); v.push(1000); handle.join().unwrap(); println!("v: {v:?}"); }
考えられる対処法:
use std::sync::{Arc, Mutex}; use std::thread; fn main() { let v = Arc::new(Mutex::new(vec![10, 20, 30])); let v2 = Arc::clone(&v); let handle = thread::spawn(move || { let mut v2 = v2.lock().unwrap(); v2.push(10); }); { let mut v = v.lock().unwrap(); v.push(1000); } handle.join().unwrap(); println!("v: {v:?}"); }
注目するとよい箇所:
vはArcとMutexの両方でラップされています。なぜなら、それらの関心は互いに独立なものであるからです。MutexをArcでラップすることは、スレッド間でミュータブルな状態を共有するためによく見られるパターンです。
v: Arc<_>は別のスレッドにムーブされる前に、v2としてクローンされる必要があります。moveがラムダ式に追加されたことに注意してください。- ブロックは
LockGuardのスコープを可能な限り狭めるために導入されています。
練習問題
This segment should take about 1 hour and 10 minutes. It contains:
| Slide | Duration |
|---|---|
| 食事する哲学者 | 20 minutes |
| マルチスレッド・リンクチェッカー | 20 minutes |
| 解答 | 30 minutes |
食事する哲学者
食事する哲学者の問題は、並行性に関する古典的な問題です。
5 人の哲学者が同じテーブルで食事をしています。それぞれの哲学者がテーブルの定位置に座り、皿の間にはフォークが 1 本置かれています。提供される料理はスパゲッティで、2 本のフォークで食べる必要があります。哲学者は思索と食事を交互に繰り返すことしかできません。さらに、哲学者は左右両方のフォークを持っている場合にのみ、スパゲッティを食べることができます。したがって、2 つのフォークは、両隣の哲学者が食べるのではなく考えている場合にのみ使用できます。それぞれの哲学者は、食べ終わった後、両方のフォークを置きます。
この演習では、ローカルの Cargo インストールが必要です。以下のコードを src/main.rs というファイルにコピーし、空欄を埋めて、cargo run がデッドロックしないことを確認します。
use std::sync::{mpsc, Arc, Mutex}; use std::thread; use std::time::Duration; struct Fork; struct Philosopher { name: String, // left_fork: ... // right_fork: ... // thoughts: ... } impl Philosopher { fn think(&self) { self.thoughts .send(format!("Eureka! {} has a new idea!", &self.name)) .unwrap(); } fn eat(&self) { // Pick up forks... println!("{} is eating...", &self.name); thread::sleep(Duration::from_millis(10)); } } static PHILOSOPHERS: &[&str] = &["Socrates", "Hypatia", "Plato", "Aristotle", "Pythagoras"]; fn main() { // フォークを作成する // 哲学者を作成する // それぞれの哲学者が思索と食事を 100 回行うようにする // 哲学者の思索を出力する }
次の Cargo.toml を使用できます。
[package]
name = "dining-philosophers"
version = "0.1.0"
edition = "2021"
マルチスレッド・リンクチェッカー
新たに身に付けた知識を活かして、マルチスレッド リンク チェッカーを作成しましょう。まず、ウェブページ上のリンクが有効かどうかを確認する必要があります。同じドメインの他のページを再帰的にチェックし、すべてのページの検証が完了するまでこの処理を繰り返します。
For this, you will need an HTTP client such as reqwest. You will also need a way to find links, we can use scraper. Finally, we’ll need some way of handling errors, we will use thiserror.
Create a new Cargo project and reqwest it as a dependency with:
cargo new link-checker
cd link-checker
cargo add --features blocking,rustls-tls reqwest
cargo add scraper
cargo add thiserror
cargo addがerror: no such subcommandで失敗する場合は、Cargo.tomlファイルを手動で編集してください。下記の依存関係を追加します。
cargo add の呼び出しにより、Cargo.toml ファイルは次のように更新されます。
[package]
name = "link-checker"
version = "0.1.0"
edition = "2021"
publish = false
[dependencies]
reqwest = { version = "0.11.12", features = ["blocking", "rustls-tls"] }
scraper = "0.13.0"
thiserror = "1.0.37"
これで、スタートページをダウンロードできるようになりました。https://www.google.org/ のような小規模なサイトで試してみましょう。
src/main.rs ファイルは次のようになります。
use reqwest::blocking::Client; use reqwest::Url; use scraper::{Html, Selector}; use thiserror::Error; #[derive(Error, Debug)] enum Error { #[error("request error: {0}")] ReqwestError(#[from] reqwest::Error), #[error("bad http response: {0}")] BadResponse(String), } #[derive(Debug)] struct CrawlCommand { url: Url, extract_links: bool, } fn visit_page(client: &Client, command: &CrawlCommand) -> Result<Vec<Url>, Error> { println!("Checking {:#}", command.url); let response = client.get(command.url.clone()).send()?; if !response.status().is_success() { return Err(Error::BadResponse(response.status().to_string())); } let mut link_urls = Vec::new(); if !command.extract_links { return Ok(link_urls); } let base_url = response.url().to_owned(); let body_text = response.text()?; let document = Html::parse_document(&body_text); let selector = Selector::parse("a").unwrap(); let href_values = document .select(&selector) .filter_map(|element| element.value().attr("href")); for href in href_values { match base_url.join(href) { Ok(link_url) => { link_urls.push(link_url); } Err(err) => { println!("On {base_url:#}: ignored unparsable {href:?}: {err}"); } } } Ok(link_urls) } fn main() { let client = Client::new(); let start_url = Url::parse("https://www.google.org").unwrap(); let crawl_command = CrawlCommand{ url: start_url, extract_links: true }; match visit_page(&client, &crawl_command) { Ok(links) => println!("Links: {links:#?}"), Err(err) => println!("Could not extract links: {err:#}"), } }
src/main.rs 内のコードを、次のコマンドで実行します。
cargo run
タスク
- スレッドを使用してリンクを同時にチェックします。つまり、チェックする URL をチャンネルに送信し、いくつかのスレッドで同時に URL を確認します。
- これを拡張して、
www.google.orgドメインのすべてのページからリンクを再帰的に抽出します。サイトがブロックされないように、ページ数の上限を 100 程度に設定します。
解答
食事する哲学者
use std::sync::{mpsc, Arc, Mutex}; use std::thread; use std::time::Duration; struct Fork; struct Philosopher { name: String, left_fork: Arc<Mutex<Fork>>, right_fork: Arc<Mutex<Fork>>, thoughts: mpsc::SyncSender<String>, } impl Philosopher { fn think(&self) { self.thoughts .send(format!("Eureka! {} has a new idea!", &self.name)) .unwrap(); } fn eat(&self) { println!("{} is trying to eat", &self.name); let _left = self.left_fork.lock().unwrap(); let _right = self.right_fork.lock().unwrap(); println!("{} is eating...", &self.name); thread::sleep(Duration::from_millis(10)); } } static PHILOSOPHERS: &[&str] = &["Socrates", "Hypatia", "Plato", "Aristotle", "Pythagoras"]; fn main() { let (tx, rx) = mpsc::sync_channel(10); let forks = (0..PHILOSOPHERS.len()) .map(|_| Arc::new(Mutex::new(Fork))) .collect::<Vec<_>>(); for i in 0..forks.len() { let tx = tx.clone(); let mut left_fork = Arc::clone(&forks[i]); let mut right_fork = Arc::clone(&forks[(i + 1) % forks.len()]); // デッドロックを避けるために、どこかで対称性を // 崩す必要があります。下記のコードでは、 // 領域を開放することなく2つのフォークを交換します。 if i == forks.len() - 1 { std::mem::swap(&mut left_fork, &mut right_fork); } let philosopher = Philosopher { name: PHILOSOPHERS[i].to_string(), thoughts: tx, left_fork, right_fork, }; thread::spawn(move || { for _ in 0..100 { philosopher.eat(); philosopher.think(); } }); } drop(tx); for thought in rx { println!("{thought}"); } }
Link Checker
use std::sync::{mpsc, Arc, Mutex}; use std::thread; use reqwest::blocking::Client; use reqwest::Url; use scraper::{Html, Selector}; use thiserror::Error; #[derive(Error, Debug)] enum Error { #[error("request error: {0}")] ReqwestError(#[from] reqwest::Error), #[error("bad http response: {0}")] BadResponse(String), } #[derive(Debug)] struct CrawlCommand { url: Url, extract_links: bool, } fn visit_page(client: &Client, command: &CrawlCommand) -> Result<Vec<Url>, Error> { println!("Checking {:#}", command.url); let response = client.get(command.url.clone()).send()?; if !response.status().is_success() { return Err(Error::BadResponse(response.status().to_string())); } let mut link_urls = Vec::new(); if !command.extract_links { return Ok(link_urls); } let base_url = response.url().to_owned(); let body_text = response.text()?; let document = Html::parse_document(&body_text); let selector = Selector::parse("a").unwrap(); let href_values = document .select(&selector) .filter_map(|element| element.value().attr("href")); for href in href_values { match base_url.join(href) { Ok(link_url) => { link_urls.push(link_url); } Err(err) => { println!("On {base_url:#}: ignored unparsable {href:?}: {err}"); } } } Ok(link_urls) } struct CrawlState { domain: String, visited_pages: std::collections::HashSet<String>, } impl CrawlState { fn new(start_url: &Url) -> CrawlState { let mut visited_pages = std::collections::HashSet::new(); visited_pages.insert(start_url.as_str().to_string()); CrawlState { domain: start_url.domain().unwrap().to_string(), visited_pages } } /// 指定されたページ内のリンクを抽出するかどうかを決定します。 fn should_extract_links(&self, url: &Url) -> bool { let Some(url_domain) = url.domain() else { return false; }; url_domain == self.domain } /// 指定されたページを訪問済みとしてマークし、すでに訪問済みであれば /// false を返します。 fn mark_visited(&mut self, url: &Url) -> bool { self.visited_pages.insert(url.as_str().to_string()) } } type CrawlResult = Result<Vec<Url>, (Url, Error)>; fn spawn_crawler_threads( command_receiver: mpsc::Receiver<CrawlCommand>, result_sender: mpsc::Sender<CrawlResult>, thread_count: u32, ) { let command_receiver = Arc::new(Mutex::new(command_receiver)); for _ in 0..thread_count { let result_sender = result_sender.clone(); let command_receiver = command_receiver.clone(); thread::spawn(move || { let client = Client::new(); loop { let command_result = { let receiver_guard = command_receiver.lock().unwrap(); receiver_guard.recv() }; let Ok(crawl_command) = command_result else { // 送信者がドロップされました。今後コマンドは受信されません。 break; }; let crawl_result = match visit_page(&client, &crawl_command) { Ok(link_urls) => Ok(link_urls), Err(error) => Err((crawl_command.url, error)), }; result_sender.send(crawl_result).unwrap(); } }); } } fn control_crawl( start_url: Url, command_sender: mpsc::Sender<CrawlCommand>, result_receiver: mpsc::Receiver<CrawlResult>, ) -> Vec<Url> { let mut crawl_state = CrawlState::new(&start_url); let start_command = CrawlCommand { url: start_url, extract_links: true }; command_sender.send(start_command).unwrap(); let mut pending_urls = 1; let mut bad_urls = Vec::new(); while pending_urls > 0 { let crawl_result = result_receiver.recv().unwrap(); pending_urls -= 1; match crawl_result { Ok(link_urls) => { for url in link_urls { if crawl_state.mark_visited(&url) { let extract_links = crawl_state.should_extract_links(&url); let crawl_command = CrawlCommand { url, extract_links }; command_sender.send(crawl_command).unwrap(); pending_urls += 1; } } } Err((url, error)) => { bad_urls.push(url); println!("Got crawling error: {:#}", error); continue; } } } bad_urls } fn check_links(start_url: Url) -> Vec<Url> { let (result_sender, result_receiver) = mpsc::channel::<CrawlResult>(); let (command_sender, command_receiver) = mpsc::channel::<CrawlCommand>(); spawn_crawler_threads(command_receiver, result_sender, 16); control_crawl(start_url, command_sender, result_receiver) } fn main() { let start_url = reqwest::Url::parse("https://www.google.org").unwrap(); let bad_urls = check_links(start_url); println!("Bad URLs: {:#?}", bad_urls); }
ようこそ
「Async」は複数のタスクが並行処理される並行性モデルです。それぞれのタスクはブロックされるまで実行され、そして次に進むことのできる他のタスクに切り替えることにより実現されます。このモデルは限られた数のスレッド上でより多くのタスクを実行することを可能にします。なぜなら、タスクごとのオーバーヘッドは通常はとても低く、効率的に実行可能なI/Oを特定するために必要なプリミティブをOSが提供してくれるからです。
Rustの非同期的な操作は「future」に基づいていて、これは将来に完了するかもしれない作業を表しています。Futureは、タスクが完了したことを知らせるシグナルが得られるまでポーリングされます。
Futureは非同期的なランタイムによりポーリングされます。ランタイムにはいくつかの選択肢があります。
他の言語との比較
-
Pythonには似たようなモデルが
asyncioとして搭載されています。しかし、ここでのFuture型はコールバックに基づくものであって、ポーリングによるものではありません。Pythonの非同期プログラムは「ループ」を必要とし、Rustのランタイムに似ています。 -
JavaScriptの
Promiseは似ているものの、これもまたもやコールバックに基づきます。 この言語のランタイムはイベントループにより実装されているため、多くのPromise解決の詳細は隠されています。
スケジュール
Including 10 minute breaks, this session should take about 3 hours and 20 minutes. It contains:
| Segment | Duration |
|---|---|
| Asyncの基礎 | 30 minutes |
| チャネルと制御フロー | 20 minutes |
| 落とし穴 | 55 minutes |
| 練習問題 | 1 hour and 10 minutes |
Asyncの基礎
This segment should take about 30 minutes. It contains:
| Slide | Duration |
|---|---|
| async/await | 10 minutes |
| Future | 4 minutes |
| ランタイム | 10 minutes |
| タスク | 10 minutes |
async/await
おおまかには、Rustの非同期コードはほとんど「通常の」逐次的なコードのように見えます:
use futures::executor::block_on; async fn count_to(count: i32) { for i in 0..count { println!("Count is: {i}!"); } } async fn async_main(count: i32) { count_to(count).await; } fn main() { block_on(async_main(10)); }
要点:
-
これは構文を示すための単純化された例であることに注意してください。長く実行されうる操作や本物の並行処理はここには含まれません。
-
The “async” keyword is syntactic sugar. The compiler replaces the return type with a future.
-
コンパイラに対して、返されたfutureの値をその後どう扱うべきかという、追加の指示を含めない限り、
mainをasyncにすることはできません。 -
You need an executor to run async code.
block_onblocks the current thread until the provided future has run to completion. -
.awaitは非同期的に他の操作の完了を待ちます。block_onとは異なり、.awaitは現在のスレッドをブロックしません。 -
.awaitcan only be used inside anasyncfunction (or block; these are introduced later).
Future
Futureはトレイトであり、まだ完了してないかもしれない操作を表現するオブジェクトにより実装されます。Futureはポーリングされることがあり、pollはPollを返します。
#![allow(unused)] fn main() { use std::pin::Pin; use std::task::Context; pub trait Future { type Output; fn poll(self: Pin<&mut Self>, cx: &mut Context<'_>) -> Poll<Self::Output>; } pub enum Poll<T> { Ready(T), Pending, } }
非同期の関数はimpl Futureを返します。自分で定義した型に対してFutureを実装することも(あまりないことですが)可能です。例えば、tokio::spawnから返されるJoinHandleはFutureを実装することにより、joinすることを可能にしています。
Futureに適用される.awaitキーワードは、そのFutureの準備ができるまで、現在の非同期の関数の一時停止を起こし、そしてその出力を評価します。
-
FutureとPollの型はまさに示されたように実装されます; ドキュメントの具体的な実装を見るにはリンクをクリックしてください。 -
PinとContextについては詳しくは扱いません。なぜなら、新しく非同期のプリミティブを作るよりも、非同期のコードを書くことに我々は重点を置くつもりだからです。簡潔には以下で説明されます:-
Contextは、特定のイベントが発生した時に、Futureが自分自身を再びポーリングされるようにスケジュールすることを可能にします。 -
Pinはfutureへのポインタが有効であり続けるために、Futureがメモリの中で移動されないことを確実にします。これは、参照が.awaitの後に有効であり続けるために必要です。
-
ランタイム
_runtime_は非同期な演算(reactor)のサポートを提供し、また、futureを実行すること(executor)を担当しています。Rustには「ビルトイン」のランタイムはありませんが、いくつかのランタイムの選択肢があります:
- Tokio: performant, with a well-developed ecosystem of functionality like Hyper for HTTP or Tonic for gRPC.
- async-std: aims to be a “std for async”, and includes a basic runtime in
async::task. - smol: simple and lightweight
いくつかのより巨大なアプリケーションは、独自のランタイムを備えています。例えばFuchsiaはそのようなものをすでに備えています。
-
上で挙げられたランタイムのうち、TokioのみがRustプレイグラウンドでサポートされています。このプレイグラウンドではいかなる入出力操作も許可されていないため、大抵の興味深い非同期のあれこれは、プレイグラウンドで実行することはできません。
-
Futureは、ポーリングを行うエグゼキュータの存在なしには何も行わない(入出力操作さえ始めない)という点で「怠惰」です。例えば、これは、エグゼキュータがなくとも最後まで実行されるJavaScriptのPromiseとは異なります。
Tokio
Tokio provides:
- 非同期のコードを実行するためのマルチスレッドのランタイム。
- 標準ライブラリの非同期バージョン。
- 大きなライブラリのエコシステム。
use tokio::time; async fn count_to(count: i32) { for i in 0..count { println!("Count in task: {i}!"); time::sleep(time::Duration::from_millis(5)).await; } } #[tokio::main] async fn main() { tokio::spawn(count_to(10)); for i in 0..5 { println!("Main task: {i}"); time::sleep(time::Duration::from_millis(5)).await; } }
-
tokio::mainのマクロにより、mainの非同期処理を作ることができます。 -
spawn関数は新しい並行の「タスク」を作成します。 -
注意:
spawnはFutureを引数に取るため、count_toに対して.awaitを呼ぶことはありません。
さらなる探求:
-
どうして
count_toは(通常は)10に辿り着かないのでしょうか?これは非同期処理のキャンセルの例です。tokio::spawnは完了まで待機するためのハンドラを返します。 -
プロセスを新しく作る代わりに、
count_to(10).awaitを試してみてください。 -
tokio::spawnから返されたタスクを待機してみてください。
タスク
Rust には、軽量のスレッド形式の一種であるタスクシステムがあります。
タスクには、単一のトップレベルのfutureがあり、これはエグゼキュータが先に進むためにポーリングする対象となります。そのfutureには一つまたは複数のfutureがネストされていることもあり、トップレベルのfutureのpollメソッドがポーリングすることになり、大まかにはコールスタックに対応すると言えます。タスクにおける並行処理は、例えば競合タイマーや入出力操作など、複数の子のfutureをポーリングすることにより可能になります。
use tokio::io::{self, AsyncReadExt, AsyncWriteExt}; use tokio::net::TcpListener; #[tokio::main] async fn main() -> io::Result<()> { let listener = TcpListener::bind("127.0.0.1:0").await?; println!("listening on port {}", listener.local_addr()?.port()); loop { let (mut socket, addr) = listener.accept().await?; println!("connection from {addr:?}"); tokio::spawn(async move { socket.write_all(b"Who are you?\n").await.expect("socket error"); let mut buf = vec![0; 1024]; let name_size = socket.read(&mut buf).await.expect("socket error"); let name = std::str::from_utf8(&buf[..name_size]).unwrap().trim(); let reply = format!("Thanks for dialing in, {name}!\n"); socket.write_all(reply.as_bytes()).await.expect("socket error"); }); } }
この例を準備したsrc/main.rsにコピーして、そこから実行してみましょう。
nc や telnet などの TCP 接続ツールを使用して接続してみてください。
-
例のサーバーがどのような状態の時に、いくつかのクライアントと接続された状態にあるのかを、可視化するように受講者に指示してください。どんなタスクが存在していますか?それらのfutureは何ですか?
-
This is the first time we’ve seen an
asyncblock. This is similar to a closure, but does not take any arguments. Its return value is a Future, similar to anasync fn. -
mainのasyncブロックを関数にリファクタして、
?を使ったエラーハンドリングを改善してみましょう。
チャネルと制御フロー
This segment should take about 20 minutes. It contains:
| Slide | Duration |
|---|---|
| Asyncチャネル | 10 minutes |
| Join | 4 minutes |
| Select | 5 minutes |
Asyncチャネル
Several crates have support for asynchronous channels. For instance tokio:
use tokio::sync::mpsc; async fn ping_handler(mut input: mpsc::Receiver<()>) { let mut count: usize = 0; while let Some(_) = input.recv().await { count += 1; println!("Received {count} pings so far."); } println!("ping_handler complete"); } #[tokio::main] async fn main() { let (sender, receiver) = mpsc::channel(32); let ping_handler_task = tokio::spawn(ping_handler(receiver)); for i in 0..10 { sender.send(()).await.expect("Failed to send ping."); println!("Sent {} pings so far.", i + 1); } drop(sender); ping_handler_task.await.expect("Something went wrong in ping handler task."); }
-
チャネルサイズを
3に変えてみて、これがどのように処理に影響するか確認してみましょう。 -
Overall, the interface is similar to the
syncchannels as seen in the morning class. -
std::mem::dropの呼び出しを除いてみましょう。何か起こるでしょうか?それはなぜでしょうか? -
Flumeクレートには
syncとasyncやsendとrecvの両方を実装するチャネルがあります。 これは入出力と重いCPUの処理のタスクの両方を含む、複雑なアプリケーションで便利です。 -
asyncチャネルを扱うことを好ましくするのは、チャネルと繋げるためにや、複雑なコントロールフローを作るために、チャネルを他のfutureと繋げられることです。
Join
Joinという操作では、futureの集合の準備が整うまで待機し、その後に結果をまとめて返します。これはJavaScriptにおける Promise.all やPythonにおけるasyncio.gatherに似ています。
use anyhow::Result; use futures::future; use reqwest; use std::collections::HashMap; async fn size_of_page(url: &str) -> Result<usize> { let resp = reqwest::get(url).await?; Ok(resp.text().await?.len()) } #[tokio::main] async fn main() { let urls: [&str; 4] = [ "https://google.com", "https://httpbin.org/ip", "https://play.rust-lang.org/", "BAD_URL", ]; let futures_iter = urls.into_iter().map(size_of_page); let results = future::join_all(futures_iter).await; let page_sizes_dict: HashMap<&str, Result<usize>> = urls.into_iter().zip(results.into_iter()).collect(); println!("{page_sizes_dict:?}"); }
この例を準備したsrc/main.rsにコピーして、そこから実行してみましょう。
-
複数の互いに素な型のfutureに対しては、
std::future::join!を利用できます。しかし、いくつのfutureがコンパイル時に存在しているのかを把握しておく必要があります。これは現在futuresクレートにありますが、近いうちにstd::futureに統合される予定です。 -
The risk of
joinis that one of the futures may never resolve, this would cause your program to stall. -
また、
join_allとjoin!を組み合わせることもできます。それは、例えばデータベースのクエリと一緒にhttpサービスへの全てのリクエストをjoinする場合です。futureにfutures::join!を用いて、tokio::time::sleepを追加してみてください。これは(次のチャプターで説明する、select!を必要とする)タイムアウトではありませんが、join!の良い実演となっています。
Select
Selectという操作では、futureの集合のうち、いずれか1つの準備が整うまで待機し、そのfutureが提供する結果に対して応答します。これはJavaScriptにおけるPromise.raceに似ています。また、Pythonにおける asyncio.wait(task_set, return_when=asyncio.FIRST_COMPLETED)と比べることができます。
Similar to a match statement, the body of select! has a number of arms, each of the form pattern = future => statement. When a future is ready, its return value is destructured by the pattern. The statement is then run with the resulting variables. The statement result becomes the result of the select! macro.
use tokio::sync::mpsc; use tokio::time::{sleep, Duration}; #[tokio::main] async fn main() { let (tx, mut rx) = mpsc::channel(32); let listener = tokio::spawn(async move { tokio::select! { Some(msg) = rx.recv() => println!("got: {msg}"), _ = sleep(Duration::from_millis(50)) => println!("timeout"), }; }); sleep(Duration::from_millis(10)).await; tx.send(String::from("Hello!")).await.expect("Failed to send greeting"); listener.await.expect("Listener failed"); }
-
The
listenerasync block here is a common form: wait for some async event, or for a timeout. Change thesleepto sleep longer to see it fail. Why does thesendalso fail in this situation? -
select!is also often used in a loop in “actor” architectures, where a task reacts to events in a loop. That has some pitfalls, which will be discussed in the next segment.
落とし穴
Async / await provides convenient and efficient abstraction for concurrent asynchronous programming. However, the async/await model in Rust also comes with its share of pitfalls and footguns. We illustrate some of them in this chapter.
This segment should take about 55 minutes. It contains:
| Slide | Duration |
|---|---|
| エグゼキュータのブロッキング | 10 minutes |
| Pin | 20 minutes |
| Asyncトレイト | 5 minutes |
| キャンセル | 20 minutes |
エグゼキュータのブロック
ほとんどの非同期ランタイムは、IO タスクの同時実行のみを許可します。つまり、CPU ブロックタスクはエグゼキュータをブロックし、他のタスクの実行を妨げます。簡単な回避策は、可能であれば非同期の同等のメソッドを使用することです。
use futures::future::join_all; use std::time::Instant; async fn sleep_ms(start: &Instant, id: u64, duration_ms: u64) { std::thread::sleep(std::time::Duration::from_millis(duration_ms)); println!( "future {id} slept for {duration_ms}ms, finished after {}ms", start.elapsed().as_millis() ); } #[tokio::main(flavor = "current_thread")] async fn main() { let start = Instant::now(); let sleep_futures = (1..=10).map(|t| sleep_ms(&start, t, t * 10)); join_all(sleep_futures).await; }
-
コードを続けて、スリープが同時ではなく連続して発生することを確認します。
-
"current_thread"フレーバーは、すべてのタスクを 1 つのスレッドに配置します。これにより、影響はより明確になりますが、バグはまだマルチスレッド フレーバーに存在します。 -
std::thread::sleepをtokio::time::sleepに切り替えて、その結果を待ちます。 -
もう 1 つの修正策は、
tokio::task::spawn_blockingを使用することです。これは、実際のスレッドを生成し、エグゼキュータをブロックせずにそのハンドルを Future に変換します。 -
タスクは OS スレッドとはみなすべきではありません。これらは 1 対 1 に対応しておらず、ほとんどのエグゼキュータは、単一の OS スレッドで多くのタスクを実行することを許可します。これは、FFI を介して他のライブラリとやり取りする場合に特に問題となります。FFI では、そのライブラリはスレッド ローカル ストレージに依存しているか、特定の OS スレッド(CUDA など)にマッピングされている可能性があるためです。そのような場合は
tokio::task::spawn_blockingを使用することをおすすめします。 -
同期ミューテックスは慎重に使用してください。
.awaitでミューテックスを保持すると、別のタスクがブロックされ、そのタスクが同じスレッドで実行される可能性があります。
Pin
非同期ブロックと関数は、Future トレイトを実装する型を返します。返される型は、ローカル変数を Future の内部に格納されるデータに変換するコンパイラ変換の結果です。
これらの変数の一部は、他のローカル変数へのポインタを保持できます。これらのポインタが無効になるため、Futureを別のメモリ位置に移動しないでください。
メモリ内の Future 型が移動するのを防ぐには、固定されたポインタのみを介してポーリングするようにします。Pin は参照のラッパーで、参照先のインスタンスを別のメモリ位置に移動するオペレーションをすべて禁止します。
use tokio::sync::{mpsc, oneshot}; use tokio::task::spawn; use tokio::time::{sleep, Duration}; // 作業アイテム。この場合、指定された時間だけスリープし、 // `respond_on` チャンネルでメッセージを返します。 #[derive(Debug)] struct Work { input: u32, respond_on: oneshot::Sender<u32>, } // キュー上の処理をリッスンして実行するワーカー。 async fn worker(mut work_queue: mpsc::Receiver<Work>) { let mut iterations = 0; loop { tokio::select! { Some(work) = work_queue.recv() => { sleep(Duration::from_millis(10)).await; // Pretend to work. work.respond_on .send(work.input * 1000) .expect("failed to send response"); iterations += 1; } // TODO: 100 ミリ秒ごとの反復処理の回数をレポート } } } // 処理をリクエストし、処理が完了するまで待機するリクエスト元。 async fn do_work(work_queue: &mpsc::Sender<Work>, input: u32) -> u32 { let (tx, rx) = oneshot::channel(); work_queue .send(Work { input, respond_on: tx }) .await .expect("failed to send on work queue"); rx.await.expect("failed waiting for response") } #[tokio::main] async fn main() { let (tx, rx) = mpsc::channel(10); spawn(worker(rx)); for i in 0..100 { let resp = do_work(&tx, i).await; println!("work result for iteration {i}: {resp}"); } }
-
これはアクターのパターンの一例です。アクターは通常、ループ内で
select!を呼び出します。 -
これはこれまでのレッスンの一部をまとめたものですので、時間をかけて復習してください。
-
_ = sleep(Duration::from_millis(100)) => { println!(..) }をselect!に追加しただけでは、実行されません。なぜでしょうか? -
代わりに、
loopの外側で、その Future を含むtimeout_futを追加します。#![allow(unused)] fn main() { let timeout_fut = sleep(Duration::from_millis(100)); loop { select! { .., _ = timeout_fut => { println!(..); }, } } } -
これでもうまくいきません。コンパイルエラーにあるように、
select!内のtimeout_futに&mutを追加して移動を回避してから、Box::pinを使用します。#![allow(unused)] fn main() { let mut timeout_fut = Box::pin(sleep(Duration::from_millis(100))); loop { select! { .., _ = &mut timeout_fut => { println!(..); }, } } } -
This compiles, but once the timeout expires it is
Poll::Readyon every iteration (a fused future would help with this). Update to resettimeout_futevery time it expires:#![allow(unused)] fn main() { let mut timeout_fut = Box::pin(sleep(Duration::from_millis(100))); loop { select! { _ = &mut timeout_fut => { println!(..); timeout_fut = Box::pin(sleep(Duration::from_millis(100))); }, } } }
-
-
Box でヒープに割り当てます。場合によっては
std::pin::pin!(最近安定化されたばかりで、古いコードでは多くの場合にtokio::pin!を使用します)も使用できますが、再割り当てされる Future に使用することは困難です。 -
別の方法としては、
pinをまったく使用せずに、100 ミリ秒ごとにoneshotチャネルに送信する別のタスクを生成するという方法もあります。 -
それ自体へのポインタを含むデータは、自己参照と呼ばれます。通常、Rust 借用チェッカーは、参照が参照先のデータより長く存続できないため、自己参照データの移動を防ぎます。ただし、非同期ブロックと関数のコード変換は、借用チェッカーによって検証されません。
-
Pinは参照のラッパーです。固定されたポインタを使用して、オブジェクトをその場所から移動することはできません。ただし、固定されていないポインタを介して移動することは可能です。 -
Futureトレイトのpollメソッドは、&mut SelfではなくPin<&mut Self>を使用してインスタンスを参照します。固定されたポインタでのみ呼び出すことができるのはこのためです。
Asyncトレイト
Async methods in traits are were stabilized in the 1.75 release. This required support for using return-position impl Trait in traits, as the desugaring for async fn includes -> impl Future<Output = ...>.
However, even with the native support, there are some pitfalls around async fn:
-
Return-position
impl Traitcaptures all in-scope lifetimes (so some patterns of borrowing cannot be expressed). -
Async traits cannot be used with trait objects (
dyn Traitsupport).
The async_trait crate provides a workaround for dyn support through a macro, with some caveats:
use async_trait::async_trait; use std::time::Instant; use tokio::time::{sleep, Duration}; #[async_trait] trait Sleeper { async fn sleep(&self); } struct FixedSleeper { sleep_ms: u64, } #[async_trait] impl Sleeper for FixedSleeper { async fn sleep(&self) { sleep(Duration::from_millis(self.sleep_ms)).await; } } async fn run_all_sleepers_multiple_times( sleepers: Vec<Box<dyn Sleeper>>, n_times: usize, ) { for _ in 0..n_times { println!("Running all sleepers..."); for sleeper in &sleepers { let start = Instant::now(); sleeper.sleep().await; println!("Slept for {} ms", start.elapsed().as_millis()); } } } #[tokio::main] async fn main() { let sleepers: Vec<Box<dyn Sleeper>> = vec![ Box::new(FixedSleeper { sleep_ms: 50 }), Box::new(FixedSleeper { sleep_ms: 100 }), ]; run_all_sleepers_multiple_times(sleepers, 5).await; }
-
async_traitは簡単に使用できますが、ヒープ割り当てを使用してこれを実現しています。このヒープ割り当てには、パフォーマンス オーバーヘッドが伴います。 -
The challenges in language support for
async traitare too deep to describe in-depth in this class. See this blog post by Niko Matsakis if you are interested in digging deeper. See also these keywords:- RPIT: short for return-position
impl Trait. - RPITIT: short for return-position
impl Traitin trait (RPIT in trait).
- RPIT: short for return-position
-
Try creating a new sleeper struct that will sleep for a random amount of time and adding it to the
Vec.
キャンセル
Future をドロップすると、その Future を再度ポーリングすることはできません。これはキャンセルと呼ばれ、どの await ポイントでも発生する可能性があります。そのため、Future がキャンセルされた場合でも、システムが正常に動作するようにしておく必要があります。たとえば、デッドロックやデータの消失があってはなりません。
use std::io; use std::time::Duration; use tokio::io::{AsyncReadExt, AsyncWriteExt, DuplexStream}; struct LinesReader { stream: DuplexStream, } impl LinesReader { fn new(stream: DuplexStream) -> Self { Self { stream } } async fn next(&mut self) -> io::Result<Option<String>> { let mut bytes = Vec::new(); let mut buf = [0]; while self.stream.read(&mut buf[..]).await? != 0 { bytes.push(buf[0]); if buf[0] == b'\n' { break; } } if bytes.is_empty() { return Ok(None); } let s = String::from_utf8(bytes) .map_err(|_| io::Error::new(io::ErrorKind::InvalidData, "not UTF-8"))?; Ok(Some(s)) } } async fn slow_copy(source: String, mut dest: DuplexStream) -> io::Result<()> { for b in source.bytes() { dest.write_u8(b).await?; tokio::time::sleep(Duration::from_millis(10)).await } Ok(()) } #[tokio::main] async fn main() -> io::Result<()> { let (client, server) = tokio::io::duplex(5); let handle = tokio::spawn(slow_copy("hi\nthere\n".to_owned(), client)); let mut lines = LinesReader::new(server); let mut interval = tokio::time::interval(Duration::from_millis(60)); loop { tokio::select! { _ = interval.tick() => println!("tick!"), line = lines.next() => if let Some(l) = line? { print!("{}", l) } else { break }, } } handle.await.unwrap()?; Ok(()) }
-
コンパイラではキャンセル安全性を確保できません。API ドキュメントを読み、
async fnが保持する状態を考慮する必要があります。 -
panicや?とは異なり、キャンセルは(エラー処理ではなく)通常の制御フローの一部です。 -
この例では、文字列の一部が失われています。
-
tick()分岐が先に終了するたびに、next()とそのbufがドロップされます。 -
bufを構造体の一部にすることで、LinesReaderにキャンセル安全性を持たせることができます。#![allow(unused)] fn main() { struct LinesReader { stream: DuplexStream, bytes: Vec<u8>, buf: [u8; 1], } impl LinesReader { fn new(stream: DuplexStream) -> Self { Self { stream, bytes: Vec::new(), buf: [0] } } async fn next(&mut self) -> io::Result<Option<String>> { // buf と bytes の先頭に self を付加します。 // ... let raw = std::mem::take(&mut self.bytes); let s = String::from_utf8(raw) .map_err(|_| io::Error::new(io::ErrorKind::InvalidData, "not UTF-8"))?; // ... } } }
-
-
Interval::tickは、ティックが「配信済み」かどうかを追跡しているため、安全にキャンセルできます。 -
AsyncReadExt::readは、データを返すか、データを読み取らないかのいずれかであるため、安全にキャンセルできます。 -
AsyncBufReadExt::read_lineはこの例と類似しており、安全にキャンセルできません。詳細と代替方法については、ドキュメントをご覧ください。
練習問題
This segment should take about 1 hour and 10 minutes. It contains:
| Slide | Duration |
|---|---|
| 食事する哲学者 | 20 minutes |
| ブロードキャスト・チャットアプリ | 30 minutes |
| 解答 | 20 minutes |
Dining Philosophers — Async
See dining philosophers for a description of the problem.
前と同様に、この演習でもローカルの Cargo インストール が必要です。以下のコードを src/main.rs というファイルにコピーし、空欄を埋めて、cargo run がデッドロックしないことを確認します。
use std::sync::Arc; use tokio::sync::{mpsc, Mutex}; use tokio::time; struct Fork; struct Philosopher { name: String, // left_fork: ... // right_fork: ... // thoughts: ... } impl Philosopher { async fn think(&self) { self.thoughts .send(format!("Eureka! {} has a new idea!", &self.name)) .await .unwrap(); } async fn eat(&self) { // Keep trying until we have both forks println!("{} is eating...", &self.name); time::sleep(time::Duration::from_millis(5)).await; } } static PHILOSOPHERS: &[&str] = &["Socrates", "Hypatia", "Plato", "Aristotle", "Pythagoras"]; #[tokio::main] async fn main() { // フォークを作成する // 哲学者を作成する // 哲学者が思索と食事を行うようにする // 哲学者の思索を出力する }
今回は非同期 Rust を使用するため、tokio 依存関係が必要になります。次の Cargo.toml を使用できます。
[package]
name = "dining-philosophers-async-dine"
version = "0.1.0"
edition = "2021"
[dependencies]
tokio = { version = "1.26.0", features = ["sync", "time", "macros", "rt-multi-thread"] }
また、今度は tokio クレートの Mutex モジュールと mpsc モジュールを使用する必要があることにも注意してください。
- 実装をシングルスレッドにできますか?
ブロードキャスト・チャットアプリ
この演習では、新たに身に付けた知識を活かしてブロードキャスト チャット アプリを実装します。クライアントが接続してメッセージを公開するチャット サーバーがあります。クライアントは標準入力からユーザー メッセージを読み取り、サーバーに送信します。チャット サーバーは受信した各メッセージをすべてのクライアントにブロードキャストします。
このために、サーバー上の ブロードキャスト チャンネル を使用し、クライアントとサーバー間の通信には tokio_websockets を使用します。
新しい Cargo プロジェクトを作成し、次の依存関係を追加します。
Cargo.toml:
[package]
name = "chat-async"
version = "0.1.0"
edition = "2021"
[dependencies]
futures-util = { version = "0.3.31", features = ["sink"] }
http = "1.1.0"
tokio = { version = "1.41.0", features = ["full"] }
tokio-websockets = { version = "0.10.1", features = ["client", "fastrand", "server", "sha1_smol"] }
必要な API
tokio と tokio_websockets の以下の関数が必要になります。少し時間をかけて API に対する理解を深めてください。
WebSocketStreamによって実装された StreamExt::next(): Websocket Stream からのメッセージを非同期で読み取ります。WebSocketStreamによって実装された SinkExt::send(): Websocket Stream 上でメッセージを非同期で送信します。- Lines::next_line(): 標準入力からのユーザー メッセージを非同期で読み取ります。
- Sender::subscribe(): ブロードキャスト チャンネルをサブスクライブします。
2 つのバイナリ
通常、Cargo プロジェクトに含めることができるのは 1 つのバイナリと 1 つの src/main.rs ファイルのみです。このプロジェクトには 2 つのバイナリが必要です。1 つはクライアント用、もう 1 つはサーバー用です。2 つの独立した Cargo プロジェクトを作成することもできますが、ここでは 1 つの Cargo プロジェクトに 2 つのバイナリを入れます。そのためには、クライアントとサーバーのコードを src/bin に配置する必要があります(ドキュメント をご覧ください)。
次のサーバーとクライアントのコードを、それぞれsrc/bin/server.rs と src/bin/client.rs にコピーします。ここでのタスクは、以下で説明するように、これらのファイルを完成させることです。
src/bin/server.rs:
use futures_util::sink::SinkExt; use futures_util::stream::StreamExt; use std::error::Error; use std::net::SocketAddr; use tokio::net::{TcpListener, TcpStream}; use tokio::sync::broadcast::{channel, Sender}; use tokio_websockets::{Message, ServerBuilder, WebSocketStream}; async fn handle_connection( addr: SocketAddr, mut ws_stream: WebSocketStream<TcpStream>, bcast_tx: Sender<String>, ) -> Result<(), Box<dyn Error + Send + Sync>> { // TODO: ヒントについては、以下のタスクの説明をご覧ください。 } #[tokio::main] async fn main() -> Result<(), Box<dyn Error + Send + Sync>> { let (bcast_tx, _) = channel(16); let listener = TcpListener::bind("127.0.0.1:2000").await?; println!("listening on port 2000"); loop { let (socket, addr) = listener.accept().await?; println!("New connection from {addr:?}"); let bcast_tx = bcast_tx.clone(); tokio::spawn(async move { // 未加工の TCP ストリームを WebSocket にラップします。 let ws_stream = ServerBuilder::new().accept(socket).await?; handle_connection(addr, ws_stream, bcast_tx).await }); } }
src/bin/client.rs:
use futures_util::stream::StreamExt; use futures_util::SinkExt; use http::Uri; use tokio::io::{AsyncBufReadExt, BufReader}; use tokio_websockets::{ClientBuilder, Message}; #[tokio::main] async fn main() -> Result<(), tokio_websockets::Error> { let (mut ws_stream, _) = ClientBuilder::from_uri(Uri::from_static("ws://127.0.0.1:2000")) .connect() .await?; let stdin = tokio::io::stdin(); let mut stdin = BufReader::new(stdin).lines(); // TODO: ヒントについては、以下のタスクの説明をご覧ください。 }
バイナリの実行
次のコマンドでサーバーを実行します。
cargo run --bin server
次のコマンドでクライアントを実行します。
cargo run --bin client
タスク
src/bin/server.rsにhandle_connection関数を実装します。- ヒント: 2 つのタスクを連続ループで同時に実行するには、
tokio::select!を使用します。1 つのタスクは、クライアントからメッセージを受信してブロードキャストします。もう 1 つのタスクは、サーバーで受信したメッセージをクライアントに送信します。
- ヒント: 2 つのタスクを連続ループで同時に実行するには、
src/bin/client.rsのメイン関数を完成させます。- ヒント: 前の例と同様に、
tokio::select!を連続ループで使用し、(1)標準入力からユーザー メッセージを読み取ってサーバーに送信するタスクと、(2)サーバーからメッセージを受信してユーザーに表示するタスクを同時に実行します。
- ヒント: 前の例と同様に、
- 省略可: 完了したら、メッセージの送信者以外のすべてのクライアントにメッセージをブロードキャストするようにコードを変更します。
解答
Dining Philosophers — Async
use std::sync::Arc; use tokio::sync::{mpsc, Mutex}; use tokio::time; struct Fork; struct Philosopher { name: String, left_fork: Arc<Mutex<Fork>>, right_fork: Arc<Mutex<Fork>>, thoughts: mpsc::Sender<String>, } impl Philosopher { async fn think(&self) { self.thoughts .send(format!("Eureka! {} has a new idea!", &self.name)) .await .unwrap(); } async fn eat(&self) { // Keep trying until we have both forks // Pick up forks... let _left_fork = self.left_fork.lock().await; let _right_fork = self.right_fork.lock().await; println!("{} is eating...", &self.name); time::sleep(time::Duration::from_millis(5)).await; // ここでロックがドロップされます。 } } static PHILOSOPHERS: &[&str] = &["Socrates", "Hypatia", "Plato", "Aristotle", "Pythagoras"]; #[tokio::main] async fn main() { // フォークを作成する let mut forks = vec![]; (0..PHILOSOPHERS.len()).for_each(|_| forks.push(Arc::new(Mutex::new(Fork)))); // 哲学者を作成する let (philosophers, mut rx) = { let mut philosophers = vec![]; let (tx, rx) = mpsc::channel(10); for (i, name) in PHILOSOPHERS.iter().enumerate() { let mut left_fork = Arc::clone(&forks[i]); let mut right_fork = Arc::clone(&forks[(i + 1) % PHILOSOPHERS.len()]); if i == PHILOSOPHERS.len() - 1 { std::mem::swap(&mut left_fork, &mut right_fork); } philosophers.push(Philosopher { name: name.to_string(), left_fork, right_fork, thoughts: tx.clone(), }); } (philosophers, rx) // tx はここでドロップされるので、後で明示的に削除する必要はありません。 }; // 哲学者が思索と食事を行うようにする for phil in philosophers { tokio::spawn(async move { for _ in 0..100 { phil.think().await; phil.eat().await; } }); } // 哲学者の思索を出力する while let Some(thought) = rx.recv().await { println!("Here is a thought: {thought}"); } }
ブロードキャスト・チャットアプリ
src/bin/server.rs:
use futures_util::sink::SinkExt; use futures_util::stream::StreamExt; use std::error::Error; use std::net::SocketAddr; use tokio::net::{TcpListener, TcpStream}; use tokio::sync::broadcast::{channel, Sender}; use tokio_websockets::{Message, ServerBuilder, WebSocketStream}; async fn handle_connection( addr: SocketAddr, mut ws_stream: WebSocketStream<TcpStream>, bcast_tx: Sender<String>, ) -> Result<(), Box<dyn Error + Send + Sync>> { ws_stream .send(Message::text("Welcome to chat! Type a message".to_string())) .await?; let mut bcast_rx = bcast_tx.subscribe(); // (1) `ws_stream` からメッセージを受信してブロードキャストするタスクと、 // (2)`bcast_rx` でメッセージを受信してクライアントに送信しするタスクを // 同時に実行するための連続ループ。 loop { tokio::select! { incoming = ws_stream.next() => { match incoming { Some(Ok(msg)) => { if let Some(text) = msg.as_text() { println!("From client {addr:?} {text:?}"); bcast_tx.send(text.into())?; } } Some(Err(err)) => return Err(err.into()), None => return Ok(()), } } msg = bcast_rx.recv() => { ws_stream.send(Message::text(msg?)).await?; } } } } #[tokio::main] async fn main() -> Result<(), Box<dyn Error + Send + Sync>> { let (bcast_tx, _) = channel(16); let listener = TcpListener::bind("127.0.0.1:2000").await?; println!("listening on port 2000"); loop { let (socket, addr) = listener.accept().await?; println!("New connection from {addr:?}"); let bcast_tx = bcast_tx.clone(); tokio::spawn(async move { // 未加工の TCP ストリームを WebSocket にラップします。 let ws_stream = ServerBuilder::new().accept(socket).await?; handle_connection(addr, ws_stream, bcast_tx).await }); } }
src/bin/client.rs:
use futures_util::stream::StreamExt; use futures_util::SinkExt; use http::Uri; use tokio::io::{AsyncBufReadExt, BufReader}; use tokio_websockets::{ClientBuilder, Message}; #[tokio::main] async fn main() -> Result<(), tokio_websockets::Error> { let (mut ws_stream, _) = ClientBuilder::from_uri(Uri::from_static("ws://127.0.0.1:2000")) .connect() .await?; let stdin = tokio::io::stdin(); let mut stdin = BufReader::new(stdin).lines(); // メッセージの同時送受信のための継続的なループ。 loop { tokio::select! { incoming = ws_stream.next() => { match incoming { Some(Ok(msg)) => { if let Some(text) = msg.as_text() { println!("From server: {}", text); } }, Some(Err(err)) => return Err(err.into()), None => return Ok(()), } } res = stdin.next_line() => { match res { Ok(None) => return Ok(()), Ok(Some(line)) => ws_stream.send(Message::text(line.to_string())).await?, Err(err) => return Err(err.into()), } } } } }
ありがとうございました!
Comprehensive Rust 🦀! を受講いただきありがとうございました。
ここまで多くのことを学んできましたが、このコースは完璧ではないため、間違いを見つけた場合や改善のアイデアがある場合は GitHub でお知らせください。皆さんからのフィードバックをお待ちしています。
用語集
以下は、Rust の多くの用語を簡単に定義することを目的とした用語集です。翻訳時に用語を英語の原文に関連付けるのにも役立ちます。
- allocate:
Dynamic memory allocation on the heap. - 引数(argument):
関数またはメソッドに渡される情報。 - associated type:
A type associated with a specific trait. Useful for defining the relationship between types. - ベアメタル Rust(Bare-metal Rust):
低レベルの Rust 開発。多くの場合、オペレーティング システムのないシステムにデプロイされます。ベアメタル Rust をご覧ください。 - block:
See Blocks and scope. - borrow:
See Borrowing. - 借用チェッカー(borrow checker):
Rust コンパイラの一部。すべての借用が有効かどうかをチェックします。 - 中かっこ(brace):
{and}。ブロックを区切ります。 - ビルド(build):
ソースコードを実行可能なコードまたは使用可能なプログラムに変換するプロセス。 - 呼び出し(call):
関数またはメソッドを呼び出します。 - チャンネル(channel):
スレッド間 でメッセージを安全に渡すために使用されます。 - Comprehensive Rust 🦀:
このコースは、まとめて Comprehensive Rust 🦀 と呼びます。 - 同時実行(concurrency):
複数のタスクまたはプロセスを同時に実行することを指します。 - Concurrency in Rust:
See Concurrency in Rust. - 定数(constant):
プログラムの実行中に変更されない値。 - 制御フロー(control flow):
個々のステートメントまたは命令がプログラム内で実行される順序。 - クラッシュ(crash):
予期しない制御不能なエラーまたは終了。 - 列挙型(enumeration):
複数の名前付き定数のうちの 1 つを保持するデータ型。関連するタプルまたは構造体を伴う場合があります。 - エラー(error):
想定された動作から逸脱した、予期しない条件または結果。 - エラー処理(error handling):
プログラムの実行中に発生するエラーを管理し、それに対応するプロセス。 - 演習(exercise:):
プログラミング スキルの向上とテストを目的としたタスクまたは問題。 - 関数(function):
特定のタスクを実行する再利用可能なコードブロック。 - ガベージ コレクタ(garbage collector):
使用されなくなったオブジェクトが占有していたメモリを自動的に解放するメカニズム。 - ジェネリクス(generics):
型のプレースホルダを使用してコードを記述し、さまざまなデータ型でコードを再利用できるようにする機能。 - 不変(immutable):
作成後に変更できないこと。 - 統合テスト(integration test):
システムのさまざまな部分やコンポーネント間の相互作用を検証するテストの一種。 - キーワード(keyword):
特定の意味を持ち、識別子として使用できない、プログラミング言語の予約語。 - ライブラリ(library):
プログラムで使用できるプリコンパイル済みのルーチンまたはコードのコレクション。 - マクロ(macro):
Rust マクロは名前に!を含めることで認識できます。マクロは、通常の関数では不十分な場合に使用されます。典型的な例がformat!です。これは可変長引数を取りますが、Rust 関数ではサポートされていません。 main関数(mainfunction):
Rust プログラムの実行はmain関数で開始されます。- 一致(match):
式の値に対するパターン マッチングを可能にする、Rust の制御フロー構造。 - メモリリーク(memory leak):
プログラムで不要になったメモリの解放に失敗し、メモリ使用量が徐々に増加する状況。 - メソッド(method):
Rust のオブジェクトまたは型に関連付けられた関数。 - モジュール(module):
関数、型、トレイトなどの定義を含む名前空間。Rust でコードを整理するために使用されます。 - 移動(move):
Rust である変数から別の変数に値の所有権を移動すること。 - 可変(mutable):
宣言後の変数の変更を可能にする Rust のプロパティ。 - 所有権(ownership):
値に関連付けられたメモリの管理をコードのどの部分が担うかを定義する Rust の概念。 - パニック(panic):
プログラムの終了を引き起こす、Rust の回復不能なエラー状態。 - パラメータ(parameter):
関数またはメソッドが呼び出されたときに渡される値。 - パターン(pattern):
Rust の式と照合できる値、リテラル、構造体の組み合わせ。 - ペイロード(payload):
メッセージ、イベント、またはデータ構造体で保持されるデータまたは情報。 - プログラム(program):
特定のタスクを実行したり、特定の問題を解決したりするためにコンピュータが実行できる一連の命令。 - プログラミング言語(programming language):
コンピュータに命令を伝えるために使用される正式なシステム(Rust など)。 - レシーバ(receiver):
メソッドが呼び出されたインスタンスを表す Rust メソッドの最初のパラメータ。 - 参照カウント(reference counting):
オブジェクトへの参照の数をトラッキングし、カウントがゼロになるとオブジェクトの割り当てを解除するメモリ管理技術。 - 戻り値(return):
関数から返される値を示すために使用される Rust のキーワード。 - Rust:
安全性、パフォーマンス、同時実行に重点を置いたシステム プログラミング言語。 - Rust Fundamentals:
Days 1 to 4 of this course. - Android での Rust(Rust in Android):
Android での Rust をご覧ください。 - Chromium での Rust(Rust in Chromium):
Chromium での Rust をご覧ください。 - 安全(safe):
Rust の所有権と借用に関するルールに従って、メモリ関連のエラーを防止するコードを指します。 - スコープ(scope):
変数が有効かつ使用可能なプログラムの領域。 - 標準ライブラリ(standard library):
Rust の必須機能を提供するモジュールのコレクション。 - 静的(static):
静的な変数や'staticライフタイムを持つアイテムを定義するために使用される Rust のキーワード。 - string:
A data type storing textual data. See Strings for more. - 構造体(struct):
異なる型の変数を 1 つの名前でグループ化する Rust の複合データ型。 - テスト(test):
他の関数の正しさをテストする関数を含む Rust モジュール。 - スレッド(thread):
同時実行を可能にする、プログラム内の独立した実行シーケンス。 - スレッドセーフ(thread safety):
マルチスレッド環境で正しい動作を保証するプログラムの特性。 - トレイト(trait):
未知の型に対して定義されたメソッドのコレクション。Rust でポリモーフィズムを実現する方法を提供します。 - トレイト境界(trait bound):
特定のトレイトを実装するために型を要求できる抽象化。 - タプル(tuple):
さまざまな型の変数を含む複合データ型。タプル フィールドには名前がなく、序数でアクセスします。 - 型(type):
Rust の特定の種類の値に対してどのオペレーションを実行できるかを指定する分類。 - 型推論(type inference):
変数または式の型を推測する Rust コンパイラの機能。 - 未定義の動作(undefined behavior):
結果が指定されていない Rust のアクションまたは条件。多くの場合、プログラムの予測不能な動作を引き起こします。 - 共用体(union):
異なる型の値を一度に 1 つだけ保持できるデータ型。 - 単体テスト(unit test):
Rust には、小規模な単体テストと大規模な統合テストを実行するための組み込みサポートが付属しています。単体テスト をご覧ください。 - ユニット型(unit type):
データを保持しない型。メンバーのないタプルとして記述されます。 - unsafe:
The subset of Rust which allows you to trigger undefined behavior. See Unsafe Rust. - 変数(variable):
データを格納するメモリの場所。変数はスコープ内で有効です。
Rust のその他のリソース
Rust コミュニティは、高品質な無料のリソースをオンラインで多数提供しています。
正式なドキュメント
Rust プロジェクトは多くのリソースをホストしており、これらは Rust 全般に対応しています。
- The Rust Programming Language: Rust の標準的な書籍で、無料で利用できます。Rust について詳しく説明されているほか、ビルドできるプロジェクトがいくつか含まれています。
- Rust By Example: さまざまな構造を示す一連のサンプルを使用して、Rust の構文を解説しています。小規模な演習がいくつか用意されており、そこでサンプルのコードを拡張するよう求められます。
- Rust Standard Library: Rust の標準ライブラリの完全なドキュメントです。
- The Rust Reference: Rust の文法とメモリモデルについて説明している未完成の書籍です。
Rust の公式サイトでホストされている、より専門的なガイド:
- The Rustonomicon: 未加工のポインタの操作や、他の言語(FFI)とのやり取りなど、安全でない Rust について説明しています。
- Asynchronous Programming in Rust: Rust Book の執筆後に導入された新しい非同期プログラミング モデルについて説明しています。
- The Embedded Rust Book: オペレーティング システムのない組み込みデバイスで Rust を使用する方法を紹介しています。
非公式の学習教材
Rust に関するその他のガイドとチュートリアル:
- Learn Rust the Dangerous Way: 高度な知識を持たない C プログラマーの視点で Rust を解説しています。
- Rust for Embedded C Programmers: covers Rust from the perspective of developers who write firmware in C.
- Rust for professionals: 他の言語(C、C++、Java、JavaScript、Python など)と並べて比較しながら、Rust の構文について説明しています。
- Rust on Exercism: Rust の学習に役立つ 100 以上の演習が用意されています。
- Ferrous Teaching Material: Rust 言語の基本的な部分と高度な部分の両方をカバーした、一連のコンパクトなプレゼンテーションです。WebAssembly、async / await などの他のトピックも扱っています。
- Advanced testing for Rust applications: a self-paced workshop that goes beyond Rust’s built-in testing framework. It covers
googletest, snapshot testing, mocking as well as how to write your own custom test harness. - Beginner’s Series to Rust および [Take your first steps with Rust](https://docs.microsoft. com/en-us/learn/paths/rust-first-steps/): 初心者のデベロッパーを対象とした 2 つの Rust ガイドです。1 つ目は 35 個の動画で構成され、2 つ目は Rust の構文と基本的な構造を説明する 11 のモジュールで構成されています。
- Learn Rust With Entirely Too Many Linked Lists: いくつかの異なるタイプのリスト構造の実装を通じて、Rust のメモリ管理ルールを深く掘り下げています。
Rust に関するその他の書籍については、Little Book of Rust Books をご覧ください。
クレジット
ここで紹介する教材は、多くの優れた Rust ドキュメントのソースに基づいています。役立つリソースの一覧については、その他のリソース のページをご覧ください。
Comprehensive Rust の教材は、Apache 2.0 ライセンスの規約により使用が許諾されています。詳細については、LICENSE をご覧ください。
Rust by Example
一部の例と演習は、Rust by Example からコピーして編集したものです。ライセンス規約などの詳細については、third_party/rust-by-example/ ディレクトリを参照してください。
Rust on Exercism
一部の演習は、Rust on Exercism をコピーして編集したものです。ライセンス規約などの詳細については、third_party/rust-on-exercism/ ディレクトリを参照してください。
CXX
C++ との相互運用性 セクションでは、CXX の画像を使用しています。ライセンス規約などの詳細については、third_party/cxx/ ディレクトリを参照してください。